You will create the base layer of the composite map by choosing a bitmap of a steel shutter, then assigning its diffuse, or color, values to an Arch & Design material. You will then add two more image layers, using alpha values to define how each are superimposed over the base layer.
 (Open File), navigate to \scenes\materials_and_mapping\composite_mapping\ and
open composite_start.max.
(Open File), navigate to \scenes\materials_and_mapping\composite_mapping\ and
open composite_start.max.
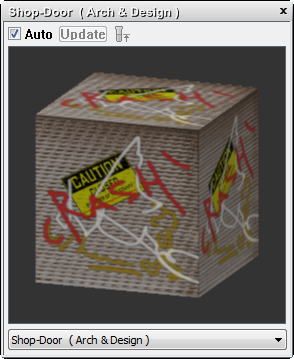
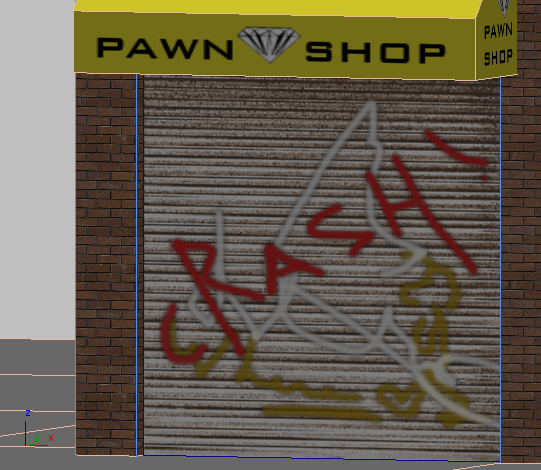
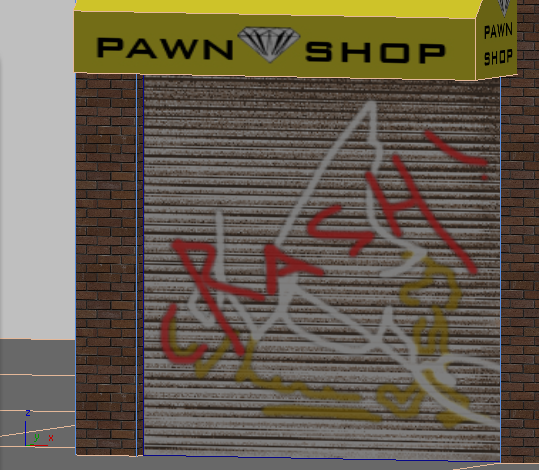
The scene consists of a pawnshop located in a rough part of town. The storefront is missing one important element: a steel shutter that protects a plate-glass window. Your task is to create a convincing composite map of the shutter.
 Preferences General panel Texture Coordinates
group and turn off Use Real-World Texture Coordinates, if it is
not already off. Click OK.
Preferences General panel Texture Coordinates
group and turn off Use Real-World Texture Coordinates, if it is
not already off. Click OK.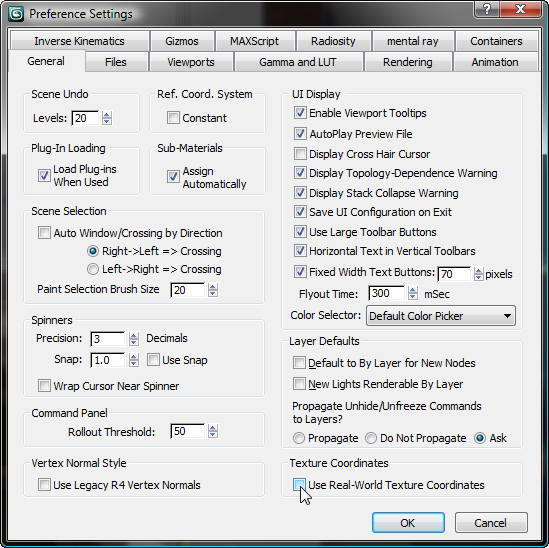
Create a base layer and color correct it:
 Slate Material Editor.
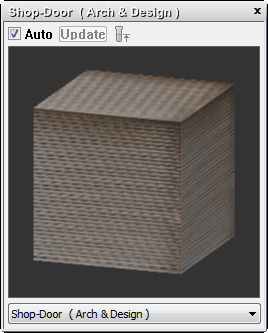
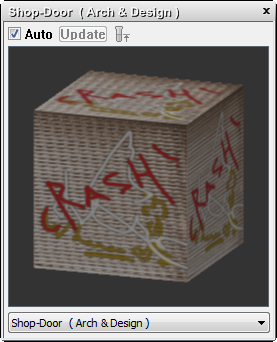
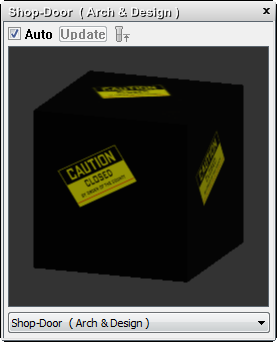
The first sample slot contains an Arch & Design material called Shop-Door. This material has already been applied to the roll-up shutter object (door-sec).
 (Show Map In Viewport) so
that later you will be able to view the Composite map in the viewports.
(Show Map In Viewport) so
that later you will be able to view the Composite map in the viewports.
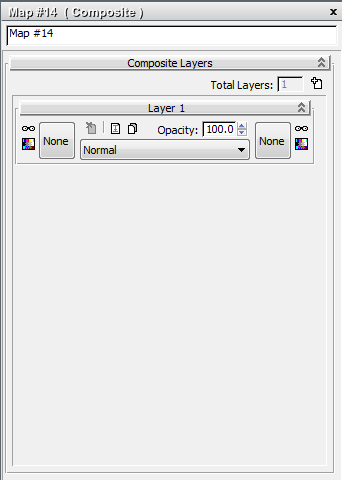
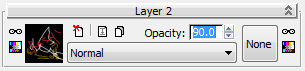
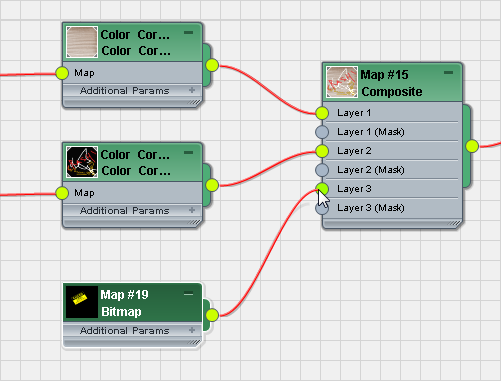
Now you will add a composite map to the material’s diffuse color component.
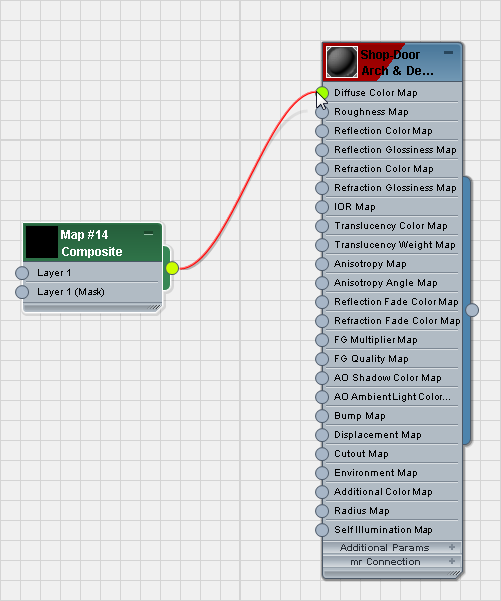
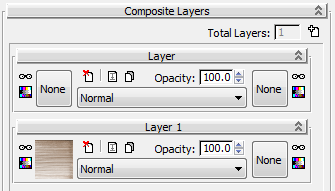
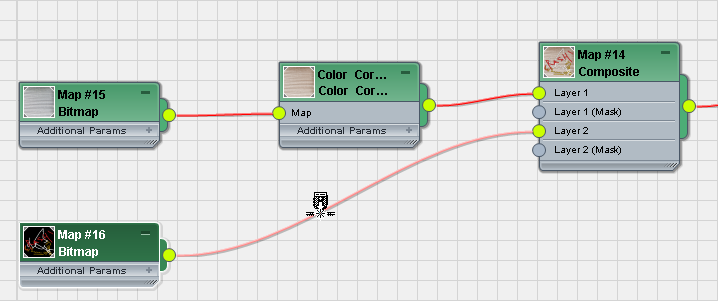
Initially, the Composite map contains a single layer.
Specify the first layer of the Composite map:
On the file dialog, choose shutters.jpg, and then click Open.
On the Layers 1 rollout for the Composite map, the Texture button now shows the shutters.jpg texture. This texture will be the base layer of the Composite map.

The preview helps you monitor the appearance of the map as you add more layers and make further adjustments.
Box.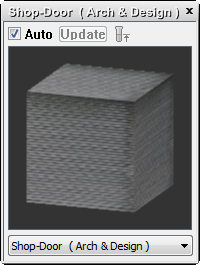
3ds Max changes the sample sphere to a cube, which is a better preview of the shutter geometry.
Add a rust tone to the first layer:
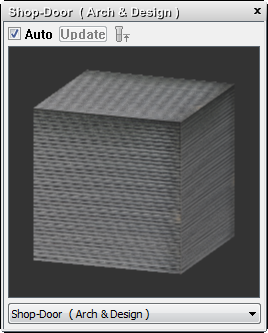
The shutter door material is uniformly gray in color. Let’s add a little rust to give the shutter a more run-down appearance.
 (Color Correct This Texture).
This button is at the left of the rollout.
(Color Correct This Texture).
This button is at the left of the rollout.
3ds Max displays Color-Correction controls in the Parameter Editor, and it inserts a Color Correction map node between the Bitmap and the Composite map.
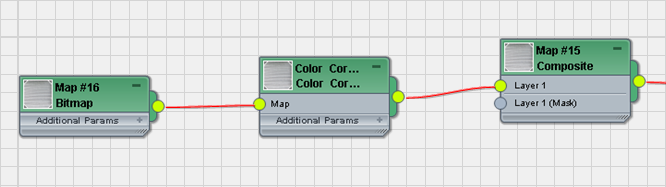
Now the Shop Door material shows a brownish tint.
Use alpha values to add a layer of graffiti:
Next, you will add a second layer to your composite map, one that contains the bold strokes of a graffiti artist (or more than one).
 (Add A New Layer).
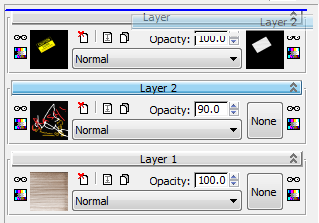
3ds Max adds a new Layer rollout to the display of the Composite map parameters.
Also, in the active View, the Composite map node now shows a new Layer 2 component.

On the file dialog, make sure Files Of Type is set to All Formats, choose graffiti.png, and then click View.
3ds Max opens a file viewer that shows the graffiti.png texture.
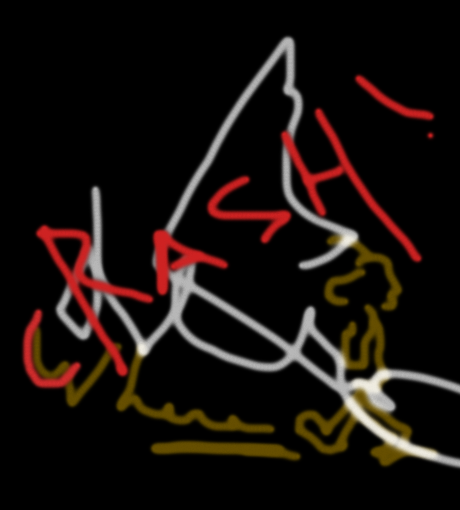
Graffiti bitmap used as the second layer in the composite map
In addition to red, green, and blue (RGB) information, the bitmap includes alpha channel information in its .png file format. This channel provides the level of opacity needed to superimpose the graffiti image over the base image.
 (Display Alpha Channel).
The viewer displays a black-and-white version of the image, showing the file’s alpha information.
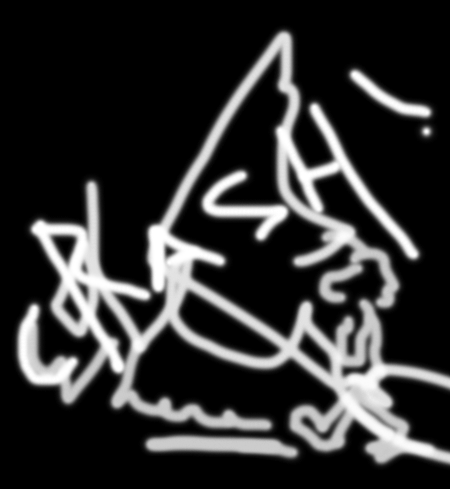
Alpha channel of the graffiti bitmap
Black regions of the bitmap will be completely transparent in the composite map. White regions, representing the graffiti strokes, will be completely opaque and fully visible in the composite map. Gray regions will be semi-transparent and provide partial visibility, giving a blurred edge to the graffiti.
 Close the graffiti.png viewer, then on the
file dialog, click Open.
Close the graffiti.png viewer, then on the
file dialog, click Open.

The Layer 2 rollout now shows the graffiti.png texture, and the material preview shows the composited graffiti.
Composite map with the graffiti layer composited on the shutter layer
Adjust the alpha and color levels:
If you look at the Shop Door material in a viewport (you will have to move or minimize the Slate Material Editor), you can see that the default values for compositing graffiti.png make the graffiti appear to float above the corrugated texture of the door.
You will fix this by adjusting some of the alpha settings for this layer.
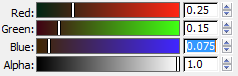
This slightly increases the overall transparency of Layer 2, so that a small portion of Layer 1 is visible beneath it. The result is a more convincing blending of the graffiti onto the shutter surface.
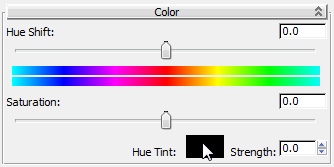
The graffiti layer still needs to stand out a little more: you will use the color correction tools to achieve this effect.
3ds Max inserts a Color Correction node between the graffiti bitmap and the Composite map. This is another way to add a Color Correction map.
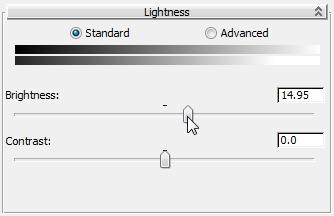
The graffiti colors are now brighter. On the other hand, the change in Brightness affects the semitransparent portion of the alpha channel as well, creating a halo effect around the graffiti strokes, which we don’t want.
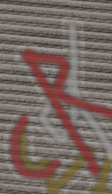
Halo surrounding graffiti strokes
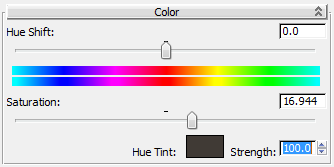
You will correct this problem by increasing the contrast level.
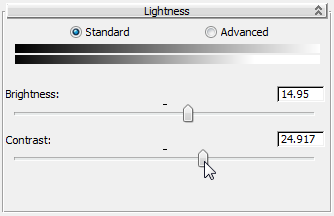
Now the graffiti looks more like it is painted on the door.
Now you will add a third layer to your composite map, one that features a sticker.
(Add A New Layer).
3ds Max adds a new Layer rollout to the Composite map parameters, and a new Layer 3 component to the Composite map node in the active View.
3ds Max displays the new Bitmap on the Layer 3 rollout and in the preview window.
The c-sign bitmap applied as a top layer in the composite map
Bitmaps saved in .jpg format have no alpha channel information. By applying the c-sign.jpg image directly as a top layer, you have completely obscured all layers beneath it. You can correct this by adding a mask. (You could easily create your mask in a paint program, but a mask image has already been prepared for you.)
On the file dialog, choose c-sign-msk.jpg, and then click Open.
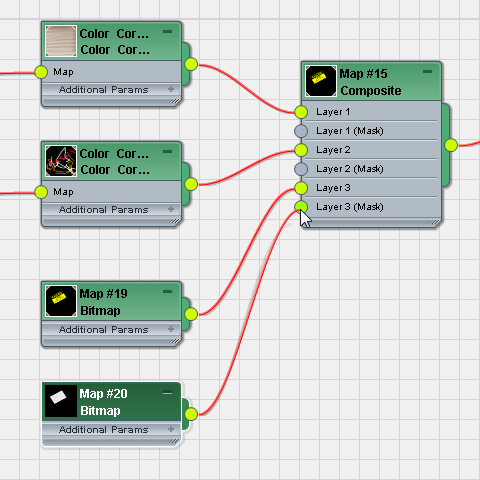
The mask is a black-and-white image that acts as a “custom” alpha channel to the color map.. Black areas of the mask allow the underlying layers to show through, white areas are opaque, and gray areas are partially transparent.

Bitmap used to create a cutout of the poster for layer 3
Now on the Layer 3 rollout, the texture with the sticker appears at the left, and the mask bitmap appears at the right.
In the preview, the “CAUTION” sticker appears by itself, with the rest of the door now visible.
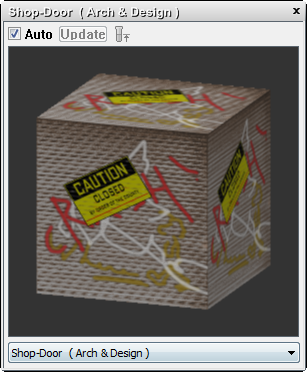
Layer 3 with the mask applied
One small problem remains. You want the graffiti to cover the sticker, not the other way around.
3ds Max reorders and renumbers the layers accordingly. (Layer 3 becomes Layer 2, and vice versa.)
Now the graffiti appears on top of the sticker about closure.