The mr Labeled Element is a render element that lets you output one or more branches of a material tree to a custom render element. (A branch comprises a map or shader and any sub-elements, such as maps assigned to the map’s map slots.)
To use this element, assign the mr Labeled Element shader as the parent of the branch to render, give it a label, and then use the same label for the render element. For details, see the following procedure.
To use the mr Labeled element:
 Color shader, and one of the Gradient maps could be assigned a Checker map, and one of the Checker maps could be assigned
a Noise map. This procedure will assume you want to render the Checker map and its constituent Noise map to an element.
Color shader, and one of the Gradient maps could be assigned a Checker map, and one of the Checker maps could be assigned
a Noise map. This procedure will assume you want to render the Checker map and its constituent Noise map to an element.
So the material structure would be like this:
A&D material Gradient (Diffuse Color) Checker (Gradient Color #1) Noise (Checker Color #1)
Color map button in the Arch & Design material to open the Gradient map settings. Youd then click the first map button (Color
#1) on the Gradient Parameters rollout to open the Checker map settings.
The material structure would now be like this (new map in italics):
A&D material Gradient (Diffuse Color) mr Labeled Element shader (Gradient Color #1) Checker (mr Labeled Element shader map) Noise (Checker Color #1)
Render Elements panel Render Elements rollout, click Add. Choose the mr Labeled Element item from the list.
Your custom element is rendered to an image file.
The following illustration shows the example described in the preceding procedure. The left-hand image shows the full material, with the Noise inside the Checker inside the Gradient, and the right-hand image shows a labeled element containing only the Noise inside the Checker. The element renders only the part of the Checker map that is used by the Gradient map.
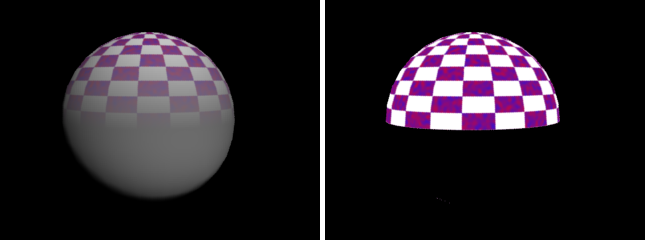
Left: Full rendering; Right: Labeled element

 (Render Setup)