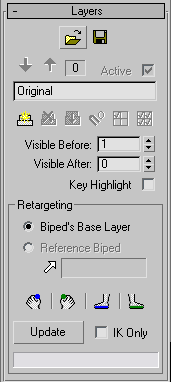
Controls on the Layers rollout allow you to add layers of animation above the original biped animation. This is a powerful way to apply global changes to character animation.
For example, if you add a layer to a run cycle and rotate the spine forward at any frame, the animation becomes a crouching run. The original biped motion is kept intact and can be viewed by switching back to the original layer. You can view layers individually or as a composite of animation in all layers. Layers behave like freeform animation; the biped can adopt any position.
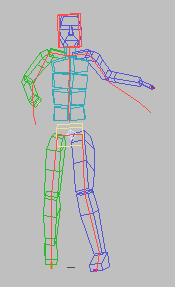
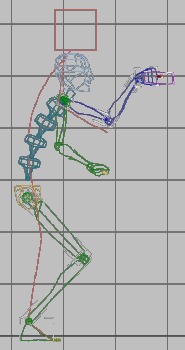
With layers, you can easily adjust raw motion-capture data that contains keys at every frame. Simply add a layer and keyframe the biped. The original layer is displayed as red bones.
Honoring IK Constraints Across Layers
You can maintain a biped's IK constraints across layers by retargeting its hands and feet to the original layer. This assures that the biped's constrained body parts are honored and locked in place while you make animation changes on the upper layers.
You can also choose to retarget a biped using another one as reference. This is useful when you need to precisely match hands and feet positioning between two animated bipeds with different body proportions.
You can save an animation containing honored constraints across layers in a BIP file. However, if the layered animation links to another biped as reference, that link is not saved with the animation.
Example: To maintain IK constraints across layers:
This procedure takes into account the fundamentals of animating across layers and expands on the concept of honoring IK constraints.
 Select your biped and on the
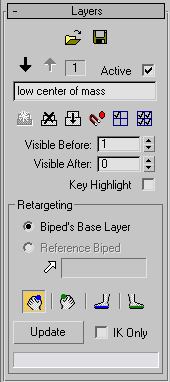
  Motion panel, expand the Layers rollout.
 Create a new layer and name it Low center of mass.
The  (Retarget Left Arm) button in the Retargeting group becomes active, which indicates that the current layer honors the IK
constraint of the base layer for this body part.
(Retarget Left Arm) button in the Retargeting group becomes active, which indicates that the current layer honors the IK
constraint of the base layer for this body part.
 Auto Key.
 (Body Vertical).
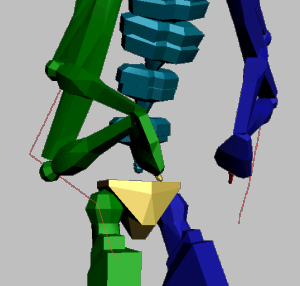
 Lower the center of mass on the Z axis until the biped's head is under the base layer's head display (represented as a red
box).
Lower the center of mass on the Z axis until the biped's head is under the base layer's head display (represented as a red
box).
 (Selection Lock Toggle) (or press the spacebar).
The entire biped is lowered except its left hand, which remains locked to the object because the current layer retargets it to match the respective IK constraint of the base layer.
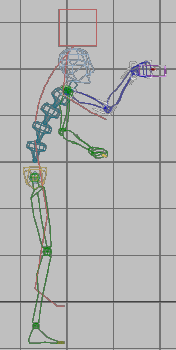
Only the biped's left hand constraint is honored.
 (Retarget Left Leg) and
  (Retarget Right Leg). Then click Update.
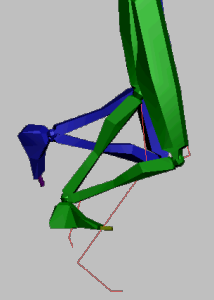
The biped's IK feet are adjusted to match those of the base layer. The animation keys are updated to reflect the current layer's retargeted feet.
Both the biped's feet and left hand constraints are honored.
 Collapse your layers when you are satisfied.
Example: To maintain IK constraints from a reference biped:
This procedure centers on using an animated biped as a retarget reference for another biped with disproportionate body parts. This method is often used when a motion is imported from raw data and adapted to bipeds with different proportions.
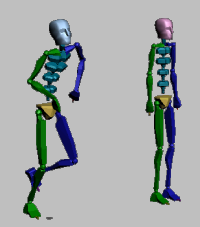
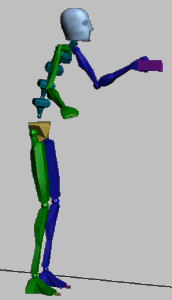
The animated biped on the left and Disproportionate Biped on the right
 (Figure Mode).
 (Symmetrical).
 (Figure Mode).
 (Select Reference Biped) and in a viewport, select your original biped.
Disproportionate Biped adopts the animation from the reference biped, whose name is now displayed next to the (Select Reference Biped) button.
 Add a new layer and name it Retargeted Biped.
(Retarget Left Arm) and
Add a new layer and name it Retargeted Biped.
(Retarget Left Arm) and  (Retarget Right Arm), and then click Update.
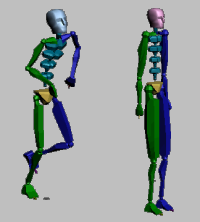
Both hands precisely match those from the reference biped. The animation keys are updated to reflect the current layer's retargeted hands.
Both hands are retargeted to honor the base layer IK constraints.
(Retarget Left Leg) and (Retarget Right Leg). Then, click Update.
The feet are correctly retargeted to the reference biped, updating the respective animation keys.
The feet are retargeted to honor the base layer IK constraints.
 (Previous Layer) and
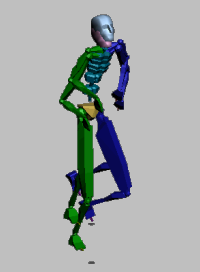
  (Next Layer) to switch between the original and Retargeted Biped layers. The base layer displays the non-targeted motion while Retargeted Biped shows an adjusted motion that matches both hands and feet from Disproportionate Biped with the original biped.
Collapse your layers when you are satisfied.
(Next Layer) to switch between the original and Retargeted Biped layers. The base layer displays the non-targeted motion while Retargeted Biped shows an adjusted motion that matches both hands and feet from Disproportionate Biped with the original biped.
Collapse your layers when you are satisfied.
You can load and save individual biped layers as BIP files.
 Load Layer
Click to display a file selector and open a BIP file for t he layer that is currently active.
3ds Max objects and list controllers are loaded only at the base layer (0). When you load into a higher layer, separate tracks are removed, and IK is removed for any limb.
If Retarget is on for a limb, the limb keys are removed. After you load a layer, retargetting does not happen automatically: you must click Update after you load the layer.
 Save Layer Previous-Next Layer Create Layer
 Delete Layer Collapse Layers
 Snap Set Key
Snaps the selected biped part to its original position in layer 0 and creates a key.
Use this in higher layers to return the selected biped part to the original motion. If a layer has a posture key that bends the character forward at frame 2 and you want to return the biped to its original posture motion at frame 50, use Snap Set Key at frame 50 with a spine object selected. The character will interpolate from its forward posture position to its original posture position between frame 2 and 50.
 Activate Only Me
 Activate All


