Texture maps consist of an image file or sequence, and a set of UV coordinates. They are similar to ordinary textures, but are used to control operator parameters instead of surface colors.
To create a texture map, you select the texture projection method and then link an image file to it.
Apply a texture projection and texture maps to the selected object by doing one of the following:
If the object already has a set of UV coordinates (texture projection) that you want to use, select it and choose Get  Property Texture Map Texture Map.
This creates a blank texture map property for the object and opens a blank Texture Map property editor in which you need to set the texture projection and select an image that will be used as the map (as described in the next steps).
To create a new texture projection for the map, select the object and choose Get Property Texture Map (type of projection) (such as Cylindrical, Spherical, UV, or XZ) that is appropriate for the shape of the object.
This creates a texture map property and texture projection for the object, but doesn't open the Texture Map property editor. Now you must open the Texture Map property editor to associate the image to this projection to use as the map (in the explorer, click the Texture Map property under the object).
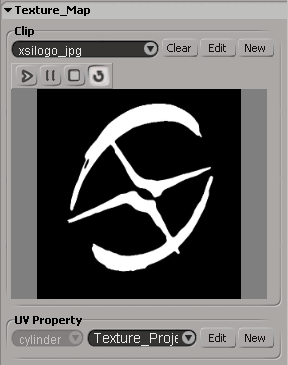
In the Clip section of the Texture Map property editor, select an image or sequence to use as the map. If there isn't already a clip for the desired image, click New to create one.
In the UV Property area beneath the image, select an existing texture projection or create a New texture projection (if there isn't already one) that is appropriate to the shape of the object or how you want to project the mapped image.
Set the other values as required. See Texture Map Property Editor [Properties Reference].
If desired, give the texture map a descriptive name by clicking the Rename button at the top of the property editor.
This opens a property editor in which you can enter a New Name for the texture map. The other options in this property editor control how references to the projection are updated. For more information, see Renaming Texture Projections [Texturing].
Connect the texture map to drive a parameter as described in Connecting Maps.
To edit the UV coordinates of a texture map's projection, select the object and open the texture editor. If necessary, use the Clips menu to display the correct image and the UVs menu to display the correct projection.
If you do this, you should make sure that the operator connected to the texture map is above the modeling region of the construction history, for example, in the animation region. Otherwise, the UV edits are "above" the operator and appear to have no effect. You can move the operator back to the modeling region when you are done.
For more information about editing texture projections in general, see Working with UVs in the Texture Editor [Texturing].
 Except where otherwise noted, this work is licensed under a Creative Commons Attribution-NonCommercial-ShareAlike 3.0 Unported License


