A pane can host any one of the following:
A view, such as an explorer or object view, or a panel, such as the Transform panel or the Toolbar panel (comprised of the Model, Animate, Render, Simulate, and Hair toolbars).
A tray that allows users to switch between several panels using buttons.
The Preview button in the editor's command bar controls the display of pane contents:
Some views and panels are available only when editing layouts. In addition, some views and panels can be instanced only once per layout.
Most of the items in the Set View menu are self-explanatory. However, some of them require a little more explanation:
The View Manager is the main view in the center of the default layout that holds the four viewports. There can be only one per layout.
A Property Panel is similar to a property editor, but it does not include the animation and preset controls at the top. In addition, it does not react to selection changes so it does not recycle automatically as you work. It is useful for displaying property pages that are static or controlled programmatically by the SDK. To specify the property to display, see Setting View Properties.
The Text Editor always includes a Run button even if you do not intend to use it to edit scripts. If users click Run, Softimage tries to run the text — if it is not a valid script, the most likely result is syntax errors.
The Animation Editor requires a great deal of resources. You should avoid having more than one in a layout or view. The Render Tree and Schematic are also quite heavy.
You should not put the RV - Material Editor in a layout. It creates temporary objects in your scene and deletes these objects when the view closes. However since a layout doesn't close in the same way as a view, these objects would never be removed.
Some views let you set the toolbar type. These views include most of the ones that have their own toolbar, such as the explorer, the schematic, and so on.
Right-click in a pane and choose an option from the Toolbar submenu.
Select a pane and set Toolbar Type in the editor's command bar. Note that this is not available in Preview mode.
You can set any of the following options:
None hides the view's toolbar. For example if you don't want users to change settings, you can hide the toolbar of an Object view and either set the display type in its View properties or control it using the SDK.
Shared displays the view's toolbar in a special area across the top of the relational view. This is supported only for explorer views. Setting it for other views may produce undesirable artifacts.
Some view types have properties that you can set. For example, you can control the target content of an Object view, set the default URL for a Netview, or specify a file to open in a text editor.
Right-click in a pane and choose Set View Properties.
The View Properties editor opens. The options available depend on the type of view. Some types of view have additional properties that can be set using the SDK but are not listed in the View Properties editor. For a list of all available properties, see View Attributes[SDK Guide].
Panes can contain toolbars and shelves. You can select only toolbars and shelves that have been created previously: you cannot create and edit a shelf or toolbar within the layout or relational view editor. See Toolbars and Shelves.
Panes can contain trays that allow users to switch between different panels by clicking buttons.
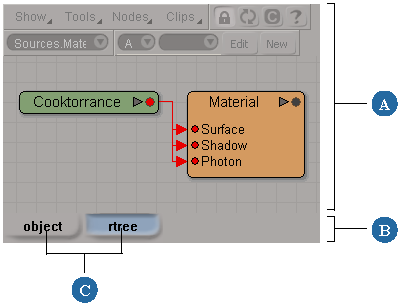
You can add and remove panes inside a tray switcher. In addition, you can split them and set their contents in the same way as usual — just click the corresponding button to display the desired pane or frameset first.
You can set the location and size of the switcher buttons. Each button can display either a text label or a bitmap.
Text labels always show the name of the associated pane or frameset.
Bitmaps must be in BMP format. They get stretched or compressed to the size of the buttons. You must import bitmaps before you can assign them to buttons.
If you supply a bitmap named filename_highlight.bmp in addition to filename.bmp, then the highlight version is displayed when the button is selected.
To change the text label on a button, you must change the name of the associated pane or frameset as follows:
Right-click in the switcher area and choose Bitmap Editor. The Bitmap Editor opens.
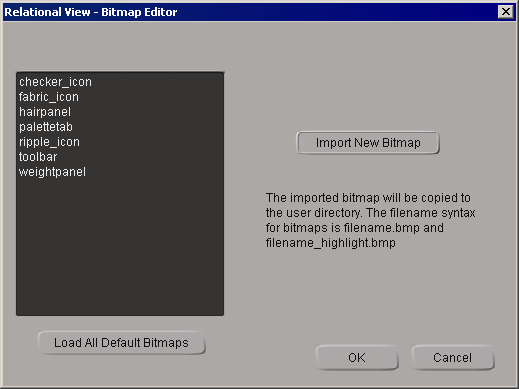
Do one or both of the following:
Click Load All Default Bitmaps. All bitmaps found in the Application\layouts\bitmaps directory of the user and factory locations are added to the list.
Click Import New Bitmap and use the browser to select a .bmp file to import. The file (as well as the highlight version, if any) is automatically copied to the Application\layouts\bitmaps directory of the user location. Repeat to import additional bitmaps.
Click OK. The bitmaps are now available on the Set Bitmap menu.
 Except where otherwise noted, this work is licensed under a Creative Commons Attribution-NonCommercial-ShareAlike 3.0 Unported License


