When you move one or more keys, you change the location of the animation along the timeline. You can move the keys with or without affecting other keys on that track, depending on whether Ripple is on or off.
With the Selection tool active (press the space bar or click the Select icon in the toolbar), click the key you want to move.

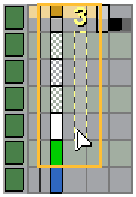
Drag the key to another frame and release the mouse button to place it at that frame.
As you drag the key, a marquee with the frame number is displayed around the current frame to help you determine which frame you're on.

While you can move only one key at a time in this way, you can move a key on a summary or collapsed track to move all the keys on that frame for all tracks that are contained within the summary or collapsed track.
To move multiple keys, do any of the following:
To move multiple keys, it's often best to create a region containing them.
While you usually move a region that contains keys, you can also move a region that has no keys in it (an empty region) and have it affect the keys on the track (with Ripple on). This is useful for easily shifting keys in long animations.
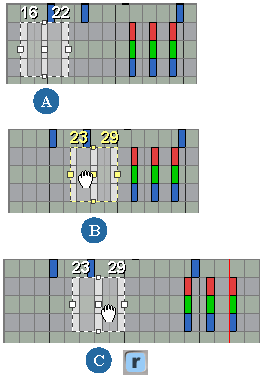
To move regions, create a region of keys (see Drawing Regions), then do any of the following:
Middle-click in the region and drag with Ripple turned on. This moves the region and pushes other keys (ripple) to the right (forward in time).

Middle-click in the region and drag with Ripple turned off. This moves a region without changing keys outside the region.

Left-click in the region and drag to move a region but not the keys. If you have multiple regions selected, you can only move them together horizontally on their respective tracks.
To move multiple regions, drag one of the regions and all other regions also move with it.
To move only one region when multiple regions are selected, press Alt while dragging the region.
 Except where otherwise noted, this work is licensed under a Creative Commons Attribution-NonCommercial-ShareAlike 3.0 Unported License