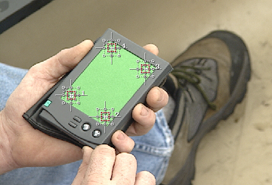
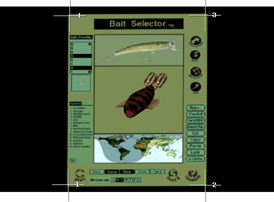
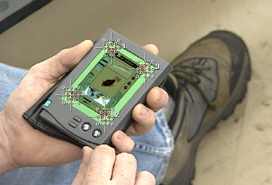
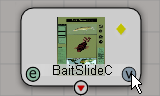
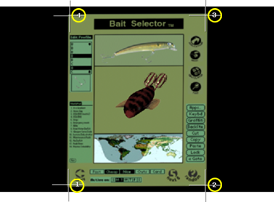
The Match Move option composites a foreground image over the input image by pinning source points on the foreground to the track points on the input. Typically, a match move uses all four trackers to place one image into a specific region of another, as shown in the images below.
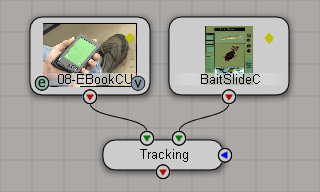
Insert a Tracking Operator into the FxTree.
Make sure to connect the desired foreground image to the operator's foreground input.
Set up the trackers as described in Setting Up the Trackers. The track points should be positioned at the locations where you want to pin the foreground image's corners.
Create the motion paths, as described in Creating Motion Paths.
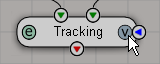
From the Tracking property editor, click the Trackers button to display the Trackers page.
Now click the Transform button to display the Transform page.
While editing the Tracking operator, click the foreground image operator's View hotspot to preview the image in the Fx Viewer.
Click and drag the source points markers to the areas that you wish to pin to the corresponding tracking markers.
The source points are numbered according to their corresponding trackers, so source point 1 in the foreground image corresponds to track point 1 in the input image.
In the FxTree, click the Tracking operator's View hotspot to preview it in the Fx Viewer. You should now see the result of the match move.
You can now do any of the following:
Fine-tune the match-move by adjusting the positions of the trackers and/or the source points.
Set the Transform options on the Transform tab of the Transform page to scale, rotate, and translate the foreground image. See the following section, Transforming the Foreground Image, for details.
Perform a perspective transform on the foreground image using the controls on the Corner tab of the Transform page. See Perspective-Transforming the Foreground Image for details.
Set the options on the Rendering tab of the Transform page to control how the match move result is output. See Setting the Rendering Options for a Match Move for details.
You can transform the foreground image in a match move using the controls on the Transform tab of the Transform page. See Tracking [Fx Operator Reference].
You can perform a perspective transformation on the foreground image of a match move using the controls on the Corner tab of the Transform page. The X and Y sliders for each corner control the foreground image's coordinates for the perspective transform. See Tracking [Fx Operator Reference].
The Rendering tab of the Transform page is where you can set various options that control what the Tracking operator outputs when you apply a match move or a one-point stabilization. You can set the following options:
 Except where otherwise noted, this work is licensed under a Creative Commons Attribution-NonCommercial-ShareAlike 3.0 Unported License