Creating an animation layer allows you to add keys in a separate layer on top of an object's main animation that's in the base layer. When you add keys in the new layer, it adds an offset to the animation in the base layer. The results of all layers are added together when you play back the animation.
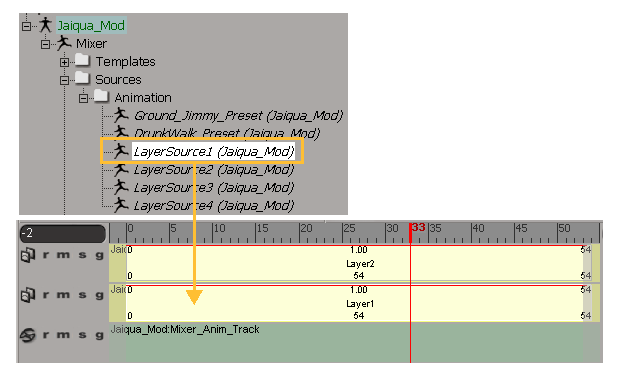
When you create an animation layer, a layer source and layer clip of the same name is automatically created for it in the current model's animation mixer. You can find the layer source in the models' Mixer node, under Sources > Animation. Animation layers are essentially a group of clips in the mixer. Layers are stacked bottom to top and the resulting animation is the addition of their animations.
Each animation layer has only one clip active at a given time. This means that the layer always matches the scene's timeline (it's in global time). As a result, you can't use a layer clip in the same nonlinear way as you would an action clip in the animation mixer; for example, you can't scale, move, trim, freeze, merge, cycle, or timewarp a layer clip. You can, however, set the layer clip's weight — see Editing the Layer's Animation.
Make sure that the animated object for which you want to create an animation layer is in a model structure - see Animation Layers, the Mixer, and Models.
Select the animated object to which you want to add animation.
You must have animation on the object's parameters before you can create a layer on top of them.
Click the KP/L tab at the bottom of the main command panel to access the Animation Layers panel.
Click the Create New Layer icon in the Animation Layers panel.
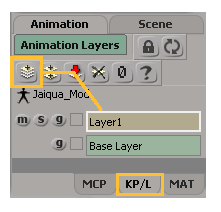
A new layer (called Layer1) appears above the Base Layer and becomes the current (active) layer, as indicated by the white border.
To rename the layer, see Renaming Animation Layers.
As well, a source for this layer is created in the model's Mixer > Sources > Animation folder and a clip representing this layer source appears in the animation mixer.
To add another layer, click the Create New Layer icon again.
The new layer is always added above the selected layer, regardless of its location in the layer stack. Each subsequent layer you create has the subsequent number appended to its name, such as Layer2, Layer3, and so on.
Set keys on the object as you like in this layer — see Animating in a Layer.
Then edit its fcurves and keys — see Editing the Layer's Animation.
Click the Lock icon at the top of the Animation Layers panel to prevent it from updating if you select a different object.

Click this icon again to deactivate it (and update the panel if the selection has changed).
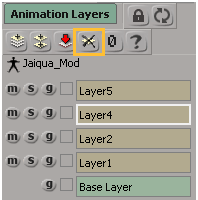
To update to a new object while keeping the Animation Panel locked, select the model or object and click the Update icon at the top of the panel. This refreshes the panel's contents to the currently selected object.

After you create or duplicate an animation layer, you may want to give it a more descriptive name than the generic Layer1, Layer2, etc.
Right-click on an animation layer in the Animation Layers panel and choose Rename Layer, then enter a new name. When you rename a layer this way, its layer clip in the animation mixer is also renamed, but not the layer source.
Right-click on an animation layer in the Animation Layers panel, or right-click on a layer clip in the animation mixer, and choose Clip Properties.
Change the Name in the layer clip's property editor that appears.
When you rename a layer this way, the layer's name is updated in the Animation Layers panel, the layer's source, and the layer's clip. The word "_Clip" is automatically appended to the new layer's name in the clip and the Animation Layers panel.
Rename animation layers in the same way as other elements in the explorer — see Renaming Scene Elements in the Explorer. You'll find the animation layers under the appropriate model's Mixer > Sources > Animation folder.
When you rename a layer this way, the layer's name is updated in the Animation Layers panel, the layer's source, and the layer's clip. The word "_Clip" is automatically appended to the new layer's name in the clip and the Animation Layers panel.
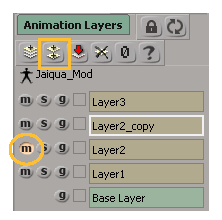
When you're working with layers, you may want to make a copy of a layer and then alter it to create different variations on its animation. When you duplicate a layer, a copy of the layer is created above the original and becomes the current (selected) layer. The original layer is automatically muted so that its animation isn't duplicated in the result.
When you delete a layer, you remove the animation in only that layer. The animation on any other layer, including the base layer, is not affected. Deleting the layer removes it from the Animation Layers panel, the layer source, and its layer clip in the mixer.
 Except where otherwise noted, this work is licensed under a Creative Commons Attribution-NonCommercial-ShareAlike 3.0 Unported License