You can attach a simulated cloth or curve's vertices to a constraining object using a nail constraint, such as the corners of a flag being nailed to a pole or clothing being attached to a body. When these vertices are nailed, they are not affected by forces and do not follow the deformation of the constraining object.
When you use a nail constraint, springs are created between the cloth's vertices and the constraining object. You can control the spring's length by setting the distance between the cloth's vertices and the constraining object.
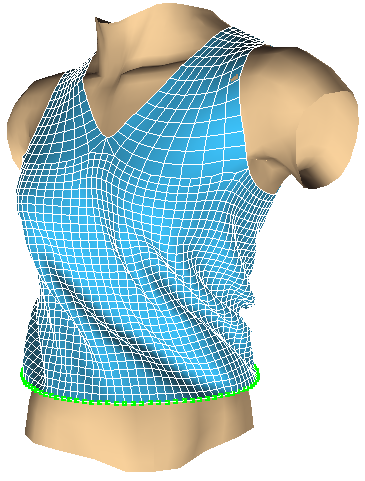
In the image below, the cluster at the bottom of the shirt is constrained to the body with a nail constraint. Unlike the pin constraint, these vertices stay put and do not move according to the deformations of the constraining object. Normally, pins are a better choice for clothing because a body is usually deforming, but if the body is not deformed, then nails are a good choice.
To set up a cloth or curve with a nail constraint using vertices, you can follow the same basic procedure as described in
Pinning Cloth or Curve Vertices to an Object, except use the Constraints  Syflex Nail compound from the Task > Syflex tab in the preset manager.
Unlike the Pin constraints, you can use any type of object as the constraining object, including nulls, cluster centers, and NURBS surface objects. Basically, only the transformation properties of the object are used, so you can use any object that can be transformed.
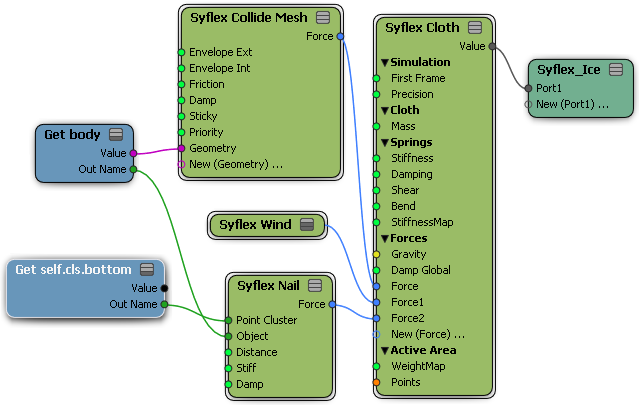
Remember to add a Syflex Nail and Get Data node for each cluster you want to use.
Set the parameters in the Syflex Nail property editor.
Instead of nailing a cluster of cloth or curve vertices, you can use a null's size, shape, and location to determine the area of the cloth or curve vertices that are nailed. All the cloth vertices that are within the null object's space are nailed to it. You can animate the location, orientation, or size of the null to create different constraint effects.
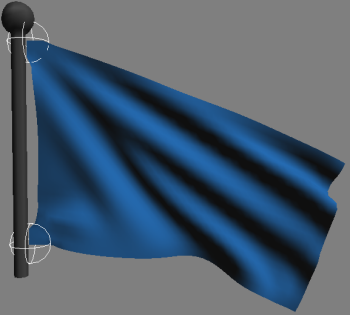
In the image below, two nulls are positioned beside the flag pole. Whichever vertices of the cloth that are within the null's space are constrained to the pole using the Syflex Nail Null constraint.
To set up a cloth or curve with a nail constraint and nulls, you can follow the same basic procedure as described in Pinning the Vertices Using Nulls, except use the Constraints Syflex Nail Null compound from the Task > Syflex tab in the preset manager.
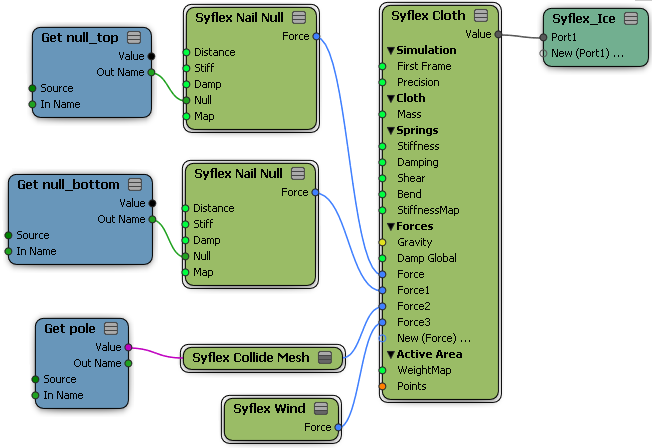
Remember to add a Syflex Nail Null and Get Data node for each null you want to use.
Set the parameters in the Syflex Nail Null property editor.
 Except where otherwise noted, this work is licensed under a Creative Commons Attribution-NonCommercial-ShareAlike 3.0 Unported License