


You can use a wizard to generate the code for a self-installing plug-in that contains a custom filter. In addition to generating the skeleton code for the plug-in and the filter, the wizard can also generate the code required to add the filter to a menu.
In the File name box, type a valid file name (the extension and path are added automatically by the wizard).
From the Coding Language list, select the language you want to generate.
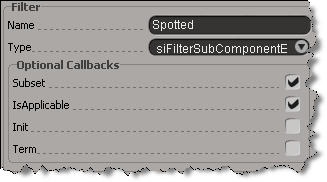
In the Filter Name box, you can type a different name for the filter. By default, the plug-in name is used as the name of the filter.
The first character in the user filter name should be a letter. Subsequent characters can be letters, numbers, or underscore (_) characters.
From the FilterType list, select the type of filter you want to generate. The values in the list correspond to the siFilterType enum.
You can also choose to also generate any of the FilterOptional Callbacks by checking any of these boxes:
 Except where otherwise noted, this work is licensed under a Creative Commons Attribution-NonCommercial-ShareAlike 3.0 Unported License