Translation changes an object's position in space. There are several different translation modes that control the reference frame and interaction — that is, how the object moves when you move the mouse.
Activate the Translate tool by doing one of the following:
If necessary, change any options:
The translation modes control the axes used. The last-used mode is automatically activated. For a description of each mode, see Translation Modes.
You can restrict the translation to specific axes. See Specifying Axes.
Set the pivot as described in Setting the Pivot. When snapping, the pivot defines the point that snaps to the target.
Translate the objects using the mouse in the 3D views:
If you are using the SRT manipulators, click and drag on different parts (handles) of the displayed transformation axes to translate the objects in different ways.
For general information about the SRT manipulators, see Transforming Interactively with the SRT Manipulators. For specific information about the Translate manipulator, see Using the Translate Manipulator.
If you are not using the SRT manipulators, click and drag the mouse anywhere in the 3D views.
The function of the left, middle, and right mouse buttons depends on the tool, mode, and other options — check the mouse/status line at the bottom of the main window for details. You can also drag while pressing multiple mouse buttons simultaneously.
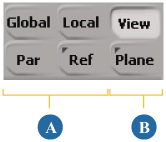
The translation modes control the axes used when you translate elements. When the Translate tool is active, you can set the transformation mode using the buttons below the SRT boxes on the Transform panel. The transformation modes are divided into two groups, based on their interaction when you are not using SRT manipulators:
The View and Plane modes use the left mouse button to drag across the corresponding plane.
The Global, Local, Object, and Ref modes use the different mouse buttons to translate along the separate X, Y, and Z axes.
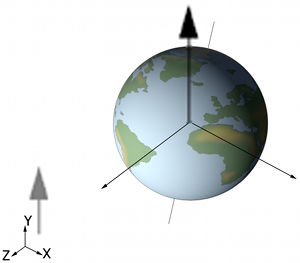
Global translations are performed along the scene's global axes.
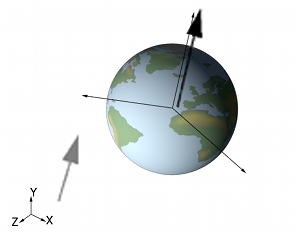
Local translations are performed along the axes of the object's local coordinate system as defined by its center.
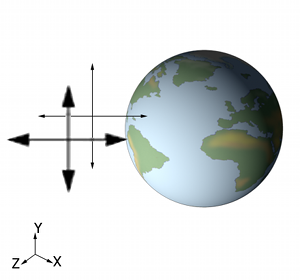
View translations are performed with respect to the 3D view. The plane in which the object moves depends on whether you are manipulating it in the Camera, Top, Front, Right, or other view.
Par, or parent, mode translates along the axes of the object's parent. This is the only mode where the axes of interaction correspond exactly to the coordinates of the object's local position for the purpose of animation. When you activate individual axes on the Transform panel, the corresponding local position parameters are automatically marked.
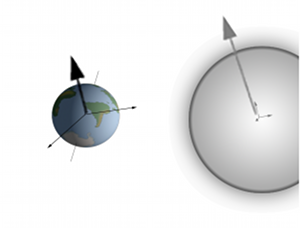
Ref, or reference, mode lets you translate an object along the X, Y, and Z axes of another element or an arbitrary reference plane. For more information, see About Reference Planes.
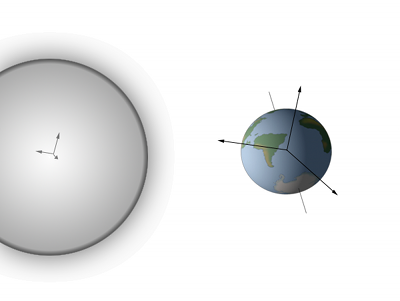
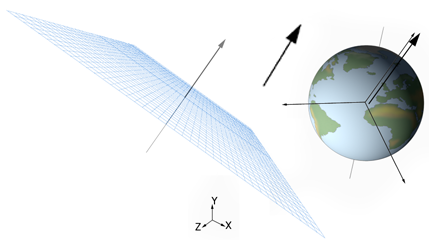
Plane mode lets you drag an object along the XZ plane of another element or an arbitrary reference plane. For more information, see About Reference Planes.
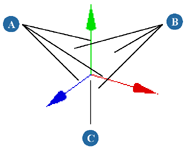
When using SRT manipulators to translate, there are seven handles that you can click and drag:
In addition to dragging the handles, you can:
Middle-click and drag anywhere in the 3D views to translate along the axis that most closely matches the drag direction.
Click and drag anywhere in the 3D views (except on the manipulator) to perform different actions, depending on the setting
for Click Outside Manipulator in the Tools  Transform preferences. See To choose the behavior when clicking outside of the manipulators.
Right-click to open a context menu, where you can set the manipulation mode and other options. If Click Outside Manipulator is set to either Select Tool or SI|3D-style Transform in your Transform Preferences, then you must right-click directly on the manipulator because those options use the right mouse button for other actions; otherwise, you can right-click anywhere for the context menu. Right-click again to dismiss the menu without choosing an item.
For information about using the SRT manipulators in general, see Transforming Interactively with the SRT Manipulators.
You can set maximum and minimum limits to an object's position in local space.
Open the object's Kinematics property editor. For details, see Kinematics Property Editor.
Toggle the minimum or maximum position box for the object's X, Y, or Z axis.
For each check box you toggle, a corresponding control displays, allowing you to set the minimum position and maximum position for that axis in SOFTIMAGE units.
The COG (center of geometry) option on the Transform panel controls how multiple objects snap when you translate them. When COG is on, the objects preserve their positions relative to each other, and their combined center of geometry snaps to the target. When COG is off, each object in the selection snaps individually to the target.
If, instead of the center of geometry, you want to snap a specific point to a target while keeping the relative positions of the objects, then first set the pivot to that point. For more information, see Setting the Pivot.
For more information about snapping, see Snapping.
 Except where otherwise noted, this work is licensed under a Creative Commons Attribution-NonCommercial-ShareAlike 3.0 Unported License