


The motion deformation tools let you convert the animation from a biped's feet and center or gravity (usually the hips) into a set of tracks (curves), allowing you to visualize the animation in space. You then deform and edit the tracks just like you would any other curve (move points, use deformers, etc.) and the character adapts to the new shape of the tracks.
Motion deformation lets you modify animation for many different purposes, such as:
Adapting a character's animation to a new environment where the terrain or path is different. For example, you could use a lattice or shrinkwrap the curves to a new surface and have the character follow all the bumps and crevices.
Changing the character's body proportions by changing the amount of space between the curves.
Giving different personalities to different characters whose animation comes from the same motion capture data (such as with crowd animation).
For example, you could make one character have a high stepping height while another has a bounce when he walks. With motion capture, this can save you time because you don't have to reanimate the whole body.
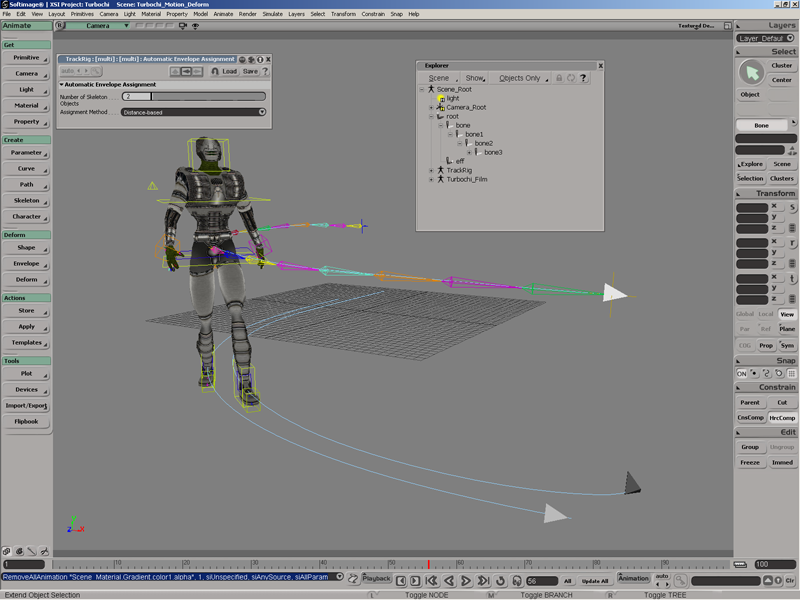
The curves that are created are like train tracks that represent the motion in space and carry the character along them. This allows you to deform the motion and keep the correlation between the feet and the center of gravity. The motion itself keeps a constant length.
Before you use the motion deform tools, you should make sure that the character whose animation you want to modify is set up correctly.
There must be animation on the two feet and the center of gravity. This can be either IK (effector positions) or FK (bone rotations), but the character must be moving "in space" (that is, no stationary walk cycles).
Set the timeline to the exact frames of animation you want to process; otherwise the velocity of other animation on the character will be calculated as part of the velocity and ruin the resulting step marks and motion tracks.
You must tag three elements that drive the animation for a biped: the two feet and the center of gravity, or hips. The motion deformer takes all three of these elements into consideration because a character's motion is a result of their combination.
One by one, select each these animated elements in the character, then choose the corresponding command from the Create  Character Biped - Tags menu on the Animate toolbar: Left Foot, Right Foot, and Center of Gravity.
Figure out the Velocity Threshold by doing a test run with the Create Character Biped - Define Step Marks command. This creates little icons that represent the stepping positions, allowing you to tune the correct Velocity Threshold.
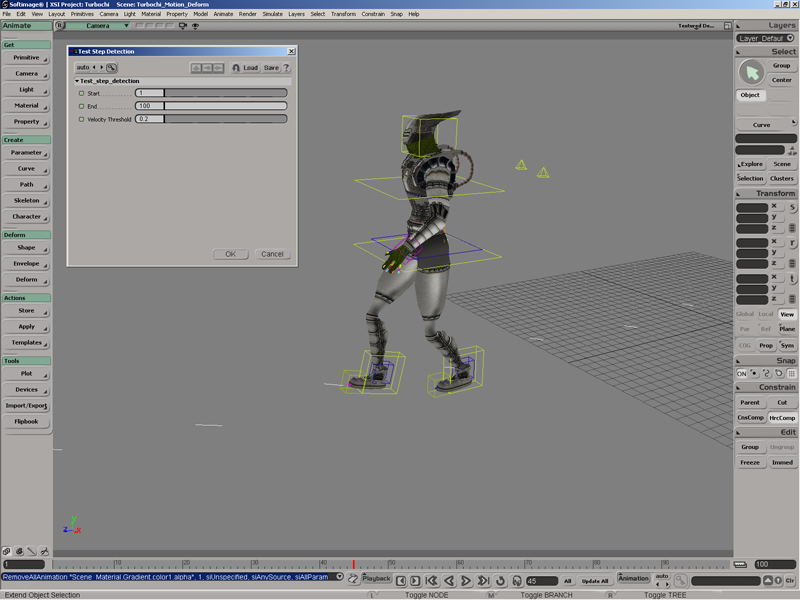
You need to find the lowest velocity of the animated elements, such as where a foot is on the ground, going from one step to the next. This value needs to be the closest to zero, but not zero.
You can reiteratively test this, starting at a very low threshold and working up until you see that all step marks are present. If a value is too low or high, just delete the step marks and try a new level. You can delete the step marks after you've run the Deform Motion command.
Once you know the Velocity Threshold, choose Create Character Biped - Deform Motion. This retargets the character's motion based on the step marks you set. Three curves are created, representing the motion
path for the character.
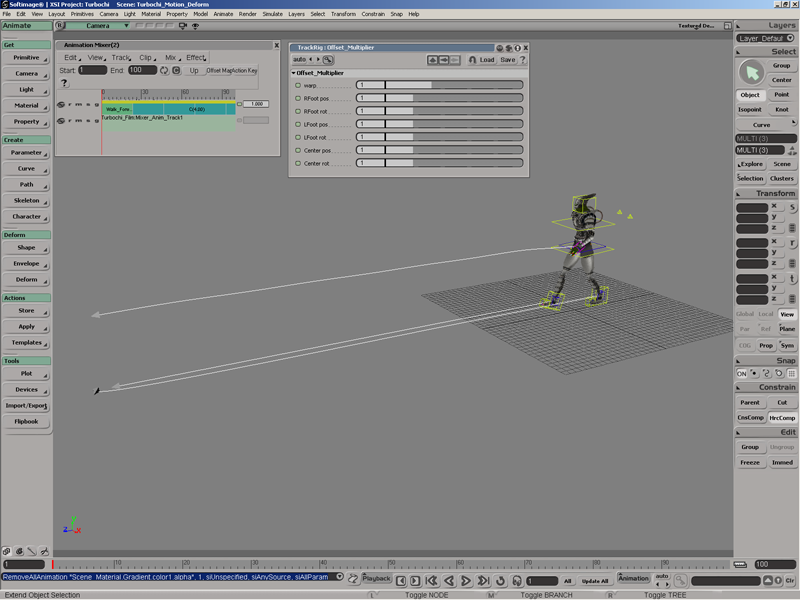
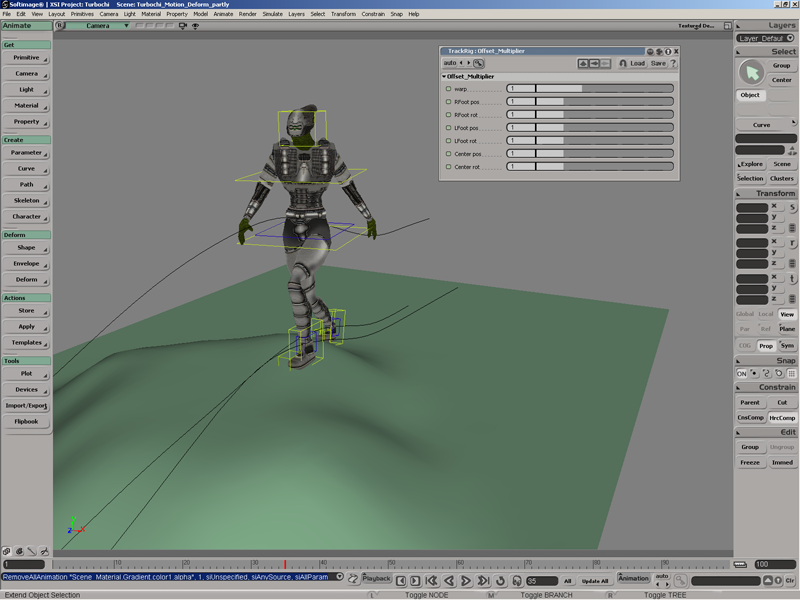
In the Offset Multiplier controls that appear in a property set, you can offset the rotation and position of the tracks, thus warping the animation in space.
Deform the tracks like you would any other curve and see how the character responds to the changes.
For example, you could create a chain from the curve, then drag the effector to change the path.
Using the Clip Match Clips command in the animation mixer, you can align two clips based on a reference object that are tagged with the Character Biped Tags commands. Using the information from the tagged object, Softimage computes and sets the appropriate pose offset on the target
clip to make it match the reference clip at the target's first frame. This is very useful for aligning two motion capture
clips one after the other (or overlapping) so that they are in the same space for mixing.
This command may also be useful for aligning an object that is not driven by a clip but is affected by it, such as a child of a parent that is driven by a clip. You can tag the child, select the clips, and choose the Match Clips command.
Tag the objects to use as part of the matching process using the Character Biped Tags Left Foot, Right Foot, and Center of Gravity commands on the Animate toolbar.
The reason you tag the objects is to use them as a point of reference. That object's pose should match after you use the Match
Clips command. For example, select the object to be considered the left foot and tag it with the Biped Tags Left Foot tag. Do the same with objects considered the right foot and the center of gravity.
In this order, select the reference clip and the target clip (which is the one to offset).
The target clip can either follow the reference clip or else overlap it. If it is overlapping, the time reference is the start of the overlap.
Choose Clip Match Clips from the animation mixer command bar.
A pose offset is created for the target clip. The animation at the beginning of the second clip is matched to the end (or overlaps the start) of the first clip.
 Except where otherwise noted, this work is licensed under a Creative Commons Attribution-NonCommercial-ShareAlike 3.0 Unported License