There are many tools in Softimage made specifically for animation, but these are some general tools that are particularly useful for character animation.
XRay shading is a viewing option that lets you see through enveloped objects in Constant, Shaded, Textured, and Textured Decal display modes. This is very useful when working with characters because you can see and select the skeleton elements inside the shaded surface of the body envelope.
If you are using "shaded bones" (see Displaying Bones Using the Viewport's Display Mode), you can see the bones using the Transparent mode.
For more information, see the XRay Mode and XRay Display Type options on the Display Options tab in the Camera Display Property Editor.
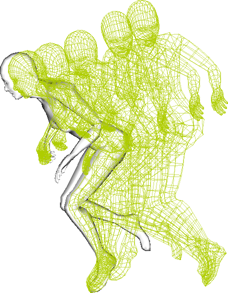
Animation ghosting, also known as onion-skinning, lets you display a series of snapshots of animated objects at frames and/or keyframes behind and/or ahead of the current frame. This lets you easily visualize the motion of an object, which can help you improve its timing and flow.
For more information, see Ghosting Animated Objects.

Use rotoscoped images of models to act as a template from which you can create skeletons or envelopes. For example, import an image of an animal in an appropriate pose into Softimage in the Rotoscopy view, create the envelope to match it, and create the skeleton to fit within the model.
As well, you can use rotoscoped images to help you animate a character, such as setting up and matching to a walk cycle sequence.
For more information on rotoscopy, see Rotoscopy.
When you're creating a skeleton, its neutral pose is often the character with outstretched arms and legs, making it easy to weight the envelope and adjust its textures. However, this doesn't always give the best values for animating the skeleton's local transformation values. To overcome this problem, you can create a neutral pose which uses zero for its local transformation values (0 for rotation and translation, 1 for scaling).
For information on how to do this, see Creating Neutral Poses for Skeletons.
When you're manipulating or animating an object, you often use the same transformation tool, such as always using the Rotation tool for rotating bones in a skeleton or using the Translation tool for the COG (center-of-gravity) control.
To make manipulation easier, you can create a transform setup property for an object so that its preferred transformation tool is automatically activated when you select that object.
For more information, see Transform Setup.

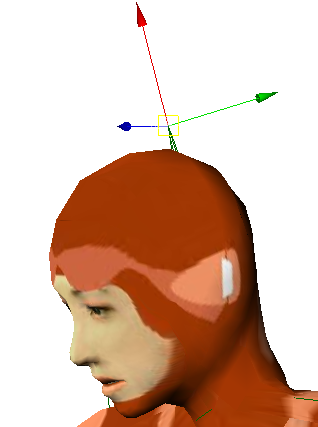
With a transform setup property, the Translate tool is automatically activated when head's effector is selected.
 Except where otherwise noted, this work is licensed under a Creative Commons Attribution-NonCommercial-ShareAlike 3.0 Unported License