You can manage ports by right-clicking on them in the areas on either side while editing a compound.
To move an exposed port, right-click on it in the area at either side and choose Move Up or Move Down.
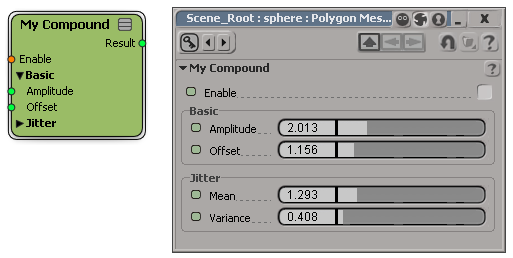
Port layout groups appear as expandable/collapsible lists on nodes, and as grouped parameters in property editors.
To create a port layout group:
The collapsed or exposed state of port layout groups is saved when you export a compound, and used by default when you create a new instance.
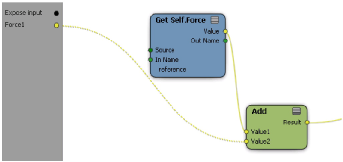
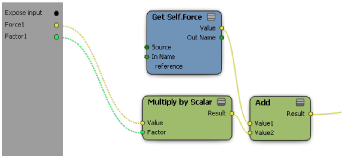
You can define ports that allow multiple instances, like the Add node or Add Forces compound. Compounds with a port defined in this way show a virtual port labelled "New (portname)". You can use these virtual ports to connect an arbitrary number of inputs. This is useful when you want to add an arbitrary number of items, allow for an arbitrary number of geometry inputs, and so on.
Right-click on an exposed port in the area at left and choose Properties.
Single. This acts as an ordinary input port and allows only a single connection.
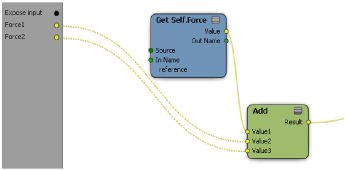
Multi - Connect New Ports to Existing Node. This allows multiple connections, and connects them all to the same node as the first one. The input port on the node to which the exposed port is connected must support multiple instances, like the Value port of an Add node.
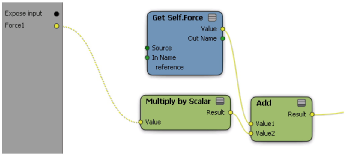
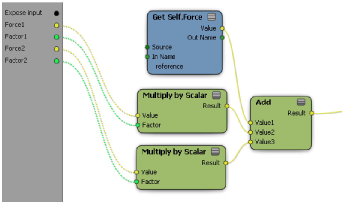
Multi - Connect New Ports Through New Node (copy values). This allows multiple connections, and connects them to the same node through a copy of a node on the first exposed instance. There can be only one node between the exposed port and the input port that supports multiple instances — if you require more complex connections, you can embed them in a single compound between the exposed port and the multi-instance input.
Multi - Connect New Ports Through New Node (default values). This is similar to the previous option, but instead of copying the node between the exposed port and the multi-instance input, it imports a fresh instance of the intervening node using its default values. If you are using a compound between the exposed port and the multi-instance input, that compound must have been exported.
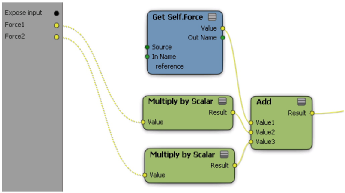
If two or more exposed ports are connected to the same multi-instance input and they both have Expose Type set to either Multi - Connect New Ports Through New Node (copy values) or (default values), they form a port group. Connecting an input to any one of the New virtual ports creates a new instance of all of them.
You can define minimum and maximum values for scalar and integer ports.
The Picking string for operator is used as a prompt in the mouse line when applying a compound using the ApplyICEOp command. It is useful for picking scene reference inputs, such as with the Footprints compound. For more information about applying compounds, see Applying ICE Compounds.
Instead of sliders or numeric inputs for integers and scalars, you can predefine values like Slow, Medium, and Fast. Users can select these values from a menu box in your compound's property editor. This is particularly useful when using the Select Case node to execute different parts of a tree based on a chosen integer value.
 Except where otherwise noted, this work is licensed under a Creative Commons Attribution-NonCommercial-ShareAlike 3.0 Unported License