Each object can have multiple projections and supports. Each projection can be associated to only one object and one support, but a single support can be associated with multiple projections on multiple objects.
If you select multiple objects and apply a projection, each object gets its own projection with its own support.
However, if you apply a projection to a group, every object gets its own projection which all share a single support. The
same is true when you apply a projection to a hierarchy in branch mode, although in this case you must apply the projection
using Get  Property Projection instead of a texture shader's property editor. This is useful if you want to blow up something that was modeled as separate
objects — you can texture them all together with a single support, then freeze their projections so that the texture sticks
to each piece as they fly apart.
Property Projection instead of a texture shader's property editor. This is useful if you want to blow up something that was modeled as separate
objects — you can texture them all together with a single support, then freeze their projections so that the texture sticks
to each piece as they fly apart.
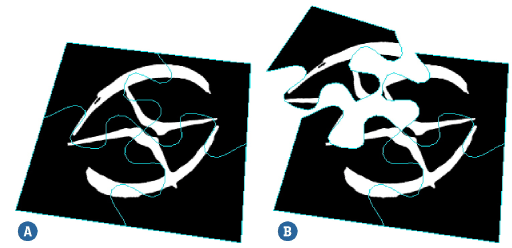
| A |
Group of four objects sharing a single texture support. |
| B |
After freezing, the objects can be moved independently and their textures stick. |
When you create a projection, you can attach it to an existing support in the scene. Alternatively, you can attach it to an existing projection — this is similar to attaching it to a support but the new projection also inherits any transformations of the existing projection as well as of the support. In either case, the elements to texture should be inside the selected texture support to be properly textured by it — if necessary, you can transform the support to fit.
Attaching a New Projection to an Existing Support
Attaching a New Projection to an Existing Projection
Choose Get Property Texture Projection Connect to Projection from the Render toolbar.
In the dialog box that opens, enter a name for the new texture projection and click OK.
Pick a texture projection in an explorer.
The new texture projection automatically assumes the same type as the existing support and projections. It is affected by the transformation and other settings of the support, as well as by the transformation of the projection it is connected to. To offset it, you must use the settings in the Texture Projection Definition property editor instead of doing it interactively with the Edit Projection tool.


