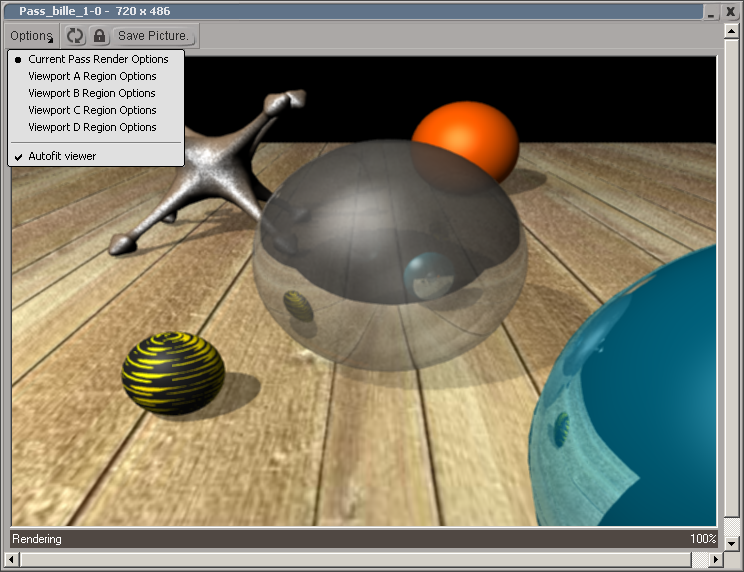
The Render  Preview command in the Render toolbar lets you preview the current frame at fully rendered quality in a floating window. The frame
is rendered using the render options for the current render pass or using the render region options defined in any of the
four viewports. The preview always shows the main channel, rather than a specific framebuffer.

From the Options menu, choose which render options to use when previewing:
Current Pass Render Options — see Pass Rendering Options for details on how to set these options.
Viewport A, B, C, D Region Options — see Setting Render Region Options. These are especially useful if you want to render a viewpoint (such as the top, front and right views) rather than a camera view.
You can also do the following in the render preview window:
Click the Lock button to stop the viewer from automatically updating when the scene changes. See Comparing Render Previews.
Select the Autofit Viewer option to resize the image to fit the preview window. See Autofitting A Render Preview.
You can open more than one render preview and compare separate results in each window.
Choose Render  Preview from the Render toolbar to open a viewer and generate a preview.
Click the Lock button to stop the viewer from updating when the scene changes.
Choose View  Rendering/Texturing
  Render Preview from the main menu to open a second preview window.
Make modifications to your scene. You can then compare the result in the locked preview window with the result in the current preview window.
The Autofit Viewer options fits the image to the maximum size the viewer can be without requiring scrollbars (the aspect ratio of the image is maintained). The maximum size allowed by the viewer is dependent on the resolution of your screen. For example, if the image was 1600 x 1600, it would end up as 800 x 800 when your screen resolution is 1280 x 1024.
If you want to capture the contents of the preview window, you can save it as a still image.
When you save a frame preview to file the viewer saves the contents of its buffer. If the viewer is set to Autofit and the preview has been resized to 800 x 800 for example, you would get an 800 x 800 image when saved. If Autofit is off, the whole image is saved.