Sampling parameters lets you automatically vary parameters and take a snapshot at different values. This technique is sometimes called bracketing, from the photographers' technique of shooting the same scene at different exposures.
You can sample parameters to quickly find the values for the effect you want, or to find a value that's close to the effect you want and then refine it further from there. This is especially useful for complex effects that may take a long time to compute — you can generate the samples over lunch or overnight, and then simply recall the desired settings.
The Parameter Sampling & Bracketing page in Netview allows you to interactively generate samples, view the results, and recall them.
The first step is to generate samples for the desired parameters.
Select a single object, and mark the desired parameters. You can mark a parameter by:
Use the Shift key to add a parameter, and the Ctrl key to toggle.
For more information about marking parameters, see Marking Parameters for Animation [Animation].
On the Animate toolbar, choose Create  Parameter Sample/Bracket Parameter Values. The Parameter Bracketing page opens in a floating Netview window.
Set all the options under Parameter Sampling, as well as Capture Method and Capture Options under Capture and Display Results. See Parameter Sampling Settings and Capture Settings.
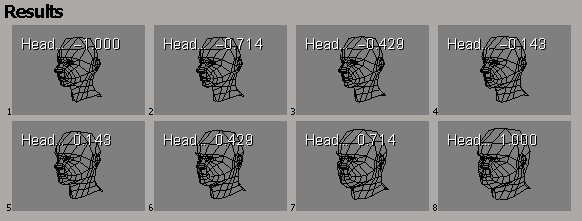
Click Generate Samples. Thumbnails are generated for the different parameter values, and displayed in the Results section of the Netview page. You can click on a thumbnail to set the parameters in your scene to the corresponding values; for more information, see Displaying Sample Parameters.
The parameter sampling settings let you set the sampling method and other options.
Sampling Method: Bracket Parameters
When the Sampling Method is set to Bracket Parameters, the marked parameters are sampled at equal intervals within a range. The range is determined by either the parameter's default slider range or its current value, as described in Relative Variation and Percentage of Variation. Samples (per param) under Bracket Options determines the number of intervals.
Be careful to keep Samples (per param) fairly low when using multiple marked parameters. The total number of samples grows exponentially with the number of marked parameters. This may result in a very large number of samples that takes a very long time to compute. For example, with five samples per parameter and two parameters, there are 25 samples in total; with three parameters, there are 125 samples in total; with four parameters, there are 625 samples in total, and so on.
You should also be careful when sampling color parameters because colors are sampled in each of their R, G, B, and A channels.
Sampling Method: Randomize Parameters
When the Sampling Method is set to Randomize Parameters, the marked parameters are set to random values within a range. The range is determined by either the parameter's default slider range or its current value, as described in Relative Variation and Percentage of Variation. Samples (total) under Randomize Options determines the number of samples generated.
Seed is a seed for the random number generator. Using the same seed always produces the same results within the same range, which means that you can always go back and regenerate a result you liked by using the same values. If you don't like any of the current samples, you can generate a new set within the same range by changing the seed.
Relative Variation and Percentage of Variation
Relative Variation controls the range used for sampling: either based on a parameter's normal slider range (off) or based on its current value (on). In either case, Perc. of Variation determines the size of the range as a ratio of the normal slider range.
If Relative Variation is off, then the range is centered on the middle of the normal slider range of the parameter in a property editor. For example with the Bracket Parameters method, if a slider's range is [-1.0, 1.0] and Samples (per param) is 5, and Perc. of Variation is 1.0 (full range), then the parameter will be sampled at -1.0, -0.5, 0.0, 0.5, and 1.0. Note that for some parameters, you can type in values outside the slider's range; however, parameter sampling is limited to the slider range.
If Relative Variation is on, then the range is centered on the parameter's current value. If the maximum or minimum falls outside of the normal slider range, it is clamped and the parameter is sampled within the allowable portion of the range. For example, if a slider's range is [0, 100], the current value is 60, and Perc. of Variation is 0.20, then the parameter will be sampled within the range [40, 80].
Relative Variation is useful to iteratively refine the parameter values: first sample with it off to see values across the entire range, then choose a value you like and resample with Relative Variation on. Repeat, reducing Perc. of Variation each time as you get closer to the desired values.
The capture settings determine how the snapshot images are generated. Image files are always in JPEG format, with a .jpg file name extension.
The capture method determines what will be shown in the snapshot images. There are three choices:
Capture performs a single-frame capture of viewport B using its current display settings. The marked parameters and values are overlaid on the image.
Capture w/o Displayed Values is the same as Capture, but the marked parameters and values are not overlaid on the image. You can still recall the corresponding values automatically as described in Recalling Values.
Render performs a render of the active camera of the current pass using the current render options (apart from size, file name, and path).
You can set the following capture options:
File Name is the base file name for the sampled images. For example, if this value is "test", the images are named test1.jpg, test2.jpg, and so on.
File Path is the directory location for the images. If you are running on Linux, you need to change the default value from C:\Temp.
Size is the vertical size of the images in pixels. The horizontal size is calculated automatically from the picture ratio set in the camera's property editor (if the capture method is Capture) or the render options (if the capture method is Render).


