After you've created particle and obstacle rigid bodies, you need to set up their rigid body properties that include elasticity and friction.
Remember that it's the combination of all rigid bodies (particles and obstacles) involved in the collision that determines the results. Any rigid body attribute values you set per particle in a point cloud are multiplied with the obstacle's rigid body properties set in the Simulate Bullet Rigid Bodies or Simulate Rigid Bodies property editor.
Although they aren't direct rigid body properties, velocity and mass also play a large role in how much a rigid body rebounds in a collision:
A rigid body moving at a high velocity is going to bounce more than one moving at a low velocity.
A rigid body with a high mass value is going to bounce less than one with a low mass value, but it will have greater momentum.
Setting Elasticity for Obstacles
Elasticity is the kinetic energy that is retained that moves rigid bodies in the opposite direction (bounce) during a collision.
In the Simulate Bullet Rigid Bodies or Simulate Rigid Bodies property editor, you can set the Elasticity slider's value for each obstacle that is plugged into that node.
The obstacle's Elasticity value is combined with the particle's Elasticity attribute to determine how much the particles bounce off the obstacle.

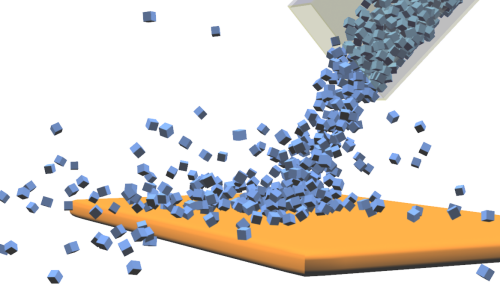
In this image, both the table obstacle and the particles have high elasticity values so that the particles bounce off the table easily.
The Elasticity values are from 0 (no elasticity) to 1 (objects return the same velocity as before the collision). With the Simulate Bullet Rigid Bodies node, you can enter values higher than 1, but you cannot enter negative values. Using values above 1 makes the object actually increase its energy at each collision, which can make a simulation less stable.
You should also keep the Elasticity value of objects low if they are going to be bouncing around inside an enclosed space such as a box or room.
Setting Friction for Obstacles
Friction is the resistive force acting between rigid bodies that tends to oppose and dampen motion.
The obstacle's Static Friction value is combined with the particle's StaticFriction attribute to determine how each particle starts sliding on the obstacle when it is at rest.
Static friction is the force that opposes a rigid body from changing its state from resting to motion. For instance, if you place a cube on a sloped plane, the static friction determines how easily the cube begins its initial slide or tumble down the plane. Static friction has little or no effect after an object is moving.
The obstacle's Dynamic Friction value is combined with the particle's DynamicFriction attribute to determine how each particle slides on the obstacle when in motion.
Dynamic (also known as kinetic) friction is how much a moving rigid body resists movement against another rigid body's surface. This is the force that tends to slow down a rigid body in motion. For example, a billiard ball rolling on a carpet would encounter more friction than if it was rolling on a marble floor.

In this image, both the table obstacle and the particles have high friction values so that the particles pile up on the table.
In the Simulate Rigid Bodies property editor, you can set the Static Friction and Dynamic Friction sliders' values for each obstacle that is plugged into the Simulate Rigid Bodies node.
In the Simulate Bullet Rigid Bodies property editor, you can set only the Static Friction sliders' values for each obstacle that is plugged into the Simulate Bullet Rigid Bodies node. The Bullet physics engine does not distinguish between static and dynamic friction: it combines the two to support just one friction value.
The value range for either the Static Friction or Dynamic Friction sliders is between 0 and 1, with 0 being no friction (free movement) and 1 being full friction (no movement). You cannot enter negative values or values over 1.
Setting Elasticity and Friction for Rigid Body Particles
In the Set Particle RBD property editor, you can set the Elasticity, StaticFriction, and DynamicFriction attributes for each rigid body particle in a point cloud.
Any rigid body attribute values you set per particle are multiplied with the obstacle's same properties set in the Simulate Bullet Rigid Bodies or Simulate Rigid Bodies property editor.
If you want to set these attributes separately, you can create a Set Data node and expose each attribute in it — see Getting and Setting ICE Particle Attributes for more information on how to do this.