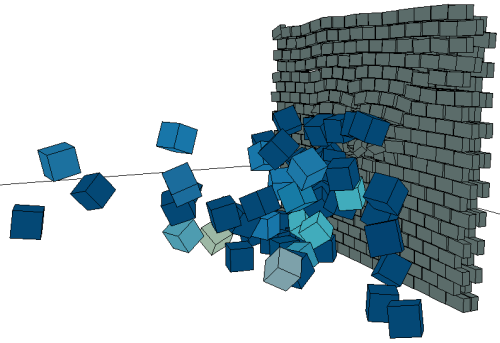
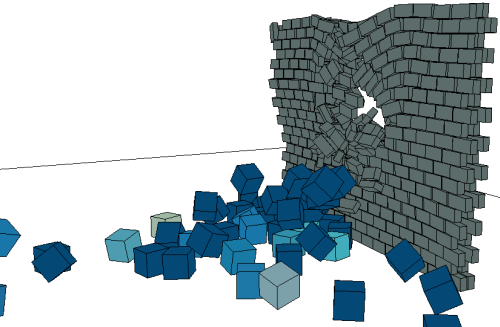
When you create a rigid body particle emission, the particles from the same point cloud can collide among themselves. All particles are considered as active rigid bodies, meaning that they are all affected by forces and by collisions with each other and with any objects you have set as collision objects.
You can also make the particles passive, which means that they are not affected by forces and collisions — see Making ICE Rigid Body Particles Passive.
If you create collisions with particles using any of the Surface Interaction compounds (such as Bounce Off Surface), you cannot also make those particles into rigid bodies in the same ICE tree. This is because the Surface Interaction compounds use the Simulate Particle node, while particle rigid bodies use the Simulate Bullet Rigid Bodies or Simulate Rigid Bodies node.
For information on creating other types of collisions with particles, such as bouncing, sticking, or sliding, see About ICE Particle Collisions.
To use rigid body particles with states, you can use the Simple State compound (which doesn't contain the Simulate Particles node) instead of the State compound - see Setting Up States for more information.
Select one or more objects to be particle emitters.
An emitter can be any type of object that has geometry: a polygon mesh, NURBS surface, a curve, or a combination of these object types.
Choose the Particles  Create Rigid Bodies command from the ICE toolbar.
When you do this, the following things happen:
In the Emit from Geometry property editor that opens, you can edit the standard particle attributes.
In the Set Particle RBD property editor that opens, you can edit the particle's rigid body attributes.
With the point cloud selected, open the ICE tree by pressing Alt+9.
You may need to click the Refresh icon on the toolbar to update the ICE tree view.
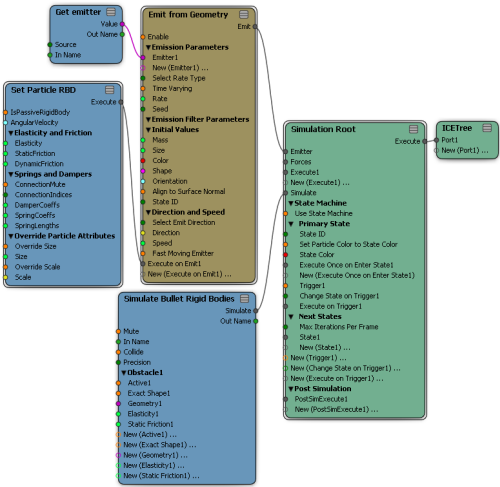
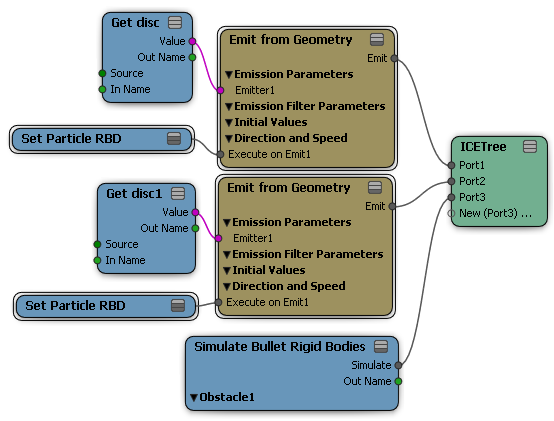
The ICE tree created is the same as the one that is created in Creating a Basic Particle Emission, except for these two nodes:
The Set Particle RBD node contains the particle's rigid body attributes that you can edit. This node is plugged into the Emit compound so that the attributes are set only upon emission of the particles.
The Simulate Bullet Rigid Bodies node makes particles into rigid bodies that use the Bullet physics engine.
You can add objects as obstacles with which the particles can collide — see ICE Particle Collisions with Obstacles for information
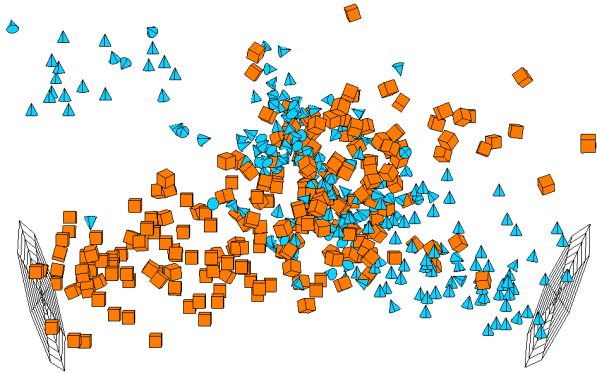
Collisions with Multiple Particle Emissions
Although only particles that are in the same point cloud can collide with each other, you can create the illusion of particles from several point clouds colliding. One of the easiest ways to do this is to use several emitters/emissions in the ICE tree of a single point cloud. Then set up the emission properties for each of the particle emissions so that they look like different particles.
You can also create a state system to set up a condition for different particles within the same point cloud to look or act differently, or use If or Not nodes to set up a condition in the same way. See ICE Particle States for more information.