This walkthrough shows how to use the Plug-in Manager to create plug-ins in a workgroup. Steps include creating a new workgroup, creating a custom command, creating a toolbar, and creating an Add-on directory.
Expand your workgroup, right-click the Plug-ins folder and choose New Command.

In the Command Wizard, click Generate Code to generate the custom command
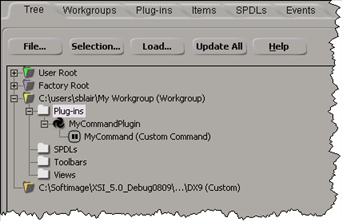
The plug-in and the custom command appear in the Plug-in Tree under the workgroup Plug-ins folder:
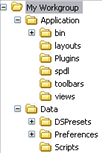
The generated code is put in the Application\Plugins folder of the workgroup.
If you chose a scripting language, the generated plug-in is automatically loaded and executed. Then, no matter what language you chose, the generated code is opened in a script editor.
To manage the plug-in (for example, to unload it, remove it from the cache, or delete it), right-click the plug-in:
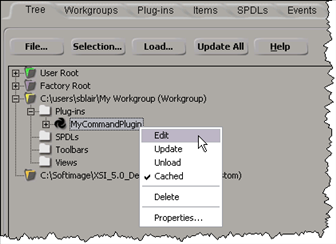
Note that if you edit a plug-in in the script editor, Softimage automatically reloads (updates) the plug-in when you save your changes. If you use an external editor (for example, to edit and recompile a C++ plug-in), you can use the Update command in the context menu to reload the plug-in.
If the plug-in had a help file, the context menu would include a Help command.
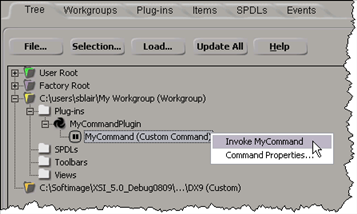
To run the command, expand the plug-in, right-click the command and choose Invoke.
Of course, you can easily run a command from the script editor. For custom properties, however, the Plug-in Tree provides a quick way to create an instance of the property on the scene root: just right-click the property and choose Create Property.
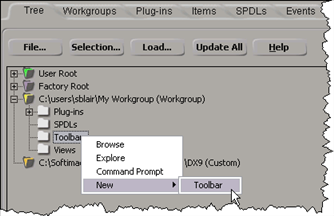
Under your workgroup, right-click the Toolbars folder and choose New Toolbar.
In the Toolbar Wizard, type a name for the toolbar and then click OK.
The wizard creates a new toolbar and opens it, and loads the toolbar .xsitb file into a script editor. The new toolbar is
also added to the ViewToolbars menu in the Softimage menu bar.
Note that the toolbar already includes a button for the command you created. If you create more commands in the workgroup, you can add them to the toolbar by dragging them from the Plug-in Tree to the toolbar.
As you create more plug-ins in a workgroup, you may find your Application\Plugins folder getting rather cluttered. If you want to separate the source code for different plug-ins, you can create an Add-on directory for each plug-in. An Add-on directory is located in the Addons folder of a workgroup. Each Add-on directory has its own Application and Data folders.
Using Add-on directories also simplifies the process of packaging an add-on for distribution.
In the Plug-in Tree, right-click your workgroup and choose NewAdd- Directory.
In the Create Add-on Directory dialog box, type a name for the add-on. This name must be a valid name for a folder.
In the Plug-in Tree, a new Addon folder node appears under the workgroup.
Expand the Addon folder, and then drag the plug-in from the workgroup to the Plugins folder in the Add-on.
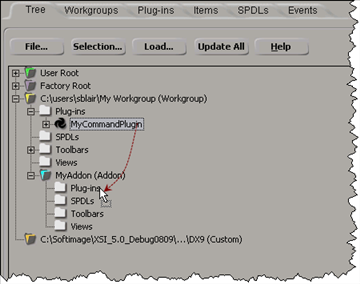
This moves the plug-in from the workgroup Application\Plugins folder to the Application\Plugins folder in the Add-on directory.
If you want, you can move the toolbar the same way: drag the .xsitb file from the workgroup to the Toolbars folder in the Add-on.
Package an Add-on for Distribution
If you need to distribute an add-on to people who cannot access your workgroup, you can easily package everything in an Add-on directory into an .xsiaddon file.


 and locate the folder that will contain the workgroup.