The Match command snaps a selection of a polygon object's sample points to one or more target types. Unlike regular snapping, which only affects the selected point closest to the mouse-down position, matching can affect all of the points in the selection, and typically affects more than one of them.
In practice, this is useful for precisely matching the positions of two or more discontiguous groups of sample points. For example, you could match the sample points from one half of an object to the points from the other half, creating a symmetrical texture map.
By default, the Match command uses a Tolerance value. Tolerance is the threshold within which snap targets are sought. The larger the tolerance value, the farther away potential snap targets can be, and vice-versa. You can deactivate the tolerance, in which case the selected points are snapped to their closest targets.
To match a selection of sample points to one or more targets
If necessary, transform the selected points to bring them closer to their targets. This removes much of the ambiguity inherent in matching points that appear to be equidistant from two targets.
Click the Match button in the command bar. The MatchUVW property editor opens.
Activate or deactivate one or more of the following target types, as needed:
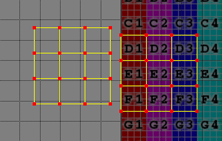
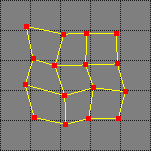
Selected Points moves points in the selection towards one another. As you increase the tolerance, the points collapse to a smaller number of positions until they occupy exactly the same location.
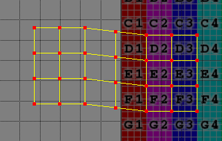
Unselected Points snaps selected points to the closest unselected points. Once again, as you increase the tolerance, the selection appears to collapse in the direction of the unselected points.
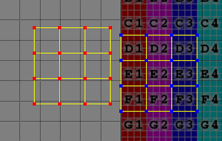
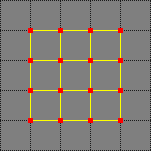
Grid snaps selected points to the closest grid points on a virtual grid. By default, the virtual grid matches the grid displayed in the texture editor work area (as specified in the texture editor preferences). You can use the Grid Info controls to change the resolution of the virtual grid and/or offset it from the texture editor grid.
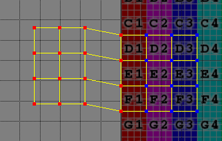
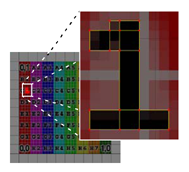
Pixel Corners snaps selected points to the nearest pixel corners. When you activate Pixel Corner matching, the Image Info controls are activated. By default, the match operation is performed relative to the texture image's resolution. You can use the Image Info controls to change the resolution of the image's resolution for matching purposes only.