The shape manager makes it easy to adjust existing shapes because you can see exactly what the results will be in the shape viewer.
Deform the object or its clusters as you like to modify that shape.
Remember that any changes you make to the object or clusters are immediately applied to that shape.
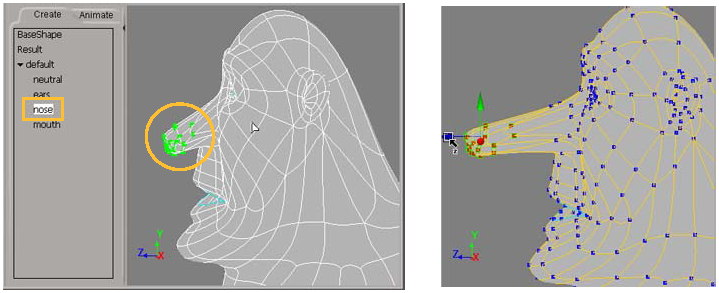
On the left, the nose shape is selected in the shape list. The points affected by this shape are highlighted in green for easy identification.
On the right, the affected points are tagged and translated on the Z axis to modify the current nose shape.
The results are displayed in the shape viewer.
If you want to see the changes of shape editing in relation to the current state of any animated deformations on the object,
such as an envelope's current shape, choose Edit  Display with Animation Deformation from the shape manager's menu bar.
When you edit the base shape, Softimage automatically switches to the Modeling construction mode so that the changes are done to the base geometry. Because the changes are made to the base geometry, all shapes that have been created from this geometry will reflect the changes.
See Base Geometry in the Modeling Region for more information.
To edit the base shape for the object
Deform the object as you like to modify the base shape.

On the left, the Base Shape is selected in the shape list. This is the base geometry for the object.
On the right, the geometry for the top of the head and ears is modified for the Base Shape. All shapes created from this geometry will reflect these changes.


