The Render Manager > Scene Render Options
Choose Render > Render > Scene Options from the Render toolbar.
Options: Scene Output Resolution and click the Output Formats button.
Choose File  Preferences from the main menu. In the preferences view, select Output Format.
The Output Format preferences provide access to a variety of camera, image-format and other parameters that are normally scattered throughout several other property editors.
You can modify all of these parameters from the Output Format property editor, and then apply the changes to all applicable parts of the scene. For example, you can change the camera picture standard and then update all of the cameras in the scene as well as the relevant render options.
This allows you to quickly make global changes to the most common settings, such as those required to switch from the NTSC picture standard to the PAL picture standard.
To set output format preferences
If you'd like, choose a Preset. You can choose NTSC, PAL, or Custom.
Set the Image Resolution options:
The Resolution X and Resolution Y values specify the width and height of the image in pixels.
If you select Maintain Picture Ratio and change Resolution X, Resolution Y scales automatically, and vice versa, to maintain a proportional picture ratio.
If necessary, adjust the Pixel Ratio. This ensures image compatibility with devices that use non-square pixels.
Set the Default Frame Rate options:
The Frame Step sets the interval at which frames are played back in the viewport. For example, a value of 2 causes the viewports to display only every second frame in the viewport during playback.
The Frame Format sets the speed at which frames are played back in the viewport (fps = frames per second). You can choose from an number of common formats.
If you select Custom, you must define the number of frames per second in the Frame Rate text box.
The Frame Rate is the selected speed at which frames are played back in the viewport. You can only change this value if the frame format is set to Custom.
The Pixel Ratio setting in the Rotoscope mode only options is automatically set according to the camera settings. However, if need be, you can deactivate the Use Camera Pixel Ratio option and set a custom pixel ratio.
Once you've set the parameters as desired, click the Apply Now button in the Update Scene Elements section. The following dialog box opens:
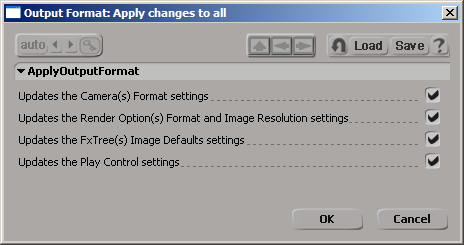
Choose the settings that you want to update:
Click OK to close the dialog box and update the selected settings.


