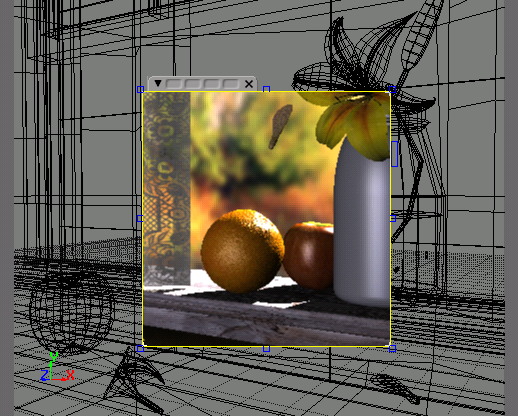
You can view a rendering of any section or object in your scene quickly and easily using a render region. Rather than setting up and launching a preview, you can simply draw a render region over any 3D view and see how your scene will appear in the final render. Each view can have its own render region with its own settings.
Because the render region can use the same renderer as the final render, you can set the region to render your previews at final output quality. This gives you a very accurate preview of what your final rendered scene will look like.
You can resize and move a render region, select objects and elements within the region, as well as modify its properties to optimize your preview. Whatever is displayed inside that region is continuously updated as you make changes to the rendering properties of the objects. Only this area is refreshed when changing object, camera, and light properties, when adjusting rendering options, or when applying textures and shaders.
When the render region is refreshed, a series of tiles starts filling in the region with the rendered image. Each time you change properties that affect the appearance of objects in your scene, the region is automatically refreshed. You do not have to wait for the region to finish refreshing to make more changes to your scene — a change simply interrupts the current refresh and restarts it to include the updates you have just made. This allows you to do iterative adjustments on the properties.
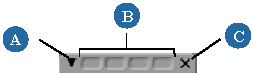
Click for more Options (A), Store and Compare (B), and Hide the Region (C).
You can draw a rectangular region of any size around the objects you want rendered interactively within any 3D view. You can draw only one render region at a time in any view, but each viewport or Object View window can have its own region.
Drag the mouse pointer diagonally across the 3D view to create the render region. The region is drawn as a box with a yellow border and blue resizing handles.
As soon as you release the mouse button, the region is drawn and whatever is displayed in that region is rendered.
The render appears as a series of tiles that fill up the region. Each tile is outlined with an angled bracket at each corner, signifying which tiles are being updated at each refresh. When you make a change that affects the visual appearance of the scene, only the part of the scene shown in the render region is rendered.
If you wish to start over, simply draw a new region anywhere you like.
To toggle the render region display on or off, press Shift+Q.
To delete the current render region, press Q to activate the render region tool and click in the view.
To have the render region update during playback, Play All Frames (All on the playback panel) must be active. The render region does not update in Real-Time Playback mode (RT).
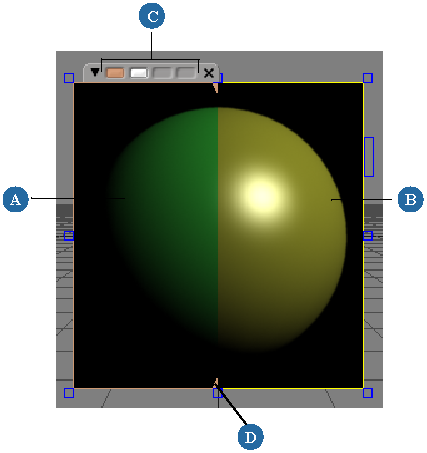
The render region has memo-regions that allow you to store, compare, and recall settings. They look similar to the viewports' memo-cams (although they are not saved with the scene).
Middle-click on a memo-region box.
The pixels are cached and displayed on the left side of the region. As soon as you modify your settings, the changes appear on the right.
Only the pixels inside the region are cached. Other pixels will be drawn stippled black and white if you move or resize the region.
The memo-region box whose cached pixels are being displayed is highlighted white, and other boxes with cached pixels are orange.
Setting the Render Region Display Mode
The render region's display mode defines what channels the region displays. For example, you can display the RGB channels, the alpha channel, and so on.
To set the render region display mode
To change all render regions, choose an item from the Render  Regions Display menu on the Render toolbar.
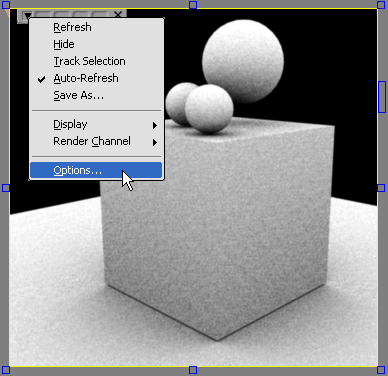
To change a specific region, click the triangle at the upper left of the regions (or right-click on the region's border) and choose an item from the Display menu.
Displaying a Render Channel in the Render Region
You can display any of the built-in, preset, or custom render channels available for your scene in the render regions. For information about setting up render channels, see About Render Channels.
Tracking Objects with the Render Region
Rather than always adjusting your render region's size and location while you are working in a scene, you can set the render region to track an object, hierarchy, group of objects, or even a part of an object (cluster).
To set the render region to track an object
Select an element and draw a render region large enough to contain its movement over the frame range.
As the object moves, only the pixels in a box containing the selected element are rendered. Selecting another object causes the render region to track the new selection.
Rather than rendering everything in the render region, you can render only the selected objects. To do this, activate Render Selection Only in the render region options. See Setting Render Region Options.
Moving and Resizing a Render Region
You can resize and reposition the region in the 3D view by dragging its border. The mouse pointer changes to indicate the type of action you can perform with the region. The placement and size of the render region are limited by the layout and size of the 3D views themselves.
Planning to make several consecutive changes to your scene and you don't want render region refreshes to launch one after another? Try hiding the region:
Press Shift+Q with the mouse over the desired view. Pressing Shift+Q again redisplays the region as it was defined prior to hiding.
With the Render Reqion tool active, middle-click in the view; middle-click again to unhide the region.
Click the triangle at the upper left of the region (or right-click the render region's border) and choose Hide Region.
Once a render region has been defined, and the render region tool is still active, click anywhere on the screen to close the region. You do not have to wait until the region is finished rendering.
Dragging a new render region over an existing one closes the original region and renders the new one.
A render region renders the scene in the same way as a final output render. As such, the rendering options you set for a render region give you an accurate preview of what your final rendered scene (current render pass or render channel) will look like.
The render region uses its own set of renderer options that affect only the render region and are not used for the final render. If necessary, you can use the various copy commands to match the region renderer settings with those of the final output renderer (and vise-versa). See Copying Render Options.
Previewing the changes you make to your scene in a render region is an interactive process. To speed up the "tune-preview-retune" cycle, use the region's rendering options to optimize the display.
To open the render region property editor
To open a combined property editor and make settings that affect all render regions, choose Render Regions All Options from the Render toolbar.
To open the property editor for the last view you clicked in (highlighted in white) and make settings that affect only it,
choose Render Regions Active Viewport Options from the Render toolbar.
To set the options for a specific region, click the triangle on its upper left or right-click its border and choose Options.
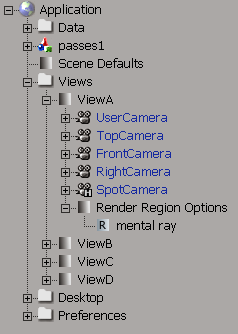
In the explorer, set the scope to Application and expand the Views node. Click the icon for the Render Region Options node that appears under ViewA, B, C, or D.
In the render region options property editor, do one of the following:
Select the Use Current Pass Options checkbox to use the renderer options exactly as defined for the current pass. The renderer options are not displayed in the property editor, they are simply used as-is.
Deselect the Use Current Pass Options checkbox to use the renderer options based on the Region Renderer setting. The renderer options are displayed in the region property editor and you can set them as needed.
For more information about the region options, see the Render Region Options Property Editor [Properties Reference].
To set the accuracy of the region
If you are using the mental ray renderer, you can quickly set the rendering accuracy (sampling level) with the slider on the right side of the region border.
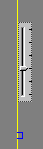
Position the mouse pointer over the blue rectangle on the right side of the region border. The Max Sample slider appears.
Drag the slider down to decrease the maximum sampling level and increase the render speed in the region.
For more information about setting the sampling level, see Controlling Aliasing.
By default, the render region refreshes automatically each time you modify the region or change scene properties. You can optimize region refresh when moving, resizing, or applying changes to your scene elements by choosing to manually refresh the region.
You should deactivate the automatic refresh of the region if you are making a number of changes that require intensive rendering calculations, like caustics and motion blur. You can refresh the render region after you have set these options and made your scene changes.
Saving the Render Region to File
If you want to capture the contents of the render region for later use, you can save the region as a still image. The region's contents is saved to disk exactly as you see it and according to the display mode setting. For example, if you selected RGB Only as the display mode there will be no alpha channel written to the file that gets output.
Set the display mode to specify what color channels get saved to file. See Setting the Render Region Display Mode.
Click the triangle at the upper left of the regions (or right-click on the region's border) and choose Save As.
Using the browser, select a directory, format and file name for your image.
Setting Render Region Preferences
The render region preferences are a subset of the rendering preferences. They allow you to se the region's Track Selection state, its Auto-Refresh state, and its display mode.
To set render region preferences
From the main menu, choose File Preferences to open the preferences window.
Select Rendering from the explorer pane to open the Rendering property editor in the right pane.
Set the Region Settings as needed. See Rendering Preferences.


