Architectural


| Transparency/Reflection | Indirect Illumination | Ambient Occlusion | Optimization | Additional Options | Render Tree Usage | Blinn

Category: Illumination

Shader Family: Surface Material

Output: Color

Related mental ray shader: mia_material

The Architectural Material (mia_material) shader is designed to support most physical materials used by architectural and product design renderings. It supports most hard surface materials such as metal, wood, and glass. It is tuned especially for glossy reflections and refractions and high-quality glass.

ImportantIf you are not using anisotropic reflections, type "None" into the Transparency/Reflection > Anisotrophy > Texture Space selection box to avoid artifacts in the render.

Illumination

Diffuse

Diffuse

Defines the Diffuse surface color in the illuminated area of the object.

Weight

Sets the desired level (and diffuses the color) of the diffuse reflectivity. Since the material is energy conserving, the actual diffuse level used depends on the Reflectivity and Transparency values set (below).

Roughness

Sets the roughness of the diffuse surface using the Oren-Nayar shading model. When this value is 0, it is identical to Lambert shading: with higher values, the surface gets a more powdery look.

Transparency/Reflection

Refraction

Transparency

Defines the level of transparency of the material. This value is the maximum value of refraction. The actual value also depends on the Reflectivity and the angle of the surface as defined by the View Angle Dependent (BRDF) parameter.

Color

Defines the color of the transparency.

Glossiness

Determines the smoothness of the surface for refraction only: the lower the value, the rougher the material; the higher the value, the smoother the surface.

Samples

Specifies the number of times the light ray is sampled: a low value is grainy; a high value is smooth.

Index of Refraction

The amount that a ray of light bends when entering a material. Which direction the light bends depends on whether it is entering or exiting the object. The shader uses the direction of the surface normal as the primary cue for figuring out whether the light is entering or exiting.

A value of 1 equals air (no refraction across the material), with a value of 1.2 being glass and 1.5 being very refractive glass.

Reflection

Reflectivity

The amount that the surface reflects its environment. The Reflectivity and Reflection Color together define the level of reflection, as well as the intensity of the specular highlight.

This value is the maximum value of reflectivity. The actual value also depends on the angle of the surface defined by the View Angle Dependent (BRDF) parameter.

Reflection Color

Color used for the reflection.

Glossiness

Amount of glossiness of the reflection, ranging from a value of 1 (mirror) to 0 (a diffusely reflective surface). This also defines how sharp or blurry the refraction/transparency is.

Glossy Samples

Defines the maximum number of samples (rays) that are shot to create the glossy reflections. Higher values render more slowly but create a smoother result. Lower values render faster, but create a grainier result. A value of 32 is adequate for most cases.

If the Glossiness value is 1 (equals a mirror), it is meaningless to shoot multiple rays, so only one reflection ray is shot.

If this parameter's value is set to 0, the reflections will be a mirror (and only one ray shot) regardless of the actual Glossiness value. This can be used to boost performance for surfaces with very weak reflections. The highlight still considers the Glossiness value.

Metal Material

Influences the reflection in the same way as a metallic object influences the color of its reflection.

When this option is on, the Diffuse parameter defines the color of the reflection, and the Reflectivity parameter sets the weight between diffuse reflections and glossy (metallic) reflections.

Base Reflection

These parameters add a second glossy lobe to mia_material, like another layer of glossy reflections below the normal glossy reflections.

This allows you to do something like a coated metal or carpaint style material in a single mia_material without having to resort to layering and blending multiple materials.

In general, you should use the Base Reflection parameters for a slightly glossy reflection with the same color as the Diffuse, and then use a sharp reflection (Reflection Glossiness = 1) as a clearcoat layer on top with a white reflectivity color.

Base Reflectivity

This is the weight between the normal Reflection settings and the Base Reflection settings.

  • If this value is 0, only the normal Reflection values are used.

  • If this value is 1, only the Base Reflection values are used.

  • If this value is 0.5, this is a 50/50 mixutre of both reflection types.

Base Reflection Color

Color used for the base reflection.

Glossiness

Amount of glossiness of the base reflection, ranging from a value of 1 (mirror) to 0 (a diffusely reflective surface). This also defines how sharp or blurry the refraction/transparency is.

Glossy Samples

Defines the maximum number of samples (rays) that are shot to create the glossy base reflections.

This is the same as for the Reflection - Glossy Samples parameter, above.

Anisotropy

Anisotropy

Sets the ratio between the width and height of the highlights to create anistropic reflections. At a value of 1, there is no effect, but any other value changes the shape of the highlight.

Rotation

Rotates the anistropic effect. A value of 0 is no rotation, and a value of 1 is a full revolution (360 degrees). This helps to direct the angle of the reflection when there is a texture map applied.

Texture Space

Sets the texture space which defines the stretch directions of the highlights. If this value is -1, the base rotation follows the local object coordinate system.

Note: If you are not using anisotropic reflections, type "None" into the Texture Space selection box to avoid artifacts in the render.

View Angle Dependent (BRDF)

The reflectivity of a surface is often view angle dependent, also known as BRDF (bidirectional reflectance distribution function). The following parameters define how much a material reflects when seen from various angles. Many materials have this quality, such as glass and water, as well as lacquered wood and plastic.

Default (IOF)

Defines the index of refraction in degrees (incident angle). A value of 0 is used for surfaces facing the view and a value of 90 is used for surfaces perpendicular to the view.

Manual

Facing Reflectivity

Defines the reflectivity for surfaces that are directly facing the viewer (incident ray). Metals are usually uniformly reflective, so you can set this value high (0.8 to 1), but other materials such as linoleum or lacquered wood have lower values (0.1 to 0.3).

Perpendicular Reflectivity

Defines the reflectivity for surfaces that are perpendicular to the viewer. Most materials show strong reflections at grazing angles so this parameter can generally be kept at 1 (and using the Reflectivity parameter to guide the overall reflectivity).

Curve Falloff

Defines the falloff of the view dependent angle (BRDF) curve.

Conserve Energy

Ensures that the incoming light energy is properly distributed to the diffuse reflection and refraction areas of the surface (Diffuse+Reflectivity+Refraction <=1). If you increase the Reflectivity, the Diffuse and Transparency are reduced accordingly; if you increase the Transparency, the Diffuse level is reduced accordingly.

This option also links the level of highlights to the Glossiness of the surface. A high Glossiness value causes a narrower but more intense highlight, while a lower value causes a wider but less intense highlights because the light energy is spread out and dissipates over a larger area.

Indirect Illumination

Global Illumination/Caustics/Final Gathering

This shader is designed to be used in a realistic lighting environment, using both full direct and indirect illumination. To generate indirect light, you can use final gathering and/or global illumination (photons). You need to at least use final gathering, but combining final gathering with global illumination gives better quality results.

If you are using an environment for your reflections, make sure the same environment (or a blurred copy of it) is used to light the scene with final gathering.

Radiance

An indirect multiplier that lets you tweak how strongly the material responds to indirect light. The default of 1 uses the global value.

Final Gather

Ray Multiplier

A local multiplier for the number of final gathering rays shot by the material. The default of 1 uses the global value.

Additional Multiplier

Aids in mapping textures that are mapped to Ray Multiplier. When this value is 0, the Ray Multiplier value is the raw quality setting; with a non-zero value (minimum of 1), the actual quality used is the product of this value with the Ray Multiplier value.

This means that with a color texture mapped to Ray Multiplier and this parameter set to 5, black in the texture results in a quality of 1 (the number of final gather rays shot is the global default), and white in the texture results in a quality of 5 (five times as many rays are shot).

Translucency

Makes the object appear translucent, which allows some light to pass through it. This is primarily used for thin-walled objects in a scene, such as curtains, screens, and rice paper. There must be some level of Transparency set on the object for Translucency to have an effect.

Enable

Activates the Translucency options.

Color

Color of the translucency.

Weight

Determines the amount of translucency is used in the transparency. At a value of 1, the translucency is 100% of the transparency (that is, no transparency); at a value of 0, no translucency is used in the transparency.

Ambient Occlusion

Enable

Activates the calculation of ambient occlusion, which is how occluded (blocked) an area of the surface is from receiving light. This is used to emulate the look of global illumination.

You must have either indirect illumination (final gathering or global illumination) or an ambient light source defined for ambient occlusion to have an effect.

Samples

Sets the number of samples (rays) shot for creating ambient occlusion. Higher values create smoother results, but are slower; lower values are faster, but the results are grainier. The default value is 16, but 64 is more useful in most situations.

Max Distance

Defines the radius in which the occluding objects are located. Smaller values restrict the ambient occlusion effect to only small crevices, but are faster to render; larger values cover larger areas but are slower to render.

Detail Enhancement

Activates the enhancement of details and "contact shadows" when used with indirect illumination. This is used to apply short distance ambient occlusion multiplying it with the indirect illumination, thus bringing out the details of an object.

  • None: Disables "detail enhancement".

  • Occlusion: Ambient occlusion used for "detail enhancement" of indirect illumination.

  • Color Bleed: Ambient occlusion with color bleed. Instead of simple occlusion, which can only add "darkness" of varying degrees, the shader will look at the color of the surrounding objects, and use that color rather than "darkness". Since this involves shading each of the points hit, this mode is not as fast as pure ambient occlusion, but it has the additional effect of resolving both bright and dark details.

Shadow Color

Sets the darkness of the ambient occlusion shadows. It is used as a multiplier value for completely occluded surfaces, meaning that black makes the ambient occlusion effect very dark, while a medium gray makes the effect brighter (less obvious).

Ambient Color

Creates the effect of an ambient light that is then attenuated by the ambient occlusion to create shadows, which can help to lighten some particularly dark corners.

Optimization

Interpolate Reflection/Refraction

Glossy reflections and refractions can be interpolated so that they render faster and become smoother. Interpolation uses an algorithm that allows rays to be reused and smoothed. The result is faster and smoother, but less accurate, glossy reflections.

Interpolation works by precalculating glossy reflections in a grid across the image. The number of samples (rays) taken at each point is determined by Refraction or Reflection Samples parameters.

Interpolation is done on a low-resolution grid which may cause artifacts. For this reason, it works best on flat surfaces, but not on wavy or detailed surfaces, or those using bump maps.

Grid Density

Sets the resolution of the grid that is used by interpolation for the precalculation of glossy reflections across an image.

  • 0 = grid resolution is double that of the rendering

  • 1 = grid resolution is same as that of the rendering

  • 2 = grid resolution is half of that of the rendering

  • 3 = grid resolution is one third of that of the rendering

  • 4 = grid resolution is one quarter of that of the rendering

  • 5 = grid resolution is one fifth of that of the rendering

Single Environment Sample

Samples the environment only once for reflection and refraction rays.

Refraction

Enable

Activates interpolation for refractions.

Samples

Sets the number of samples (rays) shot for calculating refraction for interpolation.

Reflection

Enable

Activates interpolation for reflections.

Samples

Sets the number of samples (rays) shot for calculating reflections for interpolation.

Distance On

Activates the Distance parameter.

Distance

Defines the radius in which a second set of detail rays is traced to create a clearer version of the objects within this radius.

Refraction (Transparency)

Trace Depth

Sets the maximum trace depth for each material. When this value is reached, the material displays only highlighted and emulated reflections. If this value is 0, the global trace depth value is used.

Cutoff

The threshold at which refractions are not traced anymore. This is a relative value; that is, the default of 0.01 means that rays that contribute less than 1% to the final pixel are ignored.

Falloff

Enable

Activates the Color parameter.

Color

Makes the transparency rays correctly absorb this color into the material instead of fading to black or just stopping (if this parameter is not active). This properly attenuates the material so that the thicker the material, the deeper the color (such as thick glass having a deeper color than thin glass).

Use End Color

Activates the End Color parameter.

End Color

Transparency fades out to this color. If this parameter is not active, the transparency fades out to the environment color. Using this color tends to be more useful for indoor scenes, while using the environment color is better for outdoor scenes.

Reflection

Highlights Only

Displays only highlighted and emulated reflections, so no actual reflection rays are traced, which saves rendering time. Only the highlights are shown, as well as soft reflections emulated by final gathering (if it's active). This is useful when the surface is not so reflective or doesn't require accurate glossy reflections, or for using on objects that are less important in the scene.

Trace Depth

Sets the maximum trace depth for each material. When this value is reached, the material displays only highlighted and emulated reflections. If this value is 0, the global trace depth value is used.

Cutoff

The threshold at which reflections are not traced anymore. This is a relative value; that is, the default of 0.01 means that rays that contribute less than 1% to the final pixel are ignored.

Falloff

Enable

Activates the Falloff - Distance parameter.

Distance

Limits the reflections to within a certain distance, which speeds up rendering as well as avoiding the calculation of glossy reflections of distant objects.

Use End Color

Activates the End Color parameter.

End Color

Reflections fade out to this color. If this parameter is not active, the reflections fade out to the environment color. Using this color tends to be more useful for indoor scenes, while using the environment color is better for outdoor scenes.

Additional Options

Remove Effects

Turn Off Visible Area Light Highlights

Causes visible area lights to lose their highlights and appear only as reflections on the surface. Otherwise, if both the reflection of the visible area light and the highlight are rendered, the light is added twice, causing an unrealistic brightening.

Turn Off Weak Internal Reflections

Ignores faint reflections that are on the inside of transparent objects, which saves rendering time.

Turn Off Bumps For Diffuse Only

Applies bumps to all components except the Diffuse parameter. This means that bumps are seen in reflections, highlights, etc., but not in the diffuse shading. The effect looks like a smooth diffuse surface covered in a bumpy lacquer coating.

When off, the bumps apply to all shading components (difuse, highlights, reflections, refractions, etc.).

Add Effects

Enable Thin-Walled Mode

Determines whether a material causes refractions (as if it was made of a solid transparent material) or not (as if it was made of thin sheets of a transparent material).

Enable Refractive Caustics

Enables refractive caustics for only this material; if this is off, caustics are enabled for all elements in a scene. For example, you may want caustics to be calculated for objects such as a glass bottle or ball, but not all refractive objects in a scene, such as window panes.

Enable Backface Culling

Makes surfaces invisible to the camera when seen from the reverse side. This is useful for creating see-though walls in a room so that you can look at an interior from the outside.

Transparency Uses Background Alpha Channel

Refractions and other transparency effects propagate the alpha channel information of the background through the transparent object.

If this is off, transparent objects have an opaque alpha channel.

Global Settings

Bump Mode

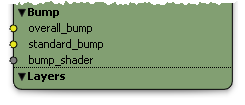
The bump_shader input accepts a shader that perturbs the normal for bump mapping. This port is only used if the Bump Mode is set to Use Old Bump Input.

The other bump modes allow you to define the coordinate-space for the overall_bump and standard_bump vector inputs, and whether they are additive or not.

The Add modes mean that the vector should contain a normal perturbation, that is, a modification is "added" to the current normal. Whereas, the Set modes mean that the actual normal is replaced by the incoming vector, and interpreted in the World, Object, or Camera coordinate space.

overall_bump defines an overall bump that always applies to both the diffuse and the specular component at all times, regardless of the Turn Off Bumps for Diffuse Only setting.

standard_bump is the vector equivalent of the old bump_shader parameter, in that it applies globally when Turn Off Bumps for Diffuse Only is off, and only to the specular/reflection layer when Turn Off Bumps for Diffuse Only is on. However, the standard_bump is added "on top of" the overall_bump result.

The intended use is to put the Round Corners (mia) shader in overall_bump and your normal bump shader into standard_bump. This way, the round corners effect will apply both to the diffuse and specular component regardless of the Turn Off Bumps for Diffuse Only setting.

Color Blend

Input to which you can apply any shader. The output of this shader is added on top of the shading done by this Architectural Material shader and can be used for self-illumination type effects, as well as for adding any additional shading you may want.

Highlight vs. Reflection Balance

Determines the balance between the highlight and the reflectivity on the object. The default value of 1 is the "physically correct" setting (that is, the highlight intensity is appropriate for the reflectivity), but you may want to change this value to alter the balance for other more artistic effects.

Cutout Opacity

Applies an opacity map to completely remove parts of objects. This is useful for mapping an image of a tree to a flat plane and then using opacity to cut away the parts of the tree that are not there.

Render Tree Usage

This surface shader can be used almost anywhere in a render tree. Although it is most commonly connected directly to a material node's Surface input, you can use any number or combination of surface shaders to control various parts of your effect. Surface shaders are often mixed with textures to add realism to them. Also, you can use textures to control color inputs (such as Diffuse) or scalar output nodes (such as gradients or fractals) to control refraction or translucency.

You can use this shader on its own or also with any of these other architectural shaders: Physical Sun (mia), Physical Sky (mia), Round Corners (mia), Simple Tone Mapping (mia), etc.