The Strand Dynamics compounds allow you to set up and control particle strand dynamics simulations using a Verlet integration method. When strands have dynamics applied, they can respond to collisions and other forces, as well as to the velocity and rotational velocity of the particle emitter. Dynamics allows you to create hair-like movement on strands, in addition to other effects.
There are several compounds that you need to use to set up strand dynamics, as described in the following section. These compounds are provided as just one possible solution to creating hair and similar effects using dynamics with ICE. You can use these compounds as a starting point (as well as the compounds nested within them) to create your own hair solutions.
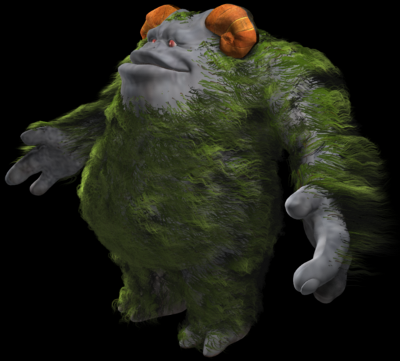
Model (without hair) Courtesy of Greg Punchatz
Choose Particles  Model Library
  Strands
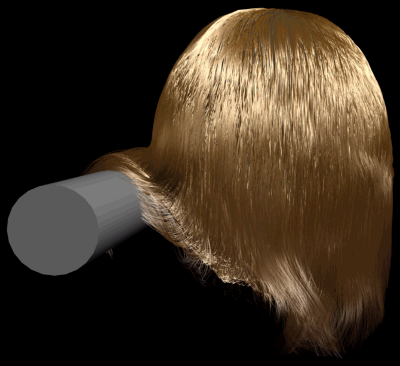
  Dynamic Hair from the ICE toolbar to load a model of a sphere with hair strands and an animated collision object. The Hair Shading shader
is used on the strands to give it that salon styling!
Check out the Strand Dynamics video and Hairy Little Monster example on the Softimage wiki.
Creating dynamics on strands involves two basic steps:
Emit guide strands and create the simulated dynamics framework on one point cloud — see Emitting the Guide Strands.
Emit filler strands on the same emitter but in another point cloud — see Emitting the Filler Strands. Filler strands are optional, but you may find them useful in many circumstances.
Guide and filler strands are similar in theory to how guide and render hairs in the hair system work: the guide hairs are used for styling, and the render hairs are generated from and interpolated between the guide hairs and are used for rendering (see Hair and Fur Basics [Hair]).
The filler strands are interpolated between guide strands that are created on another point cloud, but on the same emitter. These filler strands are constrained to the main (guide) strands so that they follow both their shape and their movements.
You can emit a smaller set of guide strands to work with when you're testing the movement of strand dynamics and creating the strand shape. When you're ready to view and render the strands, increase the number of guide strands and add the filler strands. Unlike guide hairs, the guide strands are rendered unless you choose to not render them.
Choose Particles  Create
  Strands
  Dynamic Strands from the ICE toolbar.
This creates a point cloud and sets up the following ICE tree that uses the Emit Strands and Strand Dynamics Framework compounds:
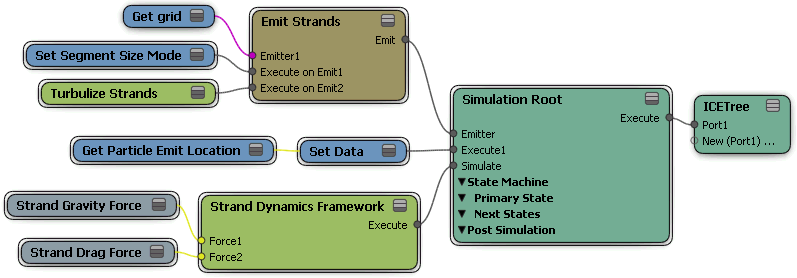
The Get Particle Emit Location and Set Data (with the PointPosition attribute selected) nodes set the strand's point position to the particle emit location. If the particle emitter is animated, this makes the particle strands stay with it.
In the Emit Strands property editor, you can set the strand properties.
If you want to change the default particle shape used for the strands, you need to open up the Emit Strands compound and then edit the Emit from Surface compound inside of it.
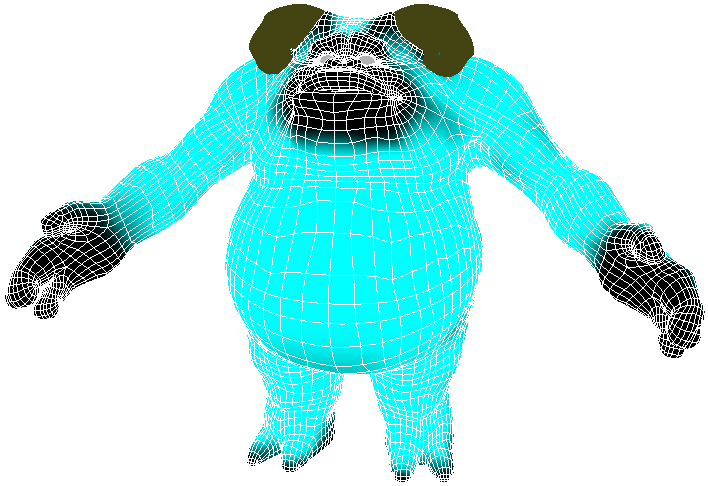
You can create a weight map for the emitter object and define this as a Length Weight Map in the guide strands' Emit Strands property editor. This works the same way as a cut map works on hair: the weight map values determine the length of the strands. Try smoothing out the edges of the weight map so the hairs become gradually shorter.
Adding Forces to Strand Dynamics
The Strand Gravity Force or Strand Drag Force nodes are automatically added to the Strand Dynamics Framework compound in the ICE tree when you choose the Dynamic Strands
command. You can also choose Particles  Force
Force  Strands
  Gravity or Drag from the ICE toolbar to do this, or add them manually in the ICE tree.
These compounds are designed specifically for strand dynamics, but you can add any forces you want to the Strand Dynamics Framework node. See Forces [ICE Reference] for information.
Once you have created a strand particle emission, you can add collision objects to the simulation.
Create a surface object to be the collision object.
If you want to use multiple collision objects, create a group that contains them.
Select the strand point cloud to which you want to add a collision object.
Choose Particles  Collisions
  Strands
  Add Geometry from the ICE toolbar.
Pick the collision object or group to add to the simulation.
After you have picked the object, the collision object's Get Data node is plugged into the Geometry port of the Strand Dynamics Framework compound. In this case, the monster (emitter) object has been added.
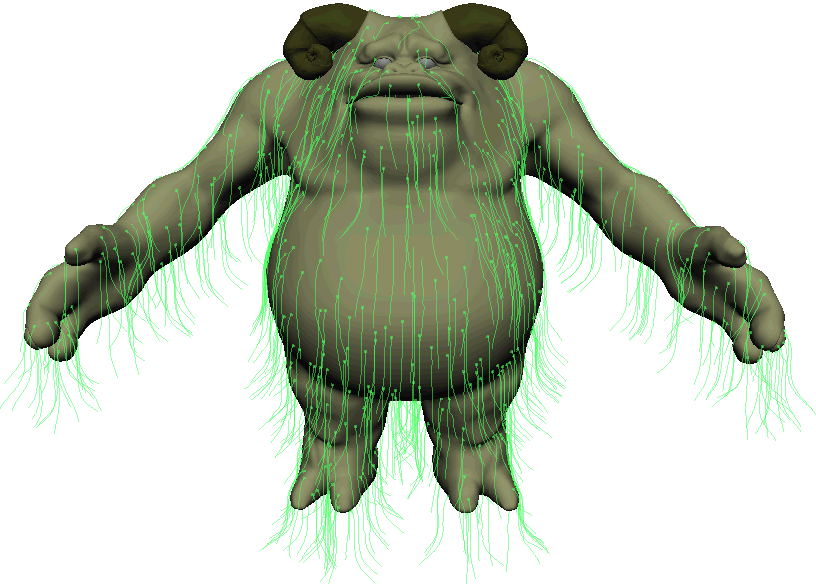
The filler strands are interpolated between guide strands using the same emitter. Filler strands are constrained to the main (guide) strands so that they follow both their shape and their movements.
The filler strands need to have the same number of segments (Num Segments) as the guide strands to which they are constrained. If not, their StrandPosition arrays will not match and the strand size, among other things, won't be considered.
You can create several point clouds as filler strands, each having a different shape, size, color, and shader setup, such as for creating varying types of animal fur or colored streaks in hair.
Create another point cloud to be used for the filler strands.
Create either an unsimulated ICE tree in the Modeling region or a simulated ICE tree (in the Simulation region) of this point cloud's construction stack, depending on your scene:
If the emitter object is not animated by deformations or transformations, you can create an unsimulated ICE tree.
If the emitter object is animated by deformations or transformations, you need to create a simulated ICE tree. This updates the position of the filler strands at every frame so that they match the guide strands to which they are constrained.
Using a simulated ICE tree for the filler strands should not slow down the simulation too much because the filler strands' stack needs to be re-evaluated anyway every time the guide strands move due to dynamics.
You can also optimize the simulated ICE tree by editing the Emit Filler Strands compound and splitting it into two parts: put the actual particle emission nodes in an ICE tree in the Modeling region for faster playback and interaction, and put the Constrain to Guide Hairs compound in an ICE tree in the Simulation region.
Get the Emit Filler Strands compound and plug its output into a port on the ICETree node.
Add a Get Data node for the emitter object and plug it into the Emitter port on the Emit Filler Strands compound. The emitter object should be the same one that is used for the guide strands.
Add a Get Data node for the guide strands that you created earlier and plug it into the Guide Strands port on the Emit Filler Strands compound.
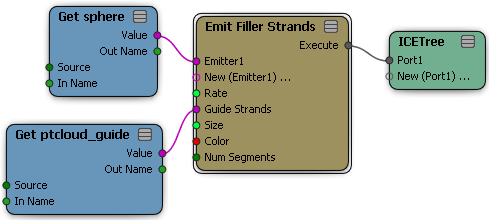
Watch the filler strands move in accordance with the guide strands as you play back the simulation.
In the Emit Filler Strands compound's property editor, define the filler strands as you like, and remember to use the same Num Segments value as you have set for the guide strands.
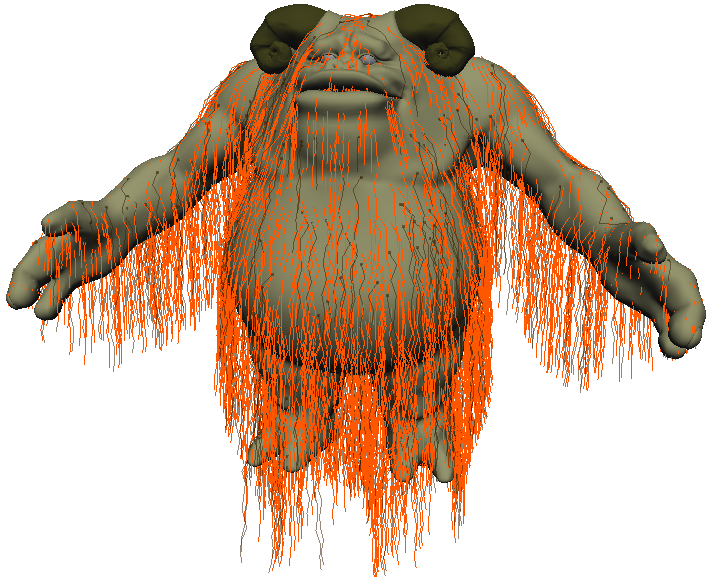
If you want to change the default particle shape used for the strands, you need to open up the Emit Filler Strands compound for editing, and then change the attributes in the Emit from Surface compound inside of it. You probably want the filler strands to match their guide strands.
To use the same weight map as you used for the guide strands, open up the Emit Filler Strand compound for editing. Inside this compound, plug a Filter by Weight Map compound into the Emit from Surface compound. Then specify the weight map to use in the Filter by Weight Map compound.
You could also create another weight map to have a different length of hairs, just in certain parts of the body, such as a bit of fuzz around the face, or a longer mane down the spine.
To keep the filler strands further away from the body, there are a few things you can tweak: