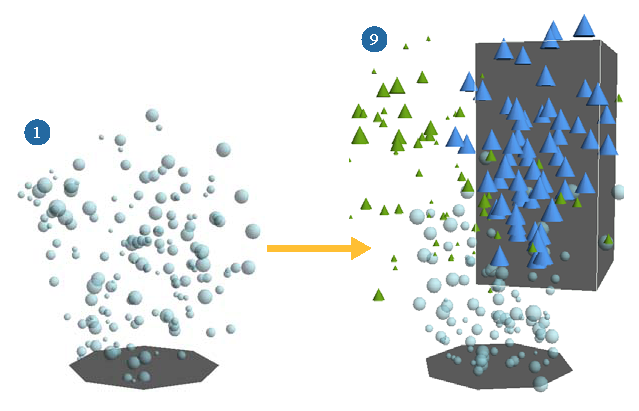
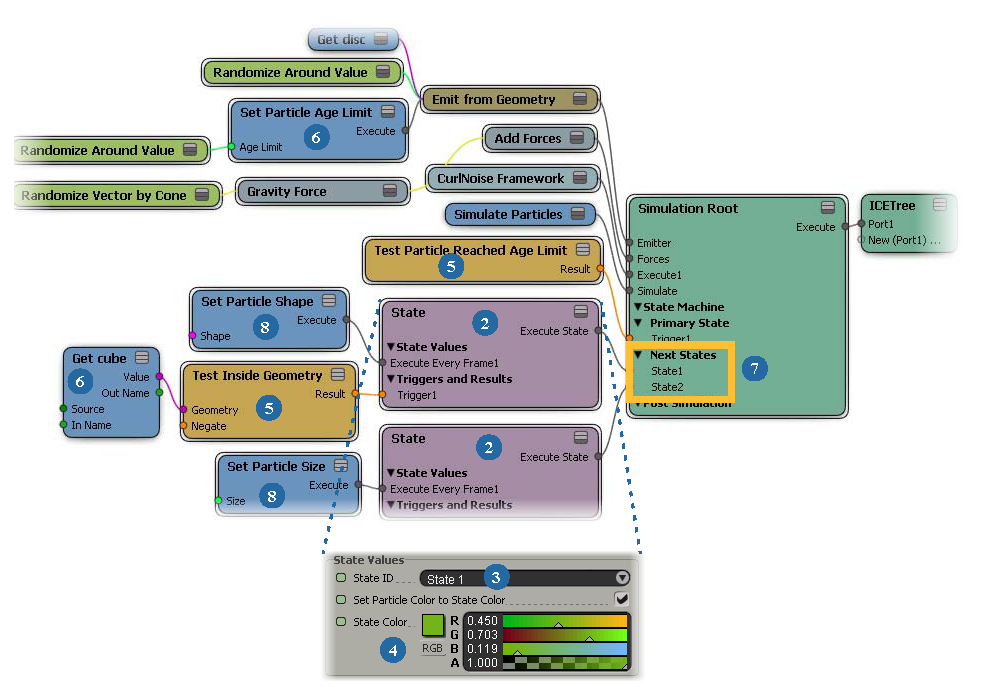
This is an overview of the state workflow using a simple example of bubble particles changing to another shape (cones) when they reach their age limit, then changing size (larger cones) when they are inside a cube.
While this is just a silly example to demonstrate how to set up a basic state, most state systems can be quite complex and sophisticated, with many State compounds defining many behavioral changes happening to the particles, such as with creating fireworks.
See the table following these images for links to more information about each step.


Choose Particles  After Emission
  State Machine
  Add State from the ICE toolbar for each new state you want to define.
See Setting Up States for more information.
3 - 4: Define Each State's ID and Color
Each state needs an ID, and a color helps to identify which state a particle is in at any time.
Give each state a unique ID to identify it in the system — see Setting the Particle's State ID.
Give each state a unique color to help you identify each state's particles as you work — see Setting the State Color.
A trigger is something that causes an effect to happen when its value is reached.
You need to define the first trigger in the primary state so that it has a reason to switch to the next state. Then each consecutive state can have a trigger, as you like.
Choose one or the Trigger commands from the Particles  After Emission
  State Machine menu on the ICE toolbar.
Specify the state to which you want the particles to transition when the trigger is pulled.
See Selecting the Trigger for more information.
8 - 9: Define the Resulting Behavior/Effect
You need to define the effect in the next state that is being used. An effect is something that happen when the trigger's value from the previous state is reached.
Get one or more effect compounds and plug them into the next state.
See Defining the Effect That Is Triggered for more information.