Waves are animated deformations that travel in both time and space. You can create shock waves, water waves, and other types of natural disturbances with wave deformations.
Waves are animated deformations whose amplitude changes over time. You can:
Create a wave control object and use it to set various properties of the wave.
Apply a wave operator to an object so that it is deformed by the wave.
Wave Control Objects and Wave Operators
There are two basic parts of a wave deformation: the wave control object and the wave operator.
The wave control object controls the basic parameters that are intrinsic to the wave itself, such as its speed and shape. Each wave control object can be used to deform any number of objects in a scene.
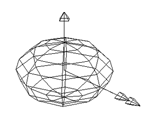
The wave control object is represented by a wireframe icon in the geometry views; there are different icons for the different types of wave. The position of the wave control object also defines the "epicenter" of the wave and its orientation defines the direction of the waves.
The wave operator deforms an object or cluster by "attaching" a wave control object. The wave operator is a node in the object's operator stack. It controls the parameters that are specific to how the wave affects a particular object, such as the spread of the deformation. You can also use a parameter map to modulate the amplitude of the deformation across the surface.
There are two ways to create a wave deformation: you can create and apply a wave at the same time or you can create a wave object first and then manually apply a wave operator later.
If objects are selected when you create a wave control object, the object is created at the object's center and a wave operator is automatically applied. However, this method does not work if points, clusters, or weight maps are selected.
To create and apply a wave to objects
Choose Get  Primitive Control Object Wave.
The wave control object is created (as represented by a wireframe icon in the geometry views) and its property editor opens. The wave object is automatically a child of the deformed object.
In addition, Wave operators are automatically applied to the objects that were selected.
If a wave object already exists in your scene, you apply it manually to scene elements. This is the only way to apply wave operators to points, clusters, and weight maps.
If necessary, create a wave object without applying it to anything by choosing Get Primitive Control Object Wave with nothing selected.
Select one or more objects, branches, models, points, point clusters, or weight maps.
Choose Deform Wave. This command is available under Modify on the Model and Simulate toolbars, as well as under Deform on the Animate toolbar.
Pick the wave object. Wave operators are applied to the selected elements and the Wave Op property editor opens.
Modifying Wave Control Objects
You can use the wave property editor to set the wave's basic characteristics such as its shape and speed — these are described in the sections that follow. This way, as you change the various parameters in the editor, you can see the effect on an object's deformation.
You can also scale, rotate, and translate the wave control object to define its center and the direction of the waves.
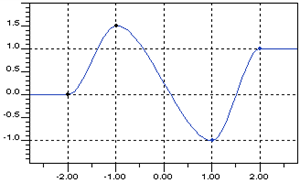
There are three parameters that control the wave shape: Type, Displacement Direction, and Profile.
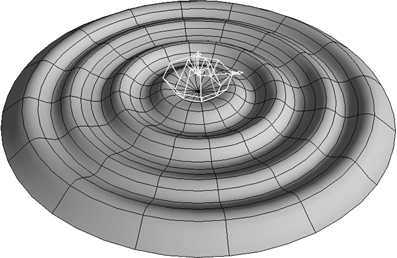
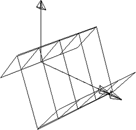
The Type parameter on the General tab of the wave property editor controls how the wave moves through space. There are three options: circular, planar, and spherical. Each type of wave is represented by a different icon in the geometry views and is shown in the following illustrations.
Circular: The waves move out from a point in a circular, planar pattern, like those from a pebble dropped in still water.
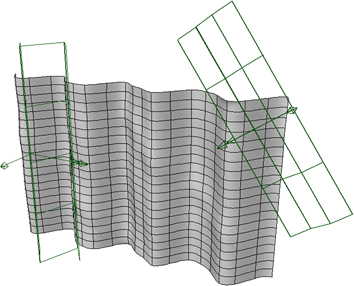
'Planar: The waves move out from a line in a straight, planar pattern, like waves hitting a beach or a flag fluttering in the wind.
|
|
Spherical: The waves moves out from a point spherically in all directions, like the shock waves of an explosion.
|
|

|
||||||||||||||||||||
|
||||||||||||||||||||||
Periodicity allows the wave to repeat continuously. There are two kinds of periodicity:
in Space repeats the shape of the wave's profile between the first and last key points indefinitely.
in Time repeats the entire wave effect, including the result of Amplitude and Spread as set in the operator's property editor (not the object's).
The wave deformation begins again after the End frame set on the Time Control tab of the operator's property editor.
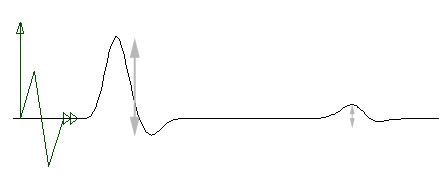
You can control the velocity and acceleration at which the wave profile moves through space using the Velocity and Acceleration parameters in the wave control object's property editor. You can even use a negative velocity to make the wave move backward.
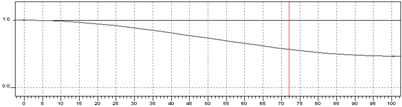
You can make the strength of the wave effect fall off after a certain vertical distance from the wave control object. The effect decays linearly between the Vertical Falloff Start and End values as measured along the wave's local Y axis.
Transforming the Wave Control Object
Translations and rotations may be applied to wave control objects in the same manner as ordinary objects. The wave's effect on objects changes in the obvious way. For example, if you move a circular wave along a grid, you change the point from which the wave emanates.
You can apply scaling as well. The icon changes shape accordingly, but the wave's effect on objects changes only in the following ways:
The wave operator deforms an object or cluster by "attaching" a wave control object. The wave operator is a node in the object's operator stack that controls the parameters that are specific to how the wave affects a particular object, such as the amplitude and spread of the deformation. By default, both the Amplitude and Spread are animated with a function curve.
To make sure that the wave operator gets re-evaluated to update the object's deformation at every frame, at least one of its parameters must be animated. A single keyframe (that is, a flat, constant-value fcurve) is enough.
By default, both Amplitude and Spread are animated, so the wave operator will be re-evaluated unless you remove the animation.
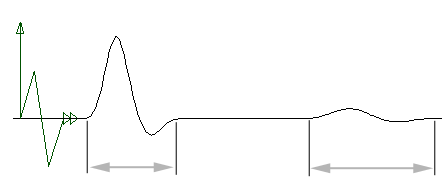
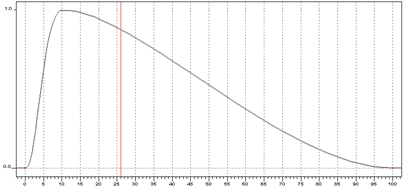
Amplitude provides an overall scaling factor for the wave profile's height over time. By default it starts at 0, rises sharply to 1, and then decays slowly back to 0. This corresponds to a wave rising rapidly on a surface and then slowly receding back to nothing.
Spread gives an overall inverse scaling factor to the X values of the wave profile. For example, a value of 0.5 stretches the profile by 2 horizontally, which has the effect of spreading the wave.
By default, the spread is the constant value 1. Certain types of waves, such as water waves, spread out as they move. For such waves, you should edit the spread function curve to start at 1 and end at a smaller value such as 0.5.