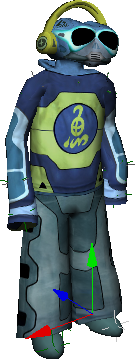
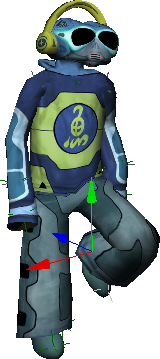
Offsetting actions is a task that you will probably perform frequently. For example, you may need to offset an action in local space so that the animation occurs in a different location from where it was originally defined.

|

|
On the left, Club-bot is in a neutral position.
On the right, an offset is added to the position of his left leg.
There are two offset commands you can use to easily and automatically adjust the offsets of parameter values for the animation in a clip:
The Set Offset Map - Changed Parameters command compares the current value of all parameters driven by the clip and sets an offset in the clip effect expression if there is a difference. If you want to create an offset for a compound clip, you must right-click the clip and choose this command.
These commands compute the difference between the parameter's actual value (the current pose) and the value that the action is giving it. An offset map only adds the difference (number) directly to the parameter. You can add only one offset map for the whole clip's duration.
Offset maps work only with one clip driving the animation at the current frame. If there are other clips overlapping this frame, you'll need to mute them temporarily. Of course, if you want to add an offset to a mix of clips, create a compound clip containing these clips and add an offset to the compound.
Set the current frame in the timeline to a frame that is controlled by the clip.
If any other clips drive the same parameters at that frame, mute their tracks (click the m button to the left of their tracks).
Adjust the desired parameters; for example, move the object to a new position.
Right-click the action clip or compound clip and choose Set Offset Map - Changed Parameters. If you want to create an offset for a compound clip, you must use this command.
In the animation mixer's command bar, make sure the correct parameters are marked and click the Offset Map button.

Because you have modified the clip's expression, a yellow bar appears above the clip as with a clip effect.
Offsets are added to the clip's expression so that it reaches the new values at the current frame. You can see these offsets by right-clicking the clip and choosing Clip Properties and opening the Clip Item Information page. For example:

Original values (this) are offset by these different amounts.