Creating particle simulations is a visual process that requires many ways of viewing. You have many choices about how to display each point cloud in a viewport, such as changing their display shape, showing trails, or simply hiding particles altogether.
As well, you can create specialized particle display attributes for each point cloud that help you get particle information, such as showing particle IDs, positions, orientation, or vector trails.
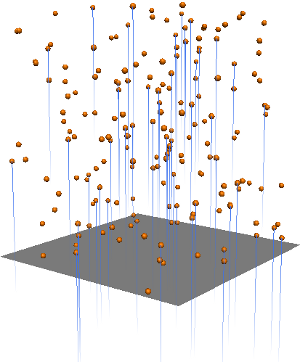
Here, particles have a display attribute that shows their velocity vectors as blue trails.
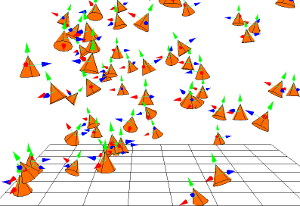
Here, particles have a display attribute that shows their orientation as axes.
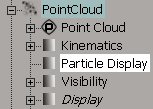
You can set up how the particles in each point cloud are displayed in a viewport by setting the options in the point cloud's Particle Display property editor. The Particle Display is a property of each point cloud, so you can define specific viewing preferences for each point cloud in a scene.
In an explorer, open the point cloud's Particle Display property editor by clicking on its icon.
Set the options in the Particle Display property editor are you like.
Here are some of the main ones — for details on the others, see Particle Display Property Editor.
Display As lets you override the particle shape only for display purposes in the viewport (that is, the particle's actual shape is still rendered in the render region and final render). Select from a number of shapes from the list that are the same as found in the Emit compound (see Setting the Initial Particle Shape for information).
If you select Automatic, it uses the current Shape that is set in the Emit compound.
The Segment shape draws particle strands behind the particles, but the particle are drawn as points.
Blobs and capsules are displayed in the viewport as spheres: you can only see their true shape in the render region.
If you're using instanced geometry on the particles, the shape you select will be scaled according to the geometry's bounding box. Using simpler shapes than the actual instanced geometry displays the particles more quickly for playback.
Display % lets you choose to display a certain percentage of the particles in the viewport. This is handy for faster playback and keeping the clutter down when there are many, many particles in the scene.
Animation Detail % displays on a certain percentage of the animation on an instanced shape on a particle. See Displaying a Percentage of Instance Animation for information.
Add Display Attribute opens up the Display Attribute property editor in which you can create special display attributes for the particles in your point cloud, such as particle IDs, point positions, or vector trails. See Creating Particle Display Attributes, below, for information.
Creating Particle Display Attributes
In addition to setting the particle display properties for a point cloud, you can create specific display attributes for particles to help you understand their movement or for troubleshooting purposes. For example, you could choose to display the particle IDs for each particle in a point cloud, or choose to display vector trails after each particle to show their movement.
Display attributes are a property of the point cloud, so you can define specific ones for each point cloud. You can create multiple display attribute properties for each point cloud and display any number of them in the viewport at one time.
For more information on display attributes in general, see Displaying Attribute Values.
To create particle attribute display properties:
Choose Get  Property Display Attribute to open the Display Attribute property editor.
In a point cloud's Particle Display property editor (see Setting the Particle Display), click the Add Display Attribute button to open the Display Attribute property editor.
Give the attribute a descriptive name and set the options you want. This creates an Attribute Display property for the point cloud.
From the Attribute list, you can choose to create any of these types (and more) of display attributes for particles: Color, Force, ID, Mass, Number of Points, Orientation, Point Position, Point Velocity, Scale, Shape, Simulated Frame Fraction, Size, and Volume Cloud.
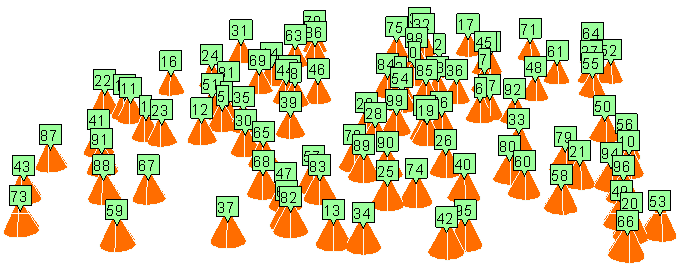
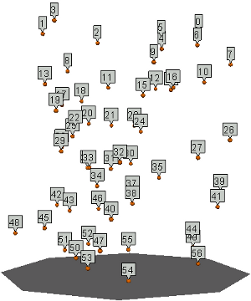
Particles with a display attribute showing their particle IDs.
Depending on the type of attribute you chose to display, you can set different parameters for each. You can set its Display As type, Scale Factor, Display %, Label (including its position and offset), Range, and Color.
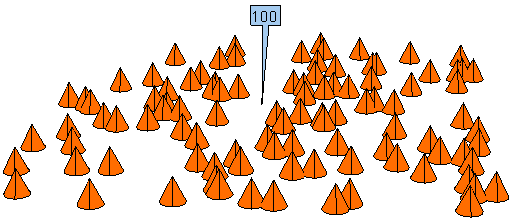
Particles with a display attribute showing the number of points in the cloud. The label is offset above the particles and the color is changed to blue.
See AttributeDisplay Property Editor for more information on these options.
Keep clicking the Add Display Attribute button to create new attribute properties. A new property editor opens up for each new display attribute property that you create and customize.
Displaying and Hiding Point Clouds in Viewports
You can display or hide all particles (point clouds) in the viewports. When you hide particles, the simulation is muted which makes it faster to play the scene. This is useful if you want to keep the particles in the scene, but you're not working on them at the moment.
To view or hide particles in a viewport :
Click the eye icon in a viewport and toggle the Point Clouds option in the view menu.

To view or hide particles in all viewports, choose Display Visibility Options (All Cameras) from the main menu bar and toggle the Particles option on the Objects page in the Visibility Options for All Cameras property
editor.
Displaying Particle Attributes in Viewports
To view or hide particle attributes in a viewport:
Click the eye icon in a viewport and choose Visibility Options.
In the Camera Visibility property editor, click the Attributes tab and make sure that the Display ICE Attributes option is selected.
Toggle these options on that tab for selected and/or unselected objects: Point Cloud IDs (shown below), Point Cloud Points Only, and Point Cloud Trails. See for more information.