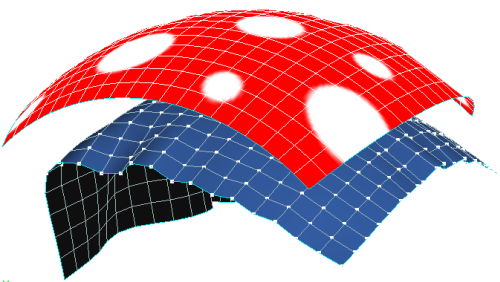
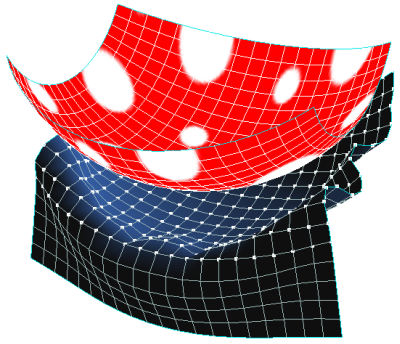
You can attach a simulated cloth or curve's vertices to those on another object that has the same topology (the same object type and same number of vertices) using a mimic constraint. When the constraining object is animated (using any transformation or deformation), the vertices of the cloth or curve attached to it will attempt to mimic it. For example, you can shape-animate the constraining object and have all or just some of the cloth's vertices mimic it. You can also hide the constraining object later.
Remember that the deformation that the cloth or curve is trying to mimic is combined with the deformation caused by its simulation.
The vertices of the cloth or curve are attached directly to the constraining object's vertices using the same index (that is, vertex 37 on the cloth or curve is constrained to vertex 37 on the constraining object). Obviously, the easiest way to get the same topology is to duplicate the cloth or curve object and then deform that duplicate object as you like.
When you use a mimic constraint, springs are created between the cloth or curve's vertices and the constraining object. You can control the spring's length by setting the distance between the cloth or curve's vertices and the constraining object.
Mimicking the Constraining Object Using Clusters
On the cloth or curve object that you want to simulate, select the vertices you want to use for mimicking and create a cluster for them. This can be all the object's vertices or just some vertices for partial mimicking.
If you modify the number of vertices in this cluster after creating the simulation, you will need to rerun the simulation.
Create a constraining object that has the same topology (the same object type and same number of vertices). Duplicating the cloth or curve object is the easiest. Deform or animate this object as you like.
Create a Syflex ICE cloth or curve simulation - see Creating Syflex ICE Simulations.
Select the cloth or curve object and open the ICE Tree view.
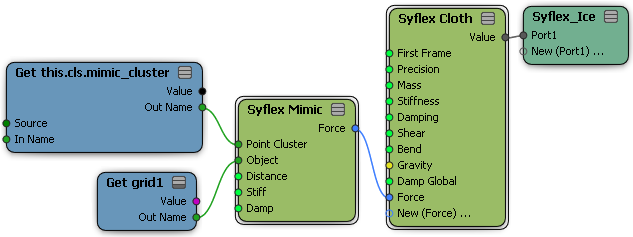
In the ICE Tree view, drag the Constraints  Syflex Mimic compound from the Task > Syflex tab in the preset manager into the ICE tree workspace.
Plug the Syflex Mimic's Force output into a Force port on the Syflex Cloth or Syflex Curve node.
Drag the name of the cloth or curve's cluster you want to use from an explorer into the ICE tree to create a Get Data node for it.
Drag the name of the constraining object from an explorer into the ICE tree to create a Get Data node for it.
Plug the constraining object's Out Name output into the Object port on the Syflex Mimic node.
Use a separate Syflex Mimic and Get Data node for each cluster that you want to use for mimicking.
Set the parameters in the Syflex Mimic property editor.
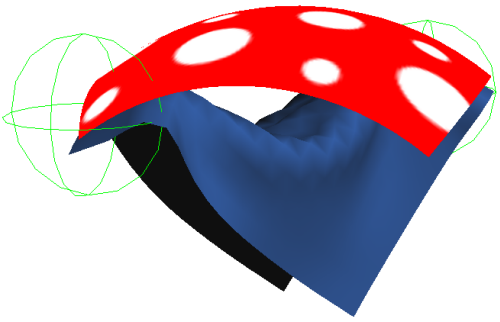
Mimicking the Constraining Object Using Nulls
Instead of using a cluster of vertices for mimicking a constraining object, you can use a null's size, shape, and location (animated or not) to determine the area of the cloth's or curve's vertices that are constrained. All the vertices that are within the null object's space are used for mimicking the constraining object, which can be deforming. You could then animate the location or size of the null to create different constraint effects.
To set up a cloth or curve with a mimic constraint and nulls, you can follow the same basic procedure as described in Pinning the Vertices Using Nulls, except use the Constraints Syflex Mimic Null compound from the Task > Syflex tab in the preset manager.
Remember to add a Syflex Mimic Null and Get Data node for each null you want to use.
Set the parameters in the Syflex Mimic Null property editor.