Auto placement sets the position, orientation and drop-off distance of the light to appropriate values based on the current
camera distance to the associated objects and the placement method you choose.
Auto placement is done using the light properties dialog box.
To open the light properties dialog box:
- Press the L key (or select ) to open the Lights interface.
- In the Lights interface, right-click a light icon and select Properties.
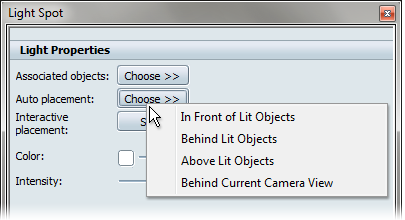
In the light properties dialog box, click the button to select the auto placement method for the light.
- : places the light in front of the associated objects (relative to the current camera view) and slightly above and to the
right. This is the same auto placement that is done when a light is first created.
- : places the light behind the associated objects and slightly above and to the left. This is the inverse of In Front, and
is useful for back-lighting and “rim” lights.
- : places the light above the associated objects, pointing at the center of the bounding box of the associated objects.
- : places the light behind the camera, but pointed at the associated objects. This is useful for intuitive positioning using
the camera controls and for “headlamp” effects.
Note
Auto Placement of the type “” is used during the creation of a light whenever geometry is selected. This insures that the lighting effect will immediately
be visible in the scene and that the light will be positioned relative to the objects it is associated to.