Show in Contents

Add to Favorites

Home: Autodesk Showcase Help

Check surface normals

Adjust geometry settings

Determine polygon count

Fix
object patches
Sometimes
an object will retain some surface patches with reversed normals.
In this case, you can’t change the surfaces by clicking on them
in the Show Normals tool. Instead, you can use the Fix Object Patches
tool to isolate the patches and reverse their normals.
The tool also lets you
delete unneeded patches; for example if they are duplicated or occluding
other objects.
Unify the normals of
all patches on a surface
- Select Edit > Show Normals to
see the normals.
- Press F3 to reverse normals for
any yellow surfaces.
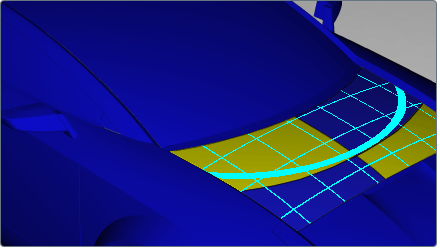
Check surface normals
- You may find that when you reverse the
normals for a surface, there will always be parts of the surface
that stay yellow.
- In this case, select Edit
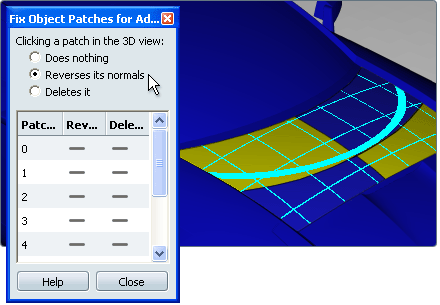
> Fix Object Patches.
The Fix Object Patches window appears.
- Click on the Reverses Its Normals button.
(This button lets you
click on yellow patches in the 3D view and reverse their normals.)
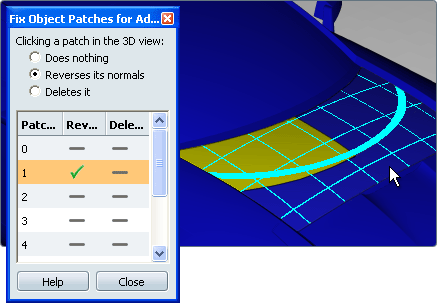
- Click on a yellow patch in the 3D view.
It changes to blue to indicate its normals are now facing outwards.
The patch number is highlighted
in the Fix Object Patches window, with a check mark under the Reverse
column to indicate the change.
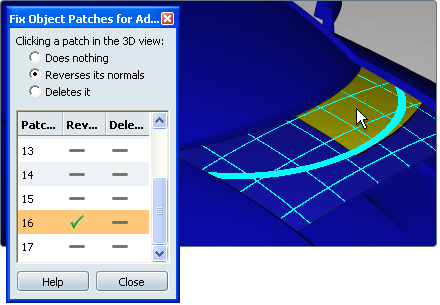
- Continue to click on yellow patches to
correct all patch normals.
When you click on another surface with yellow
patches, the Fix Object Patches window updates to show the patches
for that surface.
Delete patches
In
some cases, you may want to delete patches from an object. For example,
if they are duplicated or occluding other objects.
- Select Edit > Show Normals to
see the normals. (This view is recommended so that you can easily
see the patches.)
- Click on the surface you want to work
with.Select Edit > Fix Object Patches.
The Fix Object Patches
window appears.
Click on the Reverses Its Normals button.
(This button lets you
easily isolate patches in the 3D view by reversing their normals so
that they appear yellow.)
- Click over the patch you want to delete.
It will appear yellow and its patch number will be highlighted in
the Fix Object Patches window.
- Click in the Delete column
in the highlighted row.
- The patch disappears, revealing objects
beneath it. The Delete column indicates the patch
is deleted.
- You can easily show the patch again by
clicking over the Delete column again.
NoteYou can also
click on the Deletes it radio button in
the Fix Object Patches window to delete patches as you click on
them, but you won’t be able to see the patches until after you delete
them.