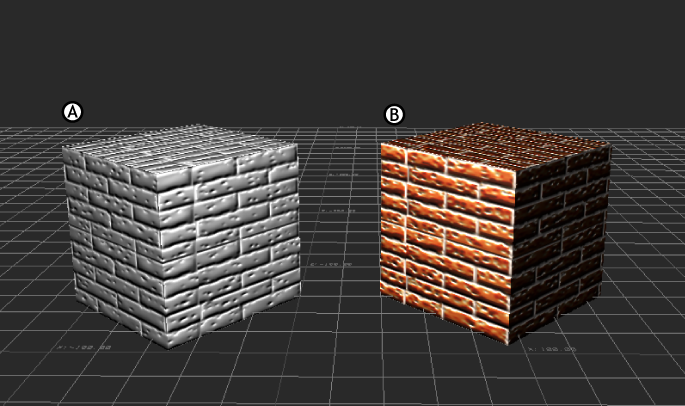
You can increase the realism of a Bump Map texture by adding a second, colorized version of the bump map or normal map image
and use it to color the model.
To add color to Bump textures:
- Begin by creating a bump map effect on your model. See Creating a Bump Map.
- Save a colored version of the bump map or normal map image file.
- From the Shading Elements folder in the Asset browser, drag a Texture asset onto the model in the Viewer.
- Select Attach Texture To Material > Diffuse from the context menu that appears.
The new texture is attached to the materials’ Diffuse property. You can access these properties in the Material settings.
See Materials.
- In the Navigator, expand the Textures folder and double-click the new texture to display the Texture settings.
- In the Texture settings’s Media menu, select New Media and browse for the colored image.
- Ensure that the texture is positioned exactly as the Bump Map texture is positioned by comparing the U and V tiling, as well
as the Translation, Rotation, and Scaling coordinates in the Texture setting.
 Except where otherwise noted, this work is licensed under a Creative Commons Attribution-NonCommercial-ShareAlike 3.0 Unported License