The cursor changes into a small cross-hair, indicating that wherever you click in the Viewer window, you create a Skeleton node.
Each time you click, another node (or bone) is added to the skeleton in a chain to create a limb. Each successive bone is parented to the preceding bone.
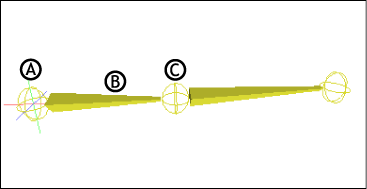
A. Skeleton root B. Skeleton limb C. Skeleton node
As you create your skeleton, you may want to add more than one limb to the same joint (for example, when creating a hand with fingers).
See Attaching more than one bone to the same joint on a skeleton.
 Except where otherwise noted, this work is licensed under a Creative Commons Attribution-NonCommercial-ShareAlike 3.0 Unported License


