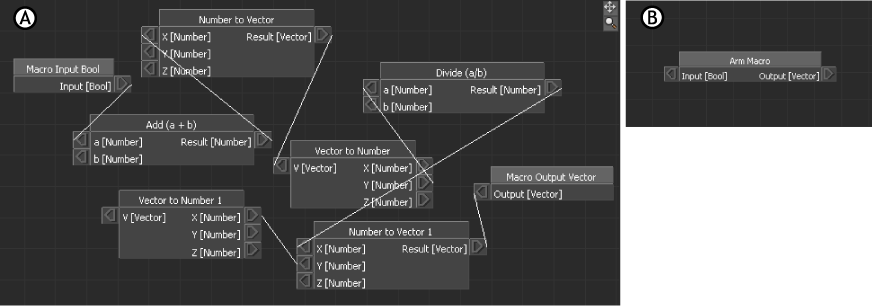
When you create a Relations constraint, it is automatically added to the operator’s My Macros node. Every relation can be used as a Macro that can be renamed and used in another relation. You can add inputs and outputs to your Macro by selecting operators found in the Macro Tools node.
The Macro becomes a single relation, representing the entire set of constraints within that Macro. All the Input-Output Relations constraints used in your Macro become connectors on that relation.

Macro constraint A. A Relations constraint named “Arm Macro” B. “Arm Macro” used as a Macro in the Relations pane.
Macros are automatically refreshed every time you exit the Relations constraint editor, even if they have not been modified.
The Macro relation refreshes when you exit the Relations constraint editor, even if it was not modified.
To rename a Macro's Input-Output connector:
If the Macro is used in a relation, a warning dialog box appears with the message “The relation constraint x is being used by other Relations. Delete all references to this Macro?”, where x is the name of the relation.
If the removal of the Macro creates gaps in a constraint, a conversion relation is automatically created to connect the unconnected Relations constraint.
 Except where otherwise noted, this work is licensed under a Creative Commons Attribution-NonCommercial-ShareAlike 3.0 Unported License