To select a track, click in the track’s Take box. The Take box displays in blue.

Take box A. Ghost Root selector B. Viewer Focus button C. Take menu D. Ghost option E. Time Offset (T) F. Time Scale (S)
When the Take box is selected, you can duplicate and remove tracks, insert and remove poses, and perform Match Selection on the selected track. A Take box has the following options that let you select and modify ghosts and tracks to create blends in your scene:
The Ghost Root selector selects the corresponding track’s root. You can also double-click the root in the Viewer window to select it, though this method may cause you to select the wrong root. When you select the root of the ghost for a given track, everything else is deselected.
In the following figure, the root displays green in the Viewer window because it is selected using the Ghost Root selector.
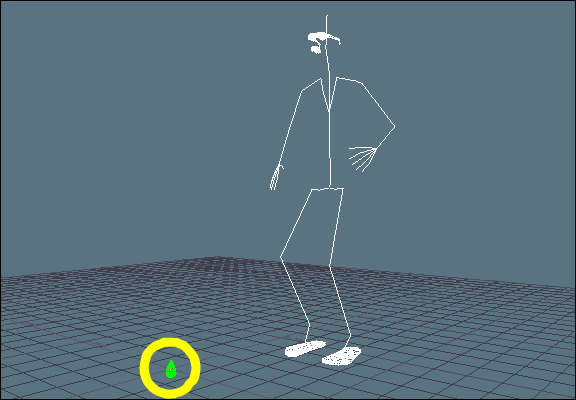
Root displayed in green
Roots are used to apply transformations to a ghost, pose, or model in the Viewer window.
The Viewer Focus button renders the current track’s blending object in the Viewer window. Only one track can be rendered in the Viewer window at a time.
In the following figure, the Viewer Focus button is selected in the second track’s Take box, so the skeleton for this track displays fully rendered. The blue skeleton is the active ghost from the first track’s Take box.
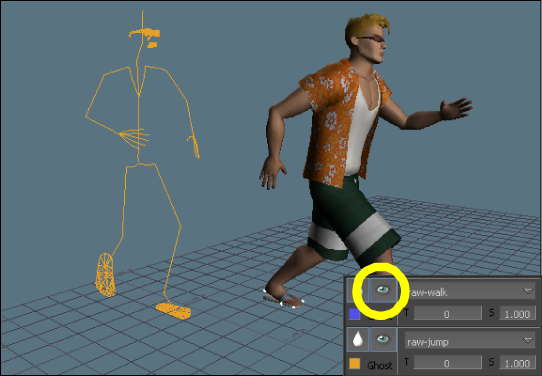
Viewer Focus button selected in the second track’s Take box
When a blending object is not rendered, it appears as a ghost. For example, the following figure shows animation on three tracks, one of which is rendered. The blending object is a character’s skeleton. The same example is shown in the following figure, but the blending object is a set of optical sensors.
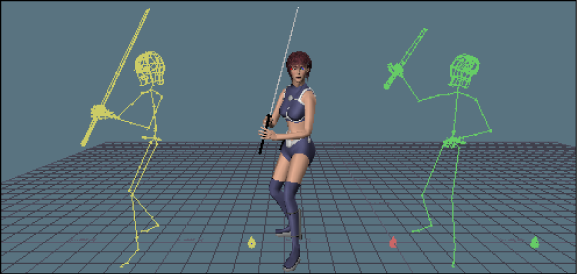
Ghost tracks and rendered track (model’s skeleton)
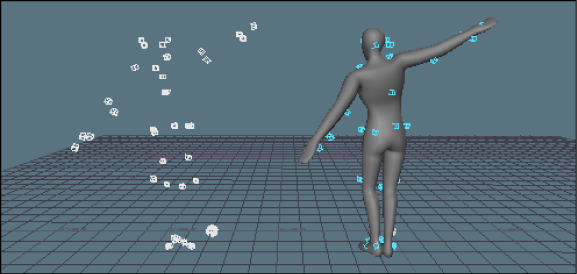
Ghost tracks and rendered track (sensors)
The Ghost option lets you show and hide ghosts in the Viewer window. A ghost is a simple wireframe representation of the blending object. There is a separate ghost for each track, including the Result track.

Motion Blend ghost in the Viewer window
You can also activate Show All Ghosts in the General options to display all the ghosts in your scene. See Show All Ghosts.
Use the Take menu to select the take for each corresponding track.
If the track’s take contains data, a blue bar appears in the corresponding track showing the total length of the take. A cut of the same length is automatically added.
After you position or resize a cut, you must translate the track to create the proper blend or interpolation. When you translate a track, the track’s cut moves with the take.
You can alter the scale of each track to speed up or slow down its cut. For example, this is useful if you want to speed up a walk cycle or slow down a few steps in a run cycle.
Click the Process button in the Result track to create a take based on the information in your Result track.
When you click Process, a Process Edit dialog box appears, letting you specify a frame rate and select filters.
See Plotting character animation for more information.

Process Edit dialog box A. Plot Rate menu B. Filters To Apply area C. Smart Plot area
 Except where otherwise noted, this work is licensed under a Creative Commons Attribution-NonCommercial-ShareAlike 3.0 Unported License


