The Batch window lets you convert multiple data files between different formats. You can batch load a series of data files onto the current character, or save all your takes to a specified data format.
The Batch window is divided into two areas:

Batch window
The Input and Output area lets you specify the input and output format and directory, as well as the skeleton.
The following input file formats are supported for batch processing.

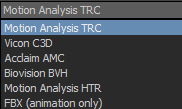
Batch input file format
The following output file formats are supported for batch processing.
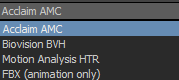
Batch output file format
| Option | Function |
|---|---|
| Character menu | The Character menu displays all Character assets used in a scene. Use the Character menu to select a Character in a scene. |
| Input Format menu | Use the Input Format menu to specify the format of the files you want to load. All files used in a batch process must be the same format. |
| Input Directory field | Double-click the Input Directory field to type the path of the directory containing the files you want to load. You can also click the Open Directory (...) button to open an Open Directory window to browse for the directory. |
| Start Animation at 0 option | Activate the Start Animation at 0 option to correct any time shifts that affect animation keys. The Start Animation at 0 option sets the start time for all .fbx files loaded in the Batch window at time 0. |
| Frame Animation option | Activate the Frame Animation option to set the timeline start and end time to correspond with the start and end time of the animation data in the currently loaded motion file. |
| Import Scaling option | Since most motion file formats contain only translation and rotation animation data, MotionBuilder automatically sets any scaling animation data to a default setting of 1.0 upon file loading. Because this default setting can create errors with character appearances in certain situations, it is best to disable the Import Scaling option. This lets you leave the scaling animation of loaded motion files untouched. |
| Keep Dummy Bones option | When the Process Type is set to either Load or Convert and the selected input format is Acclaim .amc format, the Keep Dummy Bones option is active. Enable this option to retain the file’s dummy bones. |
| Output Format menu | Use the Output Format menu to specify the format of the files that you want to convert. |
| Output Directory field | Double-click the Output Directory field to type the path of the directory in which you want to save the processed data files. You can also click the Open Directory (...) button to open an Open Directory window to browse for the directory. All processed files are saved in this directory. |
| Skeleton File field | Double-click the Skeleton File field to specify a skeleton file to be used by Input or Output Format if you are using the Acclaim .amc format. The Acclaim .amc format requires a skeleton file. This setting is specific to Load or Merge processes only. If no file is chosen, MotionBuilder creates a new file. If a file already exists, a merge is created. |
| Write Frame Rate option | Activate the Write Frame Rate option to write the frame rate in Acclaim .amc files. When Write Frame Rate is active, you are loading, converting, or saving with the frame rate specified in MotionBuilder. |
| Write Translation | Activate the Write Translation option to save any translation animation data included with Acclaim .amc motion file formats. This lets you save anything describing animation translations, for example, the movement of a prop or slight stretching between the bones. Activating this option ensures that MotionBuilder always saves the translation animation data. |
The Process Type area lets you select options for the type of batch process you are using.
| Option | Description |
|---|---|
| Load option | Activate the Load option to import motion files into separate takes. By default, the name of each take inherits the name of each file. See the Use Single Take option in this table for information on adding the suffix (batch) to each file. |
| Save option | Activate the Save option to save the data plotted to a Character or Control rig to individual data files.Each take saves in a separate file. By default, the name of each file is inherited from the name of each take. You do not have to link the Character you select to an Actor or other source. All takes must contain data plotted to the Character. Otherwise, nothing is saved for the take. |
| Convert | Activate the Convert option to convert data files. This is similar to loading and plotting a collection of data files to a Character, then saving the plotted results to individual data files. Using Convert simplifies the loading of motion files in one format and saving in another, into a single step. |
| Plot To Character Skeleton/Control Rig option | These options are only available when batch loading files. If neither of these options are selected, no data is plotted in your scene. Select either Plot To Character or Plot to Control Rig to determine the location to which you want to plot your data when you batch load files. |
| Save From Control Rig option | This option is only available when batch saving files. Use this option when you do not want the Batch process to save the plotted motion from the selected Character. |
| Keep Character Constraint option | This option is available when you are batch saving using .fbx files. Enable Keep Character Constraint to save the Character within each .fbx file. |
| Use Single Take option | This option is only available when you are batch converting files. Activate the Use Single Take function to use only one take to convert all files. Use Single Take if your computer is low in memory and cannot load many takes. To complete the process, click Start to load all files from the Input directory. Load and save a new file to the Output directory for each Input file. |
| Use Batch Suffix option | This option is available when you are batch loading, saving, and converting files. Activate the Use Batch Suffix option when you want the batch suffix to appear on your files. For example, if Use Batch Suffix is active when you save two .c3d files named “run_walk” and “walk_stand”, the new files are named run_walk(batch).c3d and walk_stand(batch).c3d. |
| Plot Options button | Click Plot Options to open the Plot Options window, where you can set the options for plotting animation to the Skeleton or to the Control rig. Click Plot Options to open the Plot Options window, where you can set the options for plotting animation to the Skeleton or to the Control rig. All of the options in the Plot Options window are identical to those found in the Plot Properties window. See Plot Properties window. |
| Start | Click Start when you are ready to load, save, or convert your batch files. Make sure you have all necessary options selected in the Batch window. |
 Except where otherwise noted, this work is licensed under a Creative Commons Attribution-NonCommercial-ShareAlike 3.0 Unported License


