This legacy workflow is for exporting a 3ds Max biped to versions of 3ds Max 2011 and earlier. If you do not have the 2012 versions of MotionBuilder and 3ds Max, you do not have access to the Send to 3ds Max option which is detailed in the tutorials.
To import a 3ds Max biped into MotionBuilder:
Because you exported your 3ds Max to the FBX file format, you can open it in MotionBuilder.

3ds Max biped skeleton imported in MotionBuilder
To characterize your 3ds Max biped:
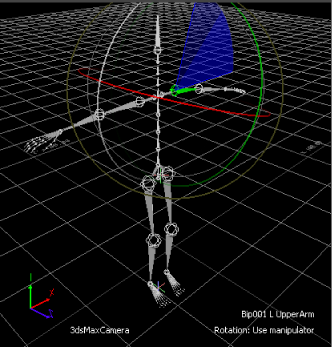
Rotate the skeleton's shoulders into a T-stance

Applying the 3ds Max Biped Template asset to the biped skeleton
The 3ds Max Biped template is designed for bipeds created in 3ds Max as they have a naming structure that MotionBuilder does not recognize.

The Character representation shows green if the characterization is correct, yellow if potential problems are detected, and red if there is an element of the skeleton matching that is incorrect.
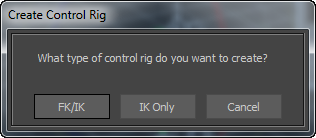
The next step is to add a Control rig so you can animate it.
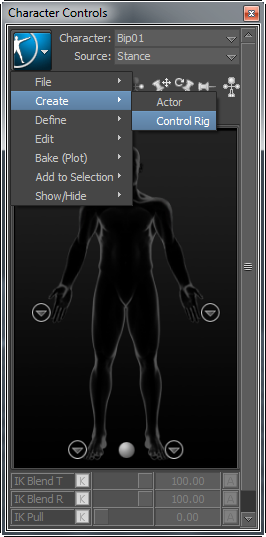
The Ctrl Rig source activates the Character Controls Character representation and displays the Control rig effectors on the biped in the Viewer window (B).

A. Control Rig selected B. Control rig effectors appear on the biped
The Character representation is an image of a human form meant to represent the biped skeleton. It contains all the effectors you need to animate its Control rig. The biped is now rigged and ready to receive animation.

Character Controls A. Right Wrist effector selected B. Full Body icon
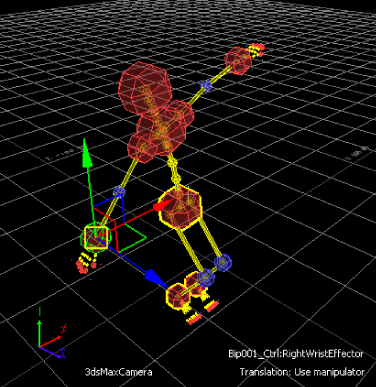
Notice as you move the hand, the arm extends and the rest of the body follows in a natural movement.
You can now transform and animate the characterized 3ds Max biped in MotionBuilder. See Animate the 3ds Max character.
 Except where otherwise noted, this work is licensed under a Creative Commons Attribution-NonCommercial-ShareAlike 3.0 Unported License


