


You can scale a group of keys using the selected keyframes as the pivot point of scaling within the FCurves window.
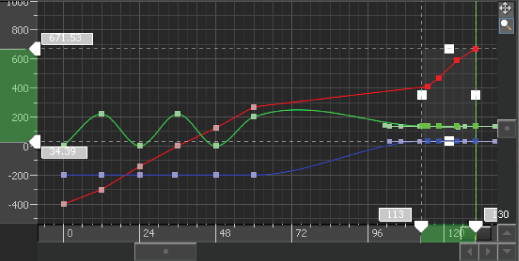
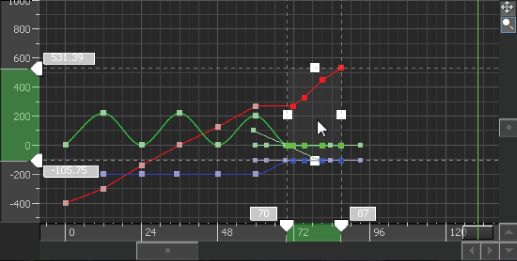
To do this, drag-select a group of keys in the FCurves window. A rectangle appears around your selection. There are two ways you can Ctrl-middle-drag them. Dragging the keys inward or outward stretches and scales the keyframes, and affects their relationship with each other. This is useful, if you need to tweak or re-purpose the animation.
You can also scale a group of keys by using the white squares that appear when you drag a rectangle around your selection. Dragging the squares on the left or the right of the rectangle scales your selection horizontally in the FCurves window. Dragging the squares on the top or the bottom of the rectangle scales your selection vertically in the FCuves window.
For example, the following illustration shows the FCurve of an animation curve and how you can use FCurve scaling to tighten the selected keyframes.
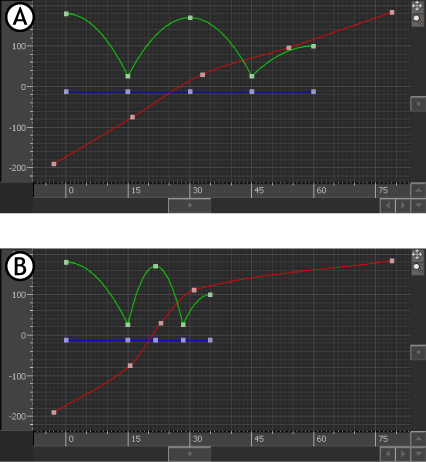
FCurves pane A. Original bouncing ball curve B. Curve scaled to create tighter bounce.
To scale selected keys in the FCurves window:
 Except where otherwise noted, this work is licensed under a Creative Commons Attribution-NonCommercial-ShareAlike 3.0 Unported License