You can choose which properties display in the Properties window for selected objects.
To create a custom view of properties:
- In the Properties window, click the Editor button.
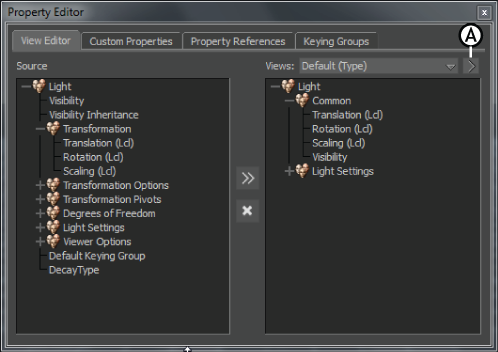
- In the Properties Editor that appears, select the View Editor pane.
- Click the View Options button, and select Create New View as > x from the menu, where x is Local View, Object Type View, or Global View.
- Select Local View if you want to create a view for the selected object only.
- Select Object Type View if you want to create a view for all objects of the same type as the selected one.
- Select Global View if you want to create a view for all objects.
- Click the View Options button again, and select Rename View to give the view a more descriptive name.
- In the Source area on the left, Ctrl-click the properties you want to add to the custom view.
- Click the Add button in the middle of the pane to add the selected properties to the custom view. You can also click the Remove
button to remove properties from the custom view.
- When you are done, close the window. The custom view is automatically saved and you can select it from the View menu in the
Properties window.
To delete a custom view:
- In the Properties window, click the Editor button and select the View Editor pane in the Properties Editor that appears.
- In the View menu of the Properties Editor, select the property you want to delete.
- Click the View Options button and select Delete View.
 Except where otherwise noted, this work is licensed under a Creative Commons Attribution-NonCommercial-ShareAlike 3.0 Unported License