To complete this tutorial, you need the current version of the 3ds Max and MotionBuilder software installed on your system.
If you do not have the current version of the 3ds Max software, you can download a trial version of the software product from the Autodesk web site at: http://www.autodesk.com/products/autodesk-3ds-max/overview.
The following assets are required for this tutorial:
- skeletons.max
- Pepe.max
- IceSlip.fbx
The following assets are the result assets of this tutorial:
- bone_skeleton.fbx
- bone_skeleton_characterized.fbx
- biped.max
- biped.fbx
- biped_characterized.fbx
- Pepe.fbx
- Pepe_rigged.fbx
- Pepe_Mocap.fbx
- Pepe_keyanim.fbx
- Pepe_keyanim.max
Best PracticeEnsure you always use the latest update of the tutorials and tutorial assets to complete the tutorials. You can download the
latest update from:
http://www.autodesk.com/motionbuilder-tutorials. If you download the tutorial assets to a location other than the
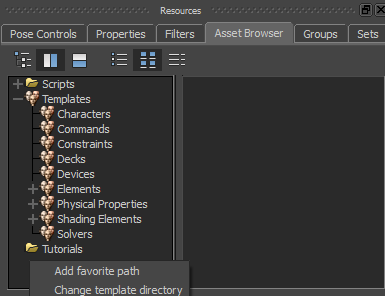
MotionBuilder default location, remember to add this location (add a favorite path) in the so you can access the assets via the .
To add a favorite path to the pane:
- In the window, make sure the tab is selected.
- In the , right-click the pane.
A context menu displays.
- Click from the context menu.
- In the window, navigate to the directory you would like to add in the .
- Click the directory and then click .
The directory is added to the pane in numeric alpha order.
 Except where otherwise noted, this work is licensed under a Creative Commons Attribution-NonCommercial-ShareAlike 3.0 Unported License

 Except where otherwise noted, this work is licensed under a Creative Commons Attribution-NonCommercial-ShareAlike 3.0 Unported License