Turn on or off the checkbox in the following options in this menu to show or hide the component of the selected character or its Control rig.
The IK rig is an Inverse Kinematics system that lets you transform your character using IK effectors. Manipulating a character using this system moves the body relative to its hierarchy, similar to the way a human body reacts.
Lets you define the nodes used by the character. The Control rig is created based on the skeleton of your model.
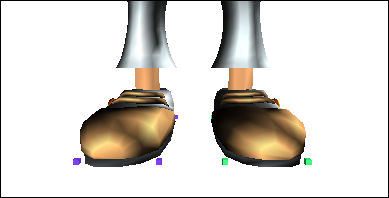
Lets you define how the feet, hands, fingers, and toes of a character should react when they are in contact with the floor of your scene. See Floor contact for more information on setting up floor contact for a character.

Green and blue markers around the feet of a character
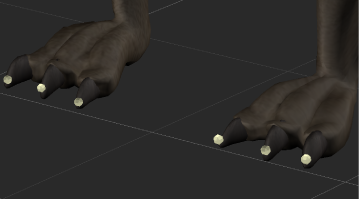
Contact spheres used to display the finger tips or toes of a character. The finger tips for a quadruped character display in the following image.

Finger tips of a quadruped character
Five options let you hide or display the interface items related to an Actor. These options are available only when your current Character or Source is an Actor.
Displays a set of connecting lines representing the bones of the Actor. To display only the bones, activate Actor Skeleton and disable Actor Body.
Displays white markers around the body of the Actor. These markers belong to the defined Marker set.
Displays markers containing the motion data. Disable this option to hide the source markers.
When both the Marker Set and Source Markers are turned on, the markers belonging to the Marker set display inside the source markers by default.
Displays the pivot points for the Actor.
By default, the pivot points appear as orange crosses. To change the appearance of pivot points, use the Actor Settings in the Properties window. You can also adjust the position of the pivot points using the Body Part Pivots properties.
 Except where otherwise noted, this work is licensed under a Creative Commons Attribution-NonCommercial-ShareAlike 3.0 Unported License