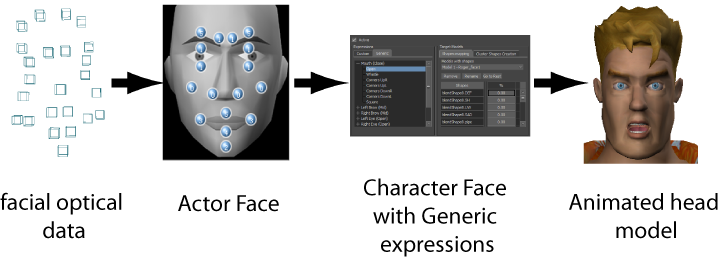
The process of animating a head model with motion capture data is similar to the process of animating a character with motion capture data. While an Actor is used to map motion data to a character, an Actor Face is used to map motion data to a Character Face.

Character face animation using motion capture data workflow
To animate a face with motion capture data:

Facial motion data markers
See Adding a Character Face and Defining a generic expression.
See Connecting an Actor Face to a Character Face.
The optical marker data is now set up to drive the expressions on your character’s face.
 Except where otherwise noted, this work is licensed under a Creative Commons Attribution-NonCommercial-ShareAlike 3.0 Unported License