The Reflection shader lets you append a regular reflection to any model, or a live reflection to any planar surface in your scene.

Reflection shader settings
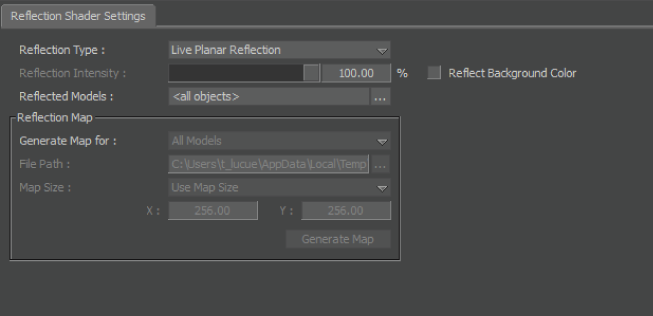
Once you apply a Reflection shader to a selected object or plane, you can adjust its various settings. Use these settings to specify map size, reflection intensity, and so on.
You can choose from four types of reflections in the Reflection Type menu:
See Reflection types for information about each Reflection type.
Reflection shader texture settings
When you choose Spherical Map or Sphere Map as a Reflection shader type, a texture is generated to project the reflection map. You can manipulate this texture and its appearance in the Navigator window. See Texture settings.
| Option | Description |
|---|---|
| Reflection Intensity | The Reflection Intensity slider lets you change the level of reflection for a selected object or plane. The Reflection Intensity can be modified in a generated map. The default intensity is 100%. |
| Reflect Background Color | Activate Reflect Background Color to match the reflection color in the selected plane or object with the background color.Reflect Background Color is not available for Live Planar Reflection On Video.This option is only available for Live Planar Reflection and Live Planar Reflection On Video reflection types. |
Alt-drag any models in your scene that you want to use with the Reflection shader into the Reflected Models field. You can also click the Reflected Models button next to the field to display the Asset list, where you can choose from the models used in your scene.
The reflection map area is only active when you select Spherical Map or Sphere Map from the Reflection Type menu.
These settings let you control the creation of a reflection as a static map or texture. This map can also be controlled using the Texture settings in the Navigator. See Texture settings.
| Setting | Description |
|---|---|
| Generate Map For | The Generate Map For menu lets you select which objects are included in the Reflection shader’s map texture. Choose either All Models or select particular models you want to appear and choose Selected Shaded Models. |
| File Path | The File Path specifies the location of the file and saves the generated map to disk as a texture file. The default path is C:\temp. |
| Map Size | Use the Map Size menu to choose the size (in pixels) of the generated map. The default size is 256 x 256. This option is only available with the Spherical Map and Sphere Map. There is a higher resolution, a longer generation waiting period, and a greater memory requirement with a larger map size. |
| X and Y | The X and Y menus let you choose the size (in pixels) of the generated map. The default is 128 by 128.There is a higher resolution, a longer generation waiting period, and a greater memory requirement with a larger map size. For more information, see Choosing a mapping method. |
Click Generate Map to create a map for all objects with the Reflection shader applied. Choose whether you want to generate a map for All Models or only the Selected Shaded Models in your scene. You must have a valid Save Map Path before you can generate a map.