You can move a clip in time and in space. Moving a clip along a track in the Story window alters the time at which its animation plays. Moving a clip in the Viewer window alters where and in which direction its assets move.
To move more than one clip at once, you can Ctrl-click each one to select them, then drag them. You can slash (/)-drag one clip to make all the clips to the right retain their distance from each other on the track.
To move a clip using its Clip In timecode:

A. Change the value of a Clip In timecode to move the clip.
To change a clip’s trajectory in the Viewer window:
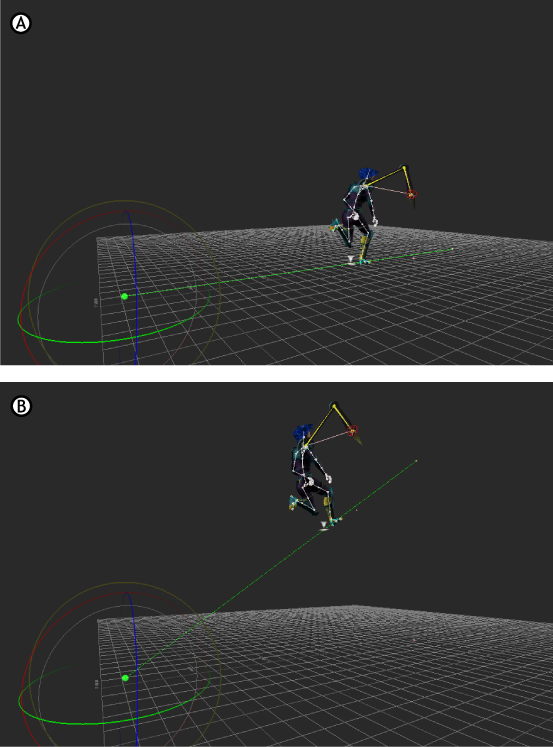
Translating and rotating a clip’s ghost changes where the animation plays and in what direction. The ghost you select is the pivot point of the clip when you rotate it.
For example, in the next image, the start of the clip’s ghost clip vector is selected. The clip pivots around the selection. If part of the model ghost is selected instead, the clip rotates around that part.

Moving a clip in the Viewer window A. The start of a clip’s clip vector ghost is selected. B. The clip vector is rotated around the selection.
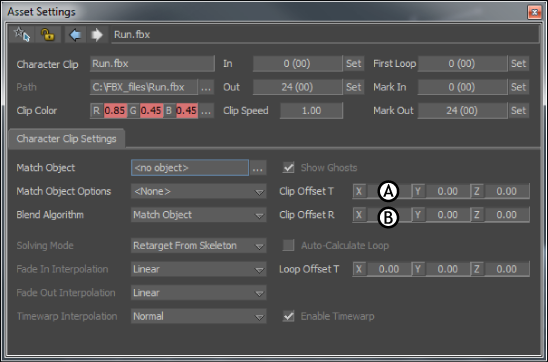
You can also translate and rotate a clip in the Viewer window by changing the values in the Clip Offset T and Clip Offset R fields (A and B) that display in the Asset Settings window and Properties window. These settings display in the Asset Settings window and Properties window when you double-click a clip.

Asset Settings window A. Clip Offset T settings B. Clip Offset R settings