A “pose” is a snapshot of an object (or character) in 3d space in a scene at a specific moment in time. The snapshot will consist of the values recorded for a set of properties (keying mode or group) which is active at the time you create the pose. For example, you can place an object in your scene, transform it (translation, rotation, scale properties) and then create your pose.
See Keying Mode menu for information about what the standard keying modes are.
See Creating a custom keying group and Mapping pose and keying group properties for more information about how you can key properties for objects.
See Poses.
You can apply an existing pose to an object also—the property values from the pose’s keying group will be applied to the object(s) selected in the scene.
Mapping pose and keying group properties
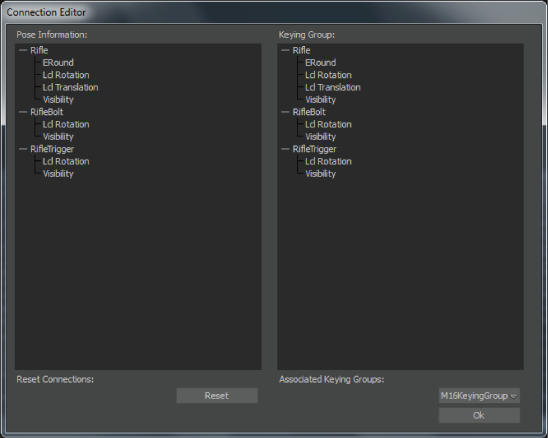
Use the Connection Editor to map channels between a custom object keying group (either “Object Type” or “Global”) and a pose—so that when you apply that particular pose to another object, the only properties that are keyed are the specific ones you’ve selected. You can create many object poses with the same keying group—and then use the Connection Editor to create a mapping of object keying group properties to pose properties that is unique for each pair (keying group and pose).
This feature is particularly useful if you’re keying many different instances of the same type of object or character movement. For example, your scene may have two different gun props in it—each with bolts and triggers. The action (or poses) of each gun may be the same (the bolts and triggers may move the same way), but some properties will be different (textures, rotation and translation may be “local” for each gun). Using the Connection Editor, you can map specific properties that will always be the same for some keying groups and poses, while the gun objects can still have their own local keying groups maintained.
To customize the mapping between keying group properties and a pose:
