Use the Matte shader to create a 3D matte for a scene. When you apply the Matte shader to an object, the object turns into a colorless 3D matte.

Matte shader settings
A 3D matte has depth, and is therefore respected by all other 3D objects in the scene. A 3D matte lets you block out parts of a scene to be replaced by video footage.
For example, the following figure shows the Matte shader applied to objects representing chairs and a film projector. This gives the illusion that the lizard character named Bill Gecko is walking behind the chairs and talent. The image of chairs and talent is a video applied to the current camera’s back plate. See Setting a camera Front or Back Plane.

There are no objects representing the chairs. Bill Gecko walks in front of the video clip that is being broadcast on the back plane of the current camera.
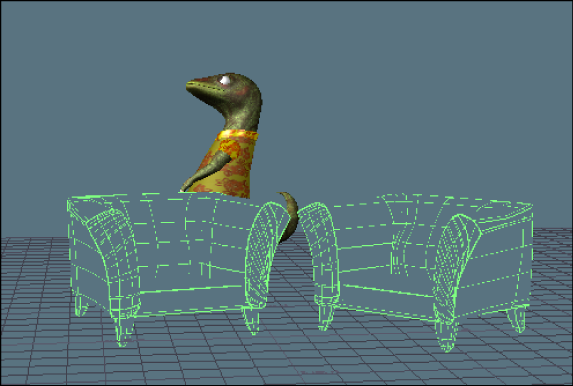
In the following image, you can see how after the models of the chair are added to the scene, and then had the Matte shader applied to them. This creates them as matte objects. The video clip is not applied to the back plane of the current camera.

Models are added to the scene. The Matte shader is applied to the chairs, making them matte objects. The video clip is not applied to the back plane of the current camera.
In the next image, you can see the composite image, and how the gecko character interacts with the matted chair models, giving the impression that he has walked behind them.

The left chair obstructs Bill Gecko. Bill Gecko now appears to walk behind the chairs in the video clip as if they were 3D objects.
Highlight Matted Objects option
When you apply the Matte shader to an object, the object becomes invisible against the background of your screen. For example, you would not be able to see the objects in the preceding figure if there was not a wireframe outlining them.
Activate Highlight Matted Objects to make it easier to locate the objects in your scene.
The Enable 3D Masking option allows the 3D Matte shader to be applied to the selected object. When Enable 3D Masking is not active, the shader appears as a wireframe.
The Adjust Alpha option lets you control the video Alpha channel sent either through your video option board or viewed in the Render window.
Activate Adjust Alpha to create an Alpha channel matte for the model shaded with the Matte shader.
The Alpha slider lets you manipulate the transparency of the Alpha channel so you can, for example, make the output slightly transparent so you can pre-visualize characters interacting with live Actors.
Using Alpha Matte and its slider does not affect what displays in the Viewer window. To use this feature, you must render your scene using a 32-bit format (such as .tiff), or send your output through a video board that supports the Alpha channel.