Creating Macro relations


When you create a new Relations constraint, it is automatically added to the operator’s My Macros node. Every relation can be used as a Macro that can be renamed and used in another relation. You can add inputs and outputs to your Macro by selecting operators found in the Macro Tools node.

To create Macro relations:

  1. In the Operators list, expand My Macros, and drag a Macro into the Relations pane.
    Note

    You must create a relation constraint for Macros to be in the folder.

  2. Drag a Macro relation into another relation, a dialog box appears asking if you want to create the relation as a Sender, Receiver, or a Macro.
  3. Select Macro to create a Relations constraint box that has both Sender and Receiver inputs and outputs, select Sender to create the Relations constraint box as a Sender that transmits data, or select Receiver to create the Relations constraint box as a Receiver that is influenced by the data transmitted from the Sender.

The Macro becomes a single relation, representing the entire set of constraints within that Macro. All the Input-Output Relations constraints used in your Macro become connectors on that relation.
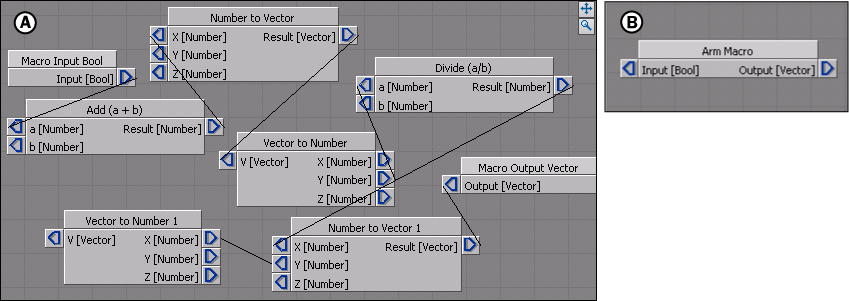
Macro constraint A. A Relations constraint named “Arm Macro” B. “Arm Macro” used as a Macro in the Relations pane.