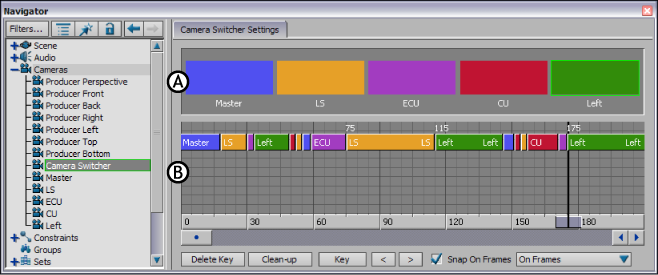
The Switcher timeline lets you create and manage each camera switch.

Camera switcher A. Camera Colors B. Switcher timeline
The Switcher timeline is managed using the following options:
The Key button lets you set a camera switch.
When the Camera switcher is the active camera, the Property field in the Key Controls window displays “Camera switcher” to signify the keyframes on the Action timeline represent existing camera switches.
The Snap On Frames option snaps camera switches to the nearest frame after the camera switch. For example, if a switch occurs in the middle of two frames, the camera switch is bumped to the next frame.
The menu to the right of the Snap On Frames button lets you choose two methods of snapping camera switches to frames:
| Option | Description |
|---|---|
| On Frames | Select On Frames to have the Camera Switch snap to the frame rate of the timeline. For example, if your take is set to thirty frames per second, the camera switches are snapped to this frame rate. If you do not have a video clip associated with the camera, a dialog box appears to warn you that there is nothing on which to base the frame snapping. |
| On Back Plate Frame | Select On Back Plate Frame to have the Camera Switch snap on the frame rate you set as the Back Plate in your Camera view. This way, your camera switch is synchronized with any Back Plate video you might be using. |